Key Takeaways
- Keep an eye out for weak airflow, loud or new noises, and visible duct damage as strong signs your ductwork needs replacing. Test vents, room by room, and record inconsistencies for a professional to check.
- Keep an eye out for stubborn strange odors, excessive dust, or increasing allergy symptoms as indicators of contamination or infestations in ducts that can damage indoor air quality and need to be addressed right away.
- Monitor energy bills and room-to-room temperature inconsistencies as tangible indicators of leaks or faulty insulation. Leaky or poorly insulated ducts can cause HVAC energy consumption to spike by roughly 30 percent.
- Check for leaks with a checklist, visual inspection, airflow tests, and photos. Schedule a professional inspection when you detect widespread leaks, rust, or system age over 10 to 25 years.
- Select targeted repairs for isolated leaks, loose connections, or installation flaws. Consider full replacement when damage is widespread, the system is aging, or you’re upgrading HVAC equipment.
- Think of new insulated ductwork as a solid investment in comfort, system longevity, and reduced energy costs. It improves airflow, decreases dust, and enables zoning or smart controls.
Signs your ductwork needs replacing are physical indicators and efficiency problems that indicate ducts no longer circulate air effectively.
Typical symptoms are constant dust, inconsistent room temperatures, abnormal airflow noises, and increasing energy costs. Age, rust, and disconnected sections all indicate impending doom.
An expert inspection can verify leaks, inadequate insulation, or contamination. The remainder of this post breaks down each sign, causes, and actionable repair or replacement options.
Telltale Signs
Ductwork tends to break down slowly. Telltale signs that ducts need to be taken care of or replaced are described below. For each sign, it explains what to observe, why it is relevant, where to look, and what to do.
1. Poor Airflow
Telltale Signs of System Trouble
Monitor air check vents for feeble drafts, particularly in end rooms and upstairs rooms. If one room feels particularly stuffy and another is just fine, this inconsistency tends to signal leaks, crushed ducts or blockages.
Test airflow by holding a tissue strip to several registers. Big variations indicate pressure loss or disconnected ducts. Bad airflow makes your HVAC system work harder, is less comfortable and wears it out.
Where to look: attics, crawl spaces, and basements where ducts run. Feel for cold or warm spots along duct runs. If ducts are more than 10 to 15 years old, replace rather than patch. Fiberglass and some materials degrade.
2. Strange Noises
Listen for new rattling, banging or persistent whistling when the system runs. Telltale signs include noises close to ceiling registers and returns that generally indicate loose fittings or small gaps that open under pressure.
Sudden bangs can come from thermal expansion in older metal ducts or from loose panels. Constant creaks and pops can mean insulation breakdown or metal fatigue, and these sounds progressively get worse.
Find where it’s banging the loudest and then check seams and hangers. If noises are pervasive and ducts are beyond 15 to 20 years, replacement is typically less expensive than continual repairs.
3. Odd Smells
Identify damp, moldy, or burning odors coming from vents or odors that remain even after new filters have been installed. Musty odors often indicate moisture or mold lurking in ducts, while burning scents could be overheated wiring or debris on heating elements.
Odors of animals or their droppings indicate infestation within duct runs. These odors are toxic and must induce an inspection fast.
Where to inspect: accessible register boots, attic duct runs, and returns. Stubborn smells following a cleaning usually indicate the duct liner is damaged and possibly requires replacement.
4. High Bills
Monitor utility bills across seasons. If heating or cooling costs skyrocket with no change in rate, leaky or poorly insulated ducts are probably to blame. A typical home can lose 20 to 30 percent of conditioned air through leaks and poor installation.
Contrast month-to-month usage and highlight abnormal spikes during peak seasons. Seal ducts or replace them if necessary to bring efficiency back. Replacement is typical every 10 to 15 years, almost always by 20, and can cut costs.
5. Visible Damage
Check for holes, seams, crushed sections, rust, or sagging ducts in attics and basements. Observe for water damage, rust, or absent insulation. Draft leaks and notes for complete analysis.
6. Dust Buildup
You have extra dust around vents and home surfaces despite cleaning, which indicates duct deterioration. If filters block quickly or dust blows out of registers, ducts may be leaking fibers or pulling in pollutants.
Worsening allergy symptoms are typical. This might require professional cleaning or replacement.
Beyond the Obvious
Duct problems usually start silently. Little signs may become comfort and expense issues. These subsections address less obvious indicators, the effect of age and installation errors that reduce HVAC efficiency. Read each to understand what to seek out and where to make a move.
Uneven Temperatures
Rooms that feel different than the rest of the house indicate air flow issues. If a bedroom stays warm while the living room is cool, it usually indicates leaks, blockages or poor balancing. Keep tabs on which rooms are consistently off and notice if it happens with heat, cooling or both.
Contrast thermostat readouts with actual room conditions. A hallway sensor can read 22ºC while a faraway bedroom displays 18º. That gap points to either duct leakage along the run or an obstruction in the branch serving that room. Use a plain, simple thermometer to double-check differences and map problem zones.
List rooms with ongoing discomfort: master bedroom, south-facing office, nursery. This list simplifies targeted inspections and helps technicians concentrate on particular runs. Lingering hot or cold pockets typically require duct sealing or partial replacement to achieve uniform comfort again.
Uneven temperatures can stem from kinks, tangles, or crushed flexible ducts. These physical faults slow flow and increase power consumption. An average home loses twenty to thirty percent of conditioned air through holes, leaks, and poor installation, so sealing up the distribution network increases both comfort and bills.
System Age
When it’s feasible, look up the ductwork installation date. Most residential systems last about 10 to 15 years, particularly in a moist or extremely hot climate. Materials degrade quicker under strain. If your ducts are more than 15 years old, get them inspected even if troubles aren’t evident.
Older ducts have materials and joint methods that are more susceptible to gaps, corrosion, and mechanical damage. Old ducts are more prone to leaks and mold and frequently don’t line up with modern, high-efficiency HVAC units, diminishing performance.
Consider the duct age versus your HVAC unit. A new furnace or heat pump on old ductwork will never be at full efficiency. Schedule replacement when ducts approach the end of their life. Replacing ducts can achieve enduring gains. Properly sealed ductwork can last 40 years and more.
Installation Flaws
Search for shoddily connected seams, loose collars, and absent sealing on joints. These typical culprits allow conditioned air to leak into attics, crawl spaces, or wall cavities. Leaky ducts make the HVAC work harder and longer and that manifests itself in higher utility bills.
Look behind your back – check duct sizing and layout! Undersized runs starve rooms of supply. Oversized sections decrease speed and hinder balancing. Tight turns, excessive length runs, and extraneous detours cause friction and diminish system volume.
Fixing these defects while they’re small prevents massive junkyard jobs. A good duct cleaning and inspection every few years snags buildup and early faults like mold or mildew. Properly sealed, well-designed ducts waste less energy and increase comfort right now.
Assess Your System
An aggressive inspection will assist in determining if repair, sealing, or complete replacement is appropriate. The steps below include visual inspections, easy DIY airflow tests, and when to hire a pro. Apply the checklists and examples to accumulate clear evidence before you invest in major work.
Visual Inspection
Check all exposed ducts for holes, gaps or disconnected joints. Small rips or loose seams at or near connections are common. Record locations and size. Kinked or tangled flex ducts frequently develop where ducts pass through tight spaces and can slash airflow.
Inspect insulation wrap for tears, water stains, or gaps. Wet or compressed insulation compromises R-value and can mask mold. Look for dark streaks or fuzzy growth. Mold or mildew is a sign of moisture and poor airflow management.
Check for unwanted visitors or debris in ducts. Rodent nests or insect casings clog flow and mildew indoor air. Employ a flashlight and mirror when feasible. Record with pictures and detailed notes to direct any contractor or claim warranties.
Airflow Test
Put a tissue or lightweight strip of paper on each vent to test the airflow throughout the rooms. Hold the paper close to the grille. Powerful vacuum-like attraction keeps it flittering. Repeat with doors open and closed to identify pressure variations.
Compare airflow in occupied and unoccupied rooms to identify imbalances. Test relative strength by timing how long the tissue remains lifted or, better yet, with a handheld anemometer. Note vent location, observation, and any numeric reading.
Write the collected results in a table for easy comparison and troubleshooting.
| Vent location | Tissue test (strong/weak) | Anemometer (m/s) | Notes |
|---|---|---|---|
| Living room | Strong | 2.1 | Supply ok |
| Master bed | Weak | 0.9 | Possible leak or blockage |
| Guest room | Medium | 1.3 | Mild skew |
Note if it appears that more than 20% of anticipated air appears absent. Most homes leak 20 to 30 percent of conditioned air, and this kind of loss is going to reflect on energy bills.
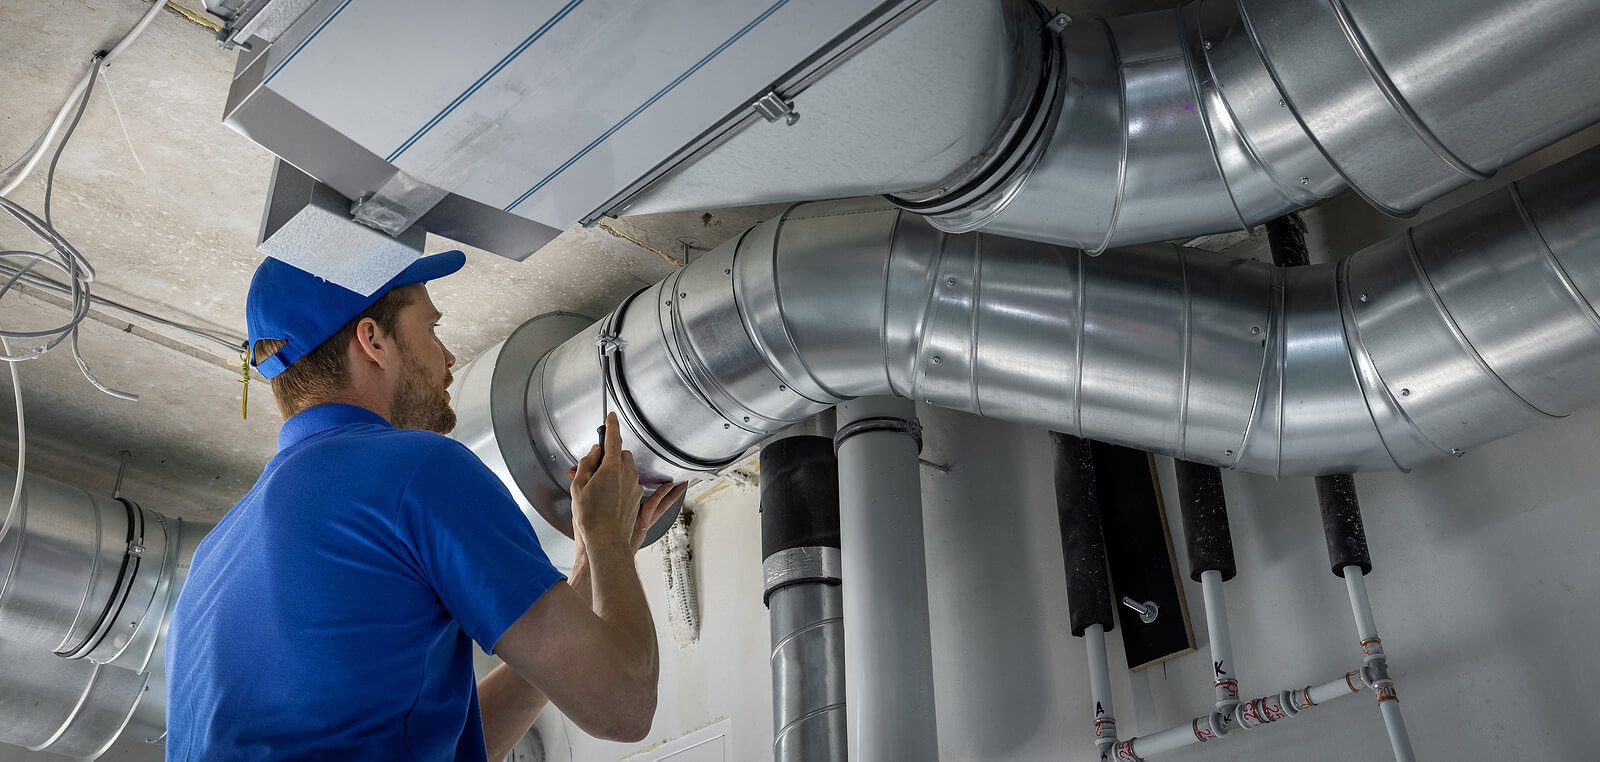
Professional Help
Have a professional HVAC technician perform a complete duct check-up, particularly if they’re more than 10 years old or exhibiting several issues. Request airflow in CFM and leak detection through pressure testing and smoke or tracer gas.
Request specific recommendations: cleaning, sealing with mastic or metal tape, or section replacement. Make sure that the contractor checks both supply and return systems. Issues on returns can sabotage the entire system.
Give me a report with photos, CFM numbers, and cost estimates so I can shop them against each other. Few things are as important to check every couple of years and clean as needed in order to keep energy consumption down and indoor air quality up.
The Hidden Costs
Ductwork issues lurk behind walls and in ceilings, out of mind and out of sight. They can have serious cost and health implications. Here’s a nice, simple chart of typical hidden costs and repair versus replace benefits to weigh options.
| Hidden cost | Repair (patching/sealing) | Replacement (new ducts) |
|---|---|---|
| Energy loss | Lowers some leaks, may leave systemic loss; temporary savings | Eliminates most leaks; immediate, sustained energy savings |
| Annual energy bill impact | Saves small amount; may still see 10–20% loss | Reduces losses that can reach 20–30% of HVAC energy use |
| HVAC strain | Short-term relief; underlying issues may persist | Restores proper airflow; reduces runtime and wear |
| Indoor air quality | May reduce visible dust but pockets remain | New ducts reduce dust, mold niches, and pathogen spread |
| Pest risk | Local fixes may not stop infestations | New, sealed ducts remove common pest entry points |
| Upfront cost | Lower initial outlay; may repeat over time | Higher initial cost ($1,000–$10,000+), plus material variance |
| Unexpected expenses | Lower but recurring repairs add up | Budget 10–15% extra for surprises; total can exceed estimates |
| Longevity | Short to medium term | Longer-term solution; sheet metal costs more per linear foot (~$13/ft) |
Energy Waste
Leaky or uninsulated ducts can allow as much as 30% of conditioned air to leak out. Most homes experience a loss of closer to 20%. That loss manifests itself in higher utility bills. Homeowners can end up paying hundreds of dollars more annually.
Gaps at joints, crushed flex runs or holes at seams draw air into crawlspaces or attics instead of living areas. Over time, that makes heating and cooling systems run longer and hit setpoints less efficiently, increasing usage throughout the whole house.
Re-plumbing ducts with properly sized, well-insulated ductwork can instantly reduce these losses and reduce monthly energy consumption.
Health Impact
- Dust, pollen, and pet dander collect in old ducts and are recirculated through living spaces.
- Mold spores can flourish where moisture collects and increase allergy and respiratory hazards.
- There’s the dirty little secret—bacteria and other pathogens can spread when filters and ducts are in disrepair.
- Rodents or insects in ducts bring their droppings and allergens, increasing your chances of sickness.
Dirty ducts can impact indoor air quality and your family’s health. Replacement clears accumulated gunk in areas repairs can’t reach. For sensitive residents, complete replacement combined with appropriate filtration tends to deliver the most consistent results.
HVAC Strain
Leaky or blocked ducts alter pressure balance and reduce airflow to vents. HVAC units then operate longer to satisfy thermostat programming. That additional run time wears components more quickly, reducing system life.
If you have frequent compressor or motor failures, you’re usually led back to duct induced airflow problems. Rapid replacement of failing ducts can safeguard the bigger HVAC investment and reduce repair return rates, sidestepping the hidden expense of premature system replacement.
Repair or Replace?
REPAIR OR REPLACE? When you’re torn between repair and replacement, weigh the damage, age of your ducts, impact on energy consumption, and long-term cost. Small, local problems tend to lend themselves to repair. Extensive damage, outliving its expected lifespan, or requirements for upgraded controls and insulation tend to skew toward replacement. Below are focused considerations and aids to help navigate that decision.
When to Repair
Choose repair if your damage is relatively minor, with small leaks, minor gaps or affected sections on an isolated basis. Sealant, mastic or metal patching can immediately halt air loss and return the pressure balance. Newer duct systems in good shape otherwise respond well to these fixes and often recover much of their efficiency.
Repair installation faults or loose connections with specific fixes! Refasten joints, replace worn sheet-metal screws and add proper collars where ducts meet plenums. These fixes require little time and cost less than major work and reduce drafts and uneven room temperatures.
Frustrated with your car? Read this. A tiny fissure can become an entryway for insects or water. Repairing early keeps contaminants out, minimizes the risk of mold, and safeguards indoor air quality. In most houses, repairing one or two bad runs will suffice instead of installing a whole new system.
Repair scenarios versus replacement scenarios:
- Repairs sufficient: single leaks under 10 percent of the system, recent ducts less than 10 years old, isolated crushed section, loose connections, local rodent damage without structural corrosion.
- Replacement necessary: More than 20 percent air loss, pervasive rust, repeated pest infestation, ducts greater than 15 years showing wear, kinked or tangled runs blocking flow, need for new insulation or indoor air quality upgrades.
- Repair may be cost effective when the estimated lifespan remaining exceeds the repair cost amortized over that time.
- Replace when long-term energy, comfort, or health benefits outweigh the short-term repair savings.
Decision table to choose solution:
- Damage extent: localized → Repair; widespread → Replace
- Age: Less than 10 years means repair is likely. Between 10 and 15 years means consider. More than 15 years means replacement is probably necessary.
- Energy loss: Less than 10 percent leads to repair. Energy loss between 10 percent and 20 percent also leads to repair. Energy loss greater than 20 percent means replacement is recommended.
- IAQ/upgrade needs: minor means Repair. Major, which includes humidity control and filtration, means Replace.
When to Replace
- Widespread leaks, rust, or other sustained pest issues affecting multiple runs or greater than 20% of air flow. Replacement halts the continued leaching of contaminants, eliminates odors, and ends perpetual microbial distribution.
- Systems beyond 10 to 15 years left, where whatever life is left is short and repairs are stop-gaps, replacing usually provides a lower lifetime cost and better performance.
- As with any major renovation or replacing an old HVAC unit, matching duct sizing and layout increases both efficiency and comfort and prevents mismatch losses.
- If ducts are kinked, tangled, or severely crushed and constrict flow, replacing them with properly routed, insulated ducting restores capacity and slashes energy bills.
Modern Ductwork
Modern ductwork refreshes the way air circulates, how efficiently homes consume energy, and the freshness of indoor air. Newer systems take advantage of improved shapes, seals, and materials to maintain smooth flow, reduce waste, and accommodate modern HVAC equipment. Here’s what homeowners should consider when deciding whether to patch old ductwork or replace it all.
New duct runs frequently exhibit obvious improvements in airflow and energy consumption. Sleek, right-sized ducts cut resistance so fans use less energy and deliver consistent temperatures. Leaky or badly routed ducts can lose 20 to 30 percent of conditioned air. Mending that with either sealed or new ducts tends to appear rapidly in reduced energy consumption and balanced rooms.
Even properly installed modern ducts last 10 to 15 years, and some systems last 25 years, so swapping can be a smart-money move when older ducts require frequent repairs. Indoor air quality needs to be improved with modern materials and better sealing. New duct materials fight dust accumulation and don’t tend to slough particles into the airstream.
Tight seals and insulated runs reduce the opportunity for dirt, pest droppings and outside pollutants to infiltrate. Pests like rats or raccoons can still harm ducts, cause odors, distribute germs and be noisy. Replacing compromised sections eliminates contamination sources and makes it more difficult for pests to get in again.
Smart HVAC gear compatibility is a functional reason to duct swap. Modern ducts play nice with zoning systems, smart thermostats, and variable-speed air handlers, enabling targeted comfort and lower bills. Homes that are adding humidity control, air scrubbers, UV sanitizers, or HEPA-grade purifiers might require larger or re-routed ducts in order to accommodate the extra components and maintain adequate static pressure.
Modern ductwork together with your new IAQ gear, upgrading ducts at the same time sidesteps the performance losses that come from undersized lines. Durability is all about installation and care. Duct sealing, if done properly, can last 40 years and postpone a replacement.
Routine inspection every few years and occasional cleaning keep kinks, tangles, and clogged sections at bay, all of which ramp up energy use. Metal or flex ducts can kink or be crushed after a while, blocking flow and causing high bills. Thermal movement is normal: when systems start after idle periods, cold ducting can expand as air warms it and contracts when off. Well-supported ducts reduce wear.
Opt for replacement when leaks, mice damage, lingering smells or constant fixes impact comfort and expenses. A full replacement often pays for itself in long-term savings and improved air quality.
Conclusion
If your home experiences weak airflow, uneven rooms, loud duct bangs or consistent dust buildup, the ductwork probably needs servicing. Older duct runs that leak, sag, or utilize torn insulation reduce comfort and increase bills. Small repairs help for isolated holes or loose joints. It’s time for full replacement when your damage extends, energy loss persists or indoor air quality dips. New ducts seal tight, fit right and cut noise. A pro inspection detects leaks, tests pressure and maps vents. Try a simple checklist: check grills, feel for drafts, note temperature gaps and log odd sounds. So you ready to get started? Schedule a licensed HVAC tech—they’ll provide a clear plan and cost estimate.
Frequently Asked Questions
How long do ducts typically last before needing replacement?
The typical metal duct system has a life span of 15 to 25 years. Flexible ducts typically have a life span of 10 to 15 years. Age, installation quality, and maintenance impact life span. Check earlier if you experience any performance problems.
How can I tell if leaks are causing my high energy bills?
Contrast energy expenses before and after HVAC runtime spike. Uneven heating or cooling, visible gaps, and higher-than-normal runtime all point to leaks. A professional duct leakage test proves it.
Are noisy ducts a sign they need replacement?
Just noise doesn’t always mean replacement. Rattling, whistling, or booming can be due to loose connections, poor airflow, or undersized ducts. If repairs don’t fix the noise, replacement is needed.
Will replacing ducts improve indoor air quality?
Yes. New, sealed ducts cut down on dust, mold spores, and allergens that are moving through the system. Better sealing and proper filtration increase air quality and comfort.
Can I repair damaged ducts instead of replacing them?
Small holes, disconnected squares or badly sealed seams are usually fixable. Deep corrosion, crushed ducts or fundamental design flaws typically need replacement for enduring effectiveness.
How much does duct replacement typically cost?
Pricing is based on home size, duct material, and accessibility. Anticipate a broad spectrum and obtain several estimates. Think in terms of long-term energy savings and improved comfort when comparing costs.
When should I choose modern ductwork over repairing the old system?
Opt for new ductwork if your system is dated, inefficient, the wrong size, or always under repair. Replacing your ductwork boosts air flow, decreases energy consumption, and minimizes maintenance down the road.