

Key Takeaways
- Divide total costs into fan unit, labor, electrical work, structural changes, and permit fees to avoid surprises and get a few quotes under each category for a realistic budget.
- Match fan type to attic size, climate, and ventilation needs as solar, electric, roof-mounted and gable-mounted models differ in upfront cost, energy consumption and installation difficulty.
- Consider installation factors including roof pitch, roofing material, attic access and location as any of these can add substantially to labor and material costs.
- Plan for sneaky costs like wiring upgrades, insulation repairs, extra venting, and unexpected structural fixes by building in a 10 to 20 percent contingency to the estimate.
- Balance DIY savings with risks such as electrical hazards, roof leaks, and code violations. Opt for a licensed pro who provides workmanship, code compliance, and liability coverage.
- Calculate payback by comparing installation cost with anticipated energy savings, enhanced home comfort, and prolonged roof life. Monitor energy bills pre and post-installation to quantify real-world benefits.
Attic fan installation cost is the amount it costs to purchase and install a fan to ventilate an attic. Costs vary between $150 and $1,500 based on fan type, capacity, roof access, and labor rates.
Typical costs include the unit itself, wiring, roof or gable work, and necessary permits. Home size and insulation condition impact the final price.
Following are costs and options for various budget levels.
The Core Cost
A transparent perspective of what influences attic fan installation costs avoids surprises and establishes practical expectations. These are the core cost buckets. We’ve provided detailed breakouts and real-world examples to inform your decision making.
| Component | Typical cost range (USD) | Impact on total cost |
|---|---|---|
| Fan unit | $65 – $1,400+ | Direct purchase cost; larger or whole-house fans cost more |
| Labor | $45 – $85 per hour; total $369 – $914 typical | Installation time and skill raise or lower final bill |
| Electrical work | $0 – several hundred (panel upgrades or new circuit) | Necessary for safe operation; older homes cost more |
| Structural changes | $0 – several hundred | Roof or framing work increases complexity and cost |
| Permits | Varies by jurisdiction | Can add fees and delay project if not planned for |
1. Fan Unit
Fan selection alters the price to start. Basic attic exhaust fans retail for roughly $65 to $650. Whole-house fans go from $300 to $1,400 plus because they circulate a lot more air.
Fans come rated by CFM, and the more CFM, the bigger the fan and the higher the purchase cost. Brand and features, such as low-noise motors, variable speed, or energy-efficient designs, contribute to upfront price but can reduce long-term running costs.
For DIY buyers, lots of workable machines run $100 to $400; pro units are costly. Put together a quick list of three choices with CFM, power draw, warranty, and cost to look side by side.
2. Labor Rates
Of course, labor differs by location and by installer. Plan on hourly rates of around $45 to $85. Basic installs frequently require just a few hours.
Professional installation averages $369 to $914 based on fan type and home layout. Tight attics, steep roofs, or limited access increase the time and drive labor up.
More complex installs such as those needing roof work or coordination with electricians may need more experienced crews who charge more but mitigate the risk of mistakes. Plan on at least a half to a full day of planning, mounting, and testing.
3. Electrical Work
About its The Core Cost, most installs require a licensed electrician. Wiring a new fan to a dedicated circuit or including switches can add a few hundred dollars, and panel upgrades run higher.
Older homes might need to be rewired or grounded in order to be operated safely, which could increase the cost. Verify whether contractor quotes encompass all electrical work or you will be left with a separate electrician bill.
Ignoring this can cause safety problems and additional expense down the line.
4. Structural Changes
Scoring roof or ceiling penetrations, flashing, or reinforcing attic joists contributes materials and labor. Large fans sometimes need framing supports, and strange shapes in attics require special flashing or trim.
Have a site review to identify required modifications prior to work commencing. Little structural needs add little cost. Big roof penetrations or repairs may double labor time.
5. Permit Fees
Local codes may require permits, with fees differing by city or county and occasionally by scope. Don’t forget permit costs; you don’t want a fine or to be forced to take it down.
Check early with local officials to verify requirements and timings.
Fan Type Matters
Various attic fan types affect not only purchase price but installation cost. Select a type according to your attic size, climate, and desired ventilation quantity. Fan type makes a difference in energy use, long-term bills, and the likelihood you’ll require additional roof work. Here are some of the trade-offs and real-world considerations to think through.
Solar Fans
Solar fans typically cost more up front than simple electric models, at the higher end of the $75 to $1,000 range for stand-alone fans. Dual-powered units that use solar first are a luxury. They reduce operating expenses since they operate on sunlight, so electricity bills decrease in sunny locations.
You might have some rebates or incentives in certain areas which tightens up the payback gap. For attics in warm, sunny climates, solar fans can be very effective. Pick a unit with higher CFM for larger attics, just be aware that higher CFM drives the price up.
Add-ons like thermostats or humidistats add an additional $50 to $400 if you want.
Electric Fans
Electric attic fans are typically less expensive up front than solar varieties, and lots of simple units stick to the $100 to $400 DIY range. Professional installation drives the overall cost higher, with average installation costs ranging from $369 to $914. Continuous power consumption adds to lifetime costs, particularly if the fan operates regularly.
Electric fans might require hard wiring and a dedicated circuit in some cases, which increases labor and material expenses. They are a safe bet in low-sun areas or when you require robust, adjustable airflow. Consider the ongoing electricity cost and the impact of greater CFM classification on costs.
Roof‑Mounted
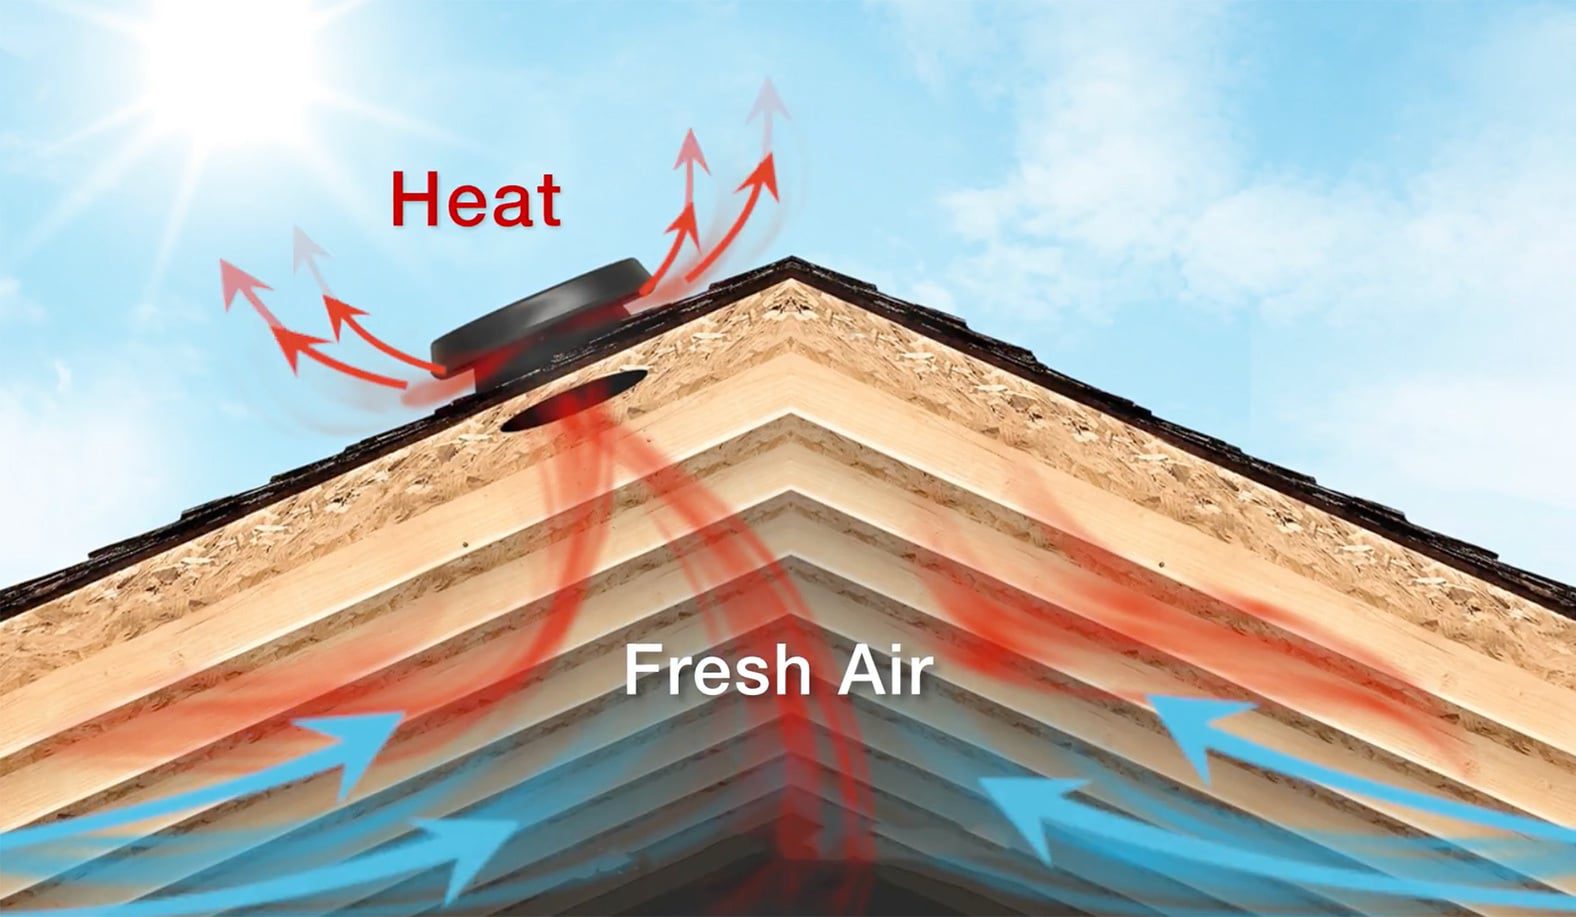
Roof-mounted fans are usually more expensive to install because installers must cut into roofing material and then seal the penetration. That adds labor and materials and increases the risk of future leaks if done poorly. These fans do a great job of pushing hot air straight out of your attic and are perfect for homes that lack sufficient gable area.
Anticipate shelling out more for roof repairs or roof fan caps, which cost around $50. Bad installation can ruin shingles or cause leaks, so professional fitting is usually recommended despite the higher initial cost.
Gable‑Mounted
Gable-mounted fans insert into existing gable vents and are typically less invasive and less expensive to install. They work well when gable ends are available and vents are sufficiently sized; otherwise, you’ll require vent expansion.
Installation complexity is lower, so labor costs go down, which can keep total cost closer to the low end of the $75 to $1,000 fan price band. Watch CFM requirements and size of gable opening before you purchase. For most homes, a gable fan provides an economical compromise of effectiveness and installation convenience.
Installation Variables
Attic fan installation cost is variable based on multiple site-specific conditions that impact labor, time, and parts. Consider these factors prior to selecting a fan or installer so that quotes are precise and comparisons are equitable.
Roof Pitch
Steep or complex roof pitches increase the difficulty and labor costs as roofers require additional safety equipment, scaffolding, or roof brackets. Labor for complex pitches can drive installation complexity fees into the $100 to $500 range.
Shallow pitches allow installers to work quicker and frequently decrease time on the roof, so total cost decreases. Provide roof pitch, in degrees or rise-over-run, to installers. Precise pitch information allows them to prepare for proper anchoring, flashing, and safe access.
A mistaken installation on a steep roof may cause leaks, loose flashing, or unsafe rigging that affect both the roof and fan performance and necessitate return repairs.
Roof Material
Certain roof types are more difficult to cut and seal. Tile or metal roofs need specialized fasteners and flashing techniques, and that typically adds labor and material expense. Anticipate additional premiums when dealing with fragile tile or standing-seam metal.
Asphalt shingles are the most convenient surface for roof-mounted fans and typically maintain a lower price. Check manufacturer guidelines for roof-type compatibility: some fans are not rated for tile without a specific curb or mounting kit.
Consider potential repair fees should tiles break or underlayment be disrupted in the course of installation.
Attic Access
Restricted attic access increases labor hours and therefore cost as the installers are forced to spend more time moving tools back and forth, removing obstructions, and generally working in cramped conditions. Open paths, put away storage, and offer a solid entrance so installers can hustle.
That easy prep can trim minutes off the visit. Some homes need insulation or small vents temporarily removed to fit the fan into place. Evaluate the attic access beforehand and mention any tight stairs, low clearances, or blocked hatches when soliciting quotes.
Geographic Location
Regional labor rates and parts costs shift pricing. Expensive cost-of-living areas will demand higher hourly labor, so anticipate a greater total even for comparable work. Climate matters: hot, humid regions may favor larger fans or models with humidistats.
Adding a humidistat costs about $100 to $300 but can be required for code or for material replacement. Look at local installers to compare prices and find out if gable-mounted ones require carpenters for structural modifications.
Depending on their size, airflow, and power source, roof-mounted fans cost anywhere from $200 to $1,400. Typical attic fan installations run around $369 to $913, with suggested sizing minimum 700 CFM per 1,000 square feet of floor space. Attic work typically takes a few hours, and labor varies by professional and project complexity.
Hidden Expenses
Installing an attic fan can reveal all sorts of expenses that never show up on the original estimate. These hidden expenses can be from electric work, insulation issues, additional vents, minor supplies or repairs discovered once the attic is opened.
Build in extra for hidden costs and inquire with installers about typical overruns. Look over recent home inspection reports to catch potential trouble ahead of work.
Wiring Upgrades
Older homes may require new wiring just to safely energize a new attic fan. It’s the hidden expenses, adding a dedicated circuit, replacing cloth-insulated or knob-and-tube wiring, or installing a new breaker, that increase costs and can require hours of licensed electrician time.
Electrical work is highly regional and complex. A couple of hundred dollars is needed for a simple run, while several thousand dollars is required for a full panel upgrade. Bringing things up to code is a given, as is insurance, but make sure to include wiring upgrades in your initial estimate to avoid surprises.
Consider permit fees and inspection costs that can often go along with electrical changes.
Insulation Issues
Insulation, especially if thin, wet, or mold-infested, may need to be replaced in part or in full during fan installation. With proper insulation, conditioned air stays inside the home and helps fans perform their magic.
Without it, your fan is sucking either heat or cooled air from one of the occupied rooms. Insulation projects can be one of the bigger hidden expenses, with a complete attic insulation job running somewhere between $1,700 and $2,000 (same currency).
Look for moisture stains, musty odors, or visible mold and budget for removal and replacement if necessary. By budgeting for insulation improvements up front, you prevent reduced efficiency and repeat work.
Venting Needs
Good attic ventilation requires both intake and exhaust to be in balance. Putting in an attic fan can expose insufficient soffit, gable, or ridge vents and adding those pushes the bill up.
Individual parts have modest prices but add up: gable-mounted vents cost between $10 and $60, roof-mounted vents cost between $30 and $50, roof fan caps cost $50, and automatic shutters cost between $50 and $80. Determine the cubic feet per minute needed and pair with venting, or the fan won’t push air.
Make sure existing vents comply with local code. If you add new vent work, you might have to pay fees for permits or inspections.

Unforeseen Repairs
Attic access can reveal roof leaks, rotten framing, or pest damage requiring repair prior to or concurrent with fan work. Small repair items like shingles cost between $25 and $35 per bundle, siding patches can go up to $100, or caulking costs $5 and are common extras.
Reserving contingency funds, usually 10 to 20 percent of the project cost, handles these shocks. A pre-installation professional inspection can identify many issues early so you can budget repairs, safeguard the home’s value, and avoid last-minute DIY surcharge fees down the road.
DIY vs. Pro
DIY vs. Pro: How this affects cost, risk, time, and long-term performance for attic fan installation. Here’s the barest of contrasts about what each path provides and the trade-offs before the H3s breakout specific risks and guarantees.
- DIY pros include lower immediate cost, control over schedule, learning experience, and material costs often ranging from $20 to $100.
- DIY cons include a higher risk of mistakes, possible code violations, safety hazards, voided warranties, and longer time if inexperienced.
- Pro pros include workmanship warranties, liability coverage, code compliance, a reduced chance of repeat repairs, and trained installers.
- Pro cons include higher upfront cost, labor typically ranging from $100 to $500 depending on complexity, and full install cost averaging between $369 and $913.
- Time note: installation often takes a few hours. DIY vs. Pro – schedule and skill level impact total man hours and cost.
The DIY Risk
If installed improperly, it can cause electrical hazards, roof leaks and voided warranties. A loose seal or wrong flashing detail lets water in and causes rot. Incorrect wiring risks shocks or fire. Inexperience increases the likelihood of these expensive errors.
Honest skill assessment matters. Someone with basic electrical knowledge and prior home projects might complete a ceiling or attic fan in a few hours. Others underestimate the steps. Cutting openings, securing mounts, routing wiring, and sealing penetrations all require care.
Material expenses are low, often between $20 and $100, but the downstream cost from mistakes can be much higher. Go with step by step guides and proper safety equipment if you venture DIY. Observe local code language, obtain a permit where necessary, disable breakers, employ a voltage tester, use fall protection on roofs, and properly seal all roof and attic penetrations.
If any step feels unclear, pause and ask a pro.
The Pro Guarantee
Professional installers offer workmanship guarantees and liability insurance that shields homeowners from defects and on-site accidents. If a licensed crew screws something up, their insurance and warranty typically mean they repair the damage, lessening the financial risk.
Pros will make sure to comply with local building codes and safety standards. They understand permit requirements and mounting standards. They will size and place fans to coordinate with your attic ventilation plan. This reduces the risk of code infractions and increases long-term efficiency.
Hiring a pro keeps you from having to fix or replace things down the road. Professional technicians are trained to notice associated problems, such as insulation gaps, ductwork issues, or roof weak spots, and address them on the job, which can save money down the line.
Pick trusted companies that come highly reviewed, have written estimates, and guarantees to get reliable results.
The Payback
Attic fans may seem like a small expense initially, but their real worth shines through in reduced energy bills, increased comfort, and decreased roof strain. The trade-off between upfront price and long-term savings varies by fan type, local weather, and installation method. Here’s how you can break down and analyze those returns.
Energy Savings
Attic fans reduce dependence on AC by venting hot attic air outdoors, thereby decreasing heat conduction into rooms. Lower attic temperatures, typically reduced to within 5 to 10 degrees Fahrenheit (3 to 6 degrees Celsius) of the outdoors, translate into less work for your A/C. Research and installer data reveal cooling savings can drop as much as 30 percent in many climates. Dry and consistently hot areas see the biggest improvements.
Net savings come from trackable savings — measuring energy bills before and after installation to get a clear baseline. The payback for swapping out your standard powered fan for an attic fan is about three years from electric savings alone in many instances. Solar-powered attic fans may have a lower per-unit cost in certain models, but can have higher installation costs. Their ongoing electricity cost is almost zero, which alters the payback calculations if you qualify for incentives.
Estimated annual energy savings by fan type:
- Standard electric fan (roof-mounted): €50–€200
- Solar-powered fan: €40–€180
- High-capacity whole-attic system: €120–€350
- Retrofit with thermostat and timer: €80–€300
Real figures are a function of your climate, roof insulation, and home usage.
Home Comfort
Attic fans help keep your home cooler in the summer because they eliminate trapped heat before it migrates into living spaces. Less humidity and better ventilation means less moisture, which leads to less dust and those mildew smells that attic air can carry. Steady attic ventilation balances temperature between rooms, which is a benefit for homes that are stuffy or show hot spots.
Homes with inadequate roof ventilation or insufficient insulation experience the most dramatic comfort improvements. For those with uneven temperatures within their living spaces, an attic fan can be a smart move before updating central cooling units.
Roof Longevity
Heat and moisture accelerate the life of shingles and roof decking. Attic fans reduce both threats by exhausting warm moist air. Good ventilation reduces the risk of mold and mildew, and in the winter it minimizes ice-dam formation by keeping attic temperatures nearer to outside values. The payback is less early repairs and deferred roof replacement.
Home Maintenance for your Fan – fan cleaning, bearing checks, and thermostat calibration keep protection steady and savings preserved. In most cases, attic fans repay their installation costs through energy and roof work savings over time.
Installation costs typically range from €300 to €900 and fan units from €90 to €360 for DIY options.
Conclusion
Attic fan install cost is based on some easy to understand realities. That’s why fan type drives price. A simple solar fan is cheaper initially. A powered fan costs more but circulates more air. Labor and roof access quickly fluctuate the bill. New wiring, flashing, or permit work add obvious dollars. DIY cuts labor but adds risk and time. Pro work means a clean install and a backed warranty.
Anticipate variability, account for additional materials, and verify local regulations. For one-story homes with simple roof access, expect lower costs. For steep or complex roofs, anticipate higher bids. Run the payback calculation for cooling savings. Compare three quotes, note warranties, and balance price with peace of mind.
Get one clear next step: request local quotes and compare line item costs.
Frequently Asked Questions
What is the typical total cost to install an attic fan?
Average Total Cost is approximately €300 to €1,800, depending on fan type, labor, and materials. Mid-range installations typically fall somewhere in the €700 to €1,200 range. Costs differ by location and details of your home.
How much does the attic fan unit itself cost?
Basic attic fans begin at around €50 to €150. Mid-range powered or thermostatic models cost €150 to €450. High-end, quieter, or solar options cost €450 to €1,000 or more.
How do installation labor costs break down?
Anticipate labor to be €150 to €600. Easy rooftop or gable installations require less time. Complicated roof work, wiring, or insulation repair adds labor. Licensed electricians or roofers are even higher.
Are there extra materials or hidden expenses to expect?
Yes. Roof flashing, wiring, thermostat, louvers, permits and small roof repairs cost an additional €50 to €400. If attic insulation or ventilation balance needs fixing, costs increase even more.
Is a DIY install a good way to save money?
DIY can save €150 to €400 if you have electrical and roofing experience. There are dangers such as incorrect wiring, leaks, and voided warranties. Hire a pro for safety and to ensure your work meets code requirements.
Do attic fans reduce cooling bills enough to pay back the cost?
Electric attic fans can reduce cooling load a bit. Payback varies by climate, usage and insulation. Solar attic fans can provide even faster payback in sunny states.
When should I choose solar vs. electric attic fans?
Go solar for low operating cost and easy installs in sunny regions. Select electric for reliable operation in overcast conditions or for thermostatic control and greater airflow requirements.