
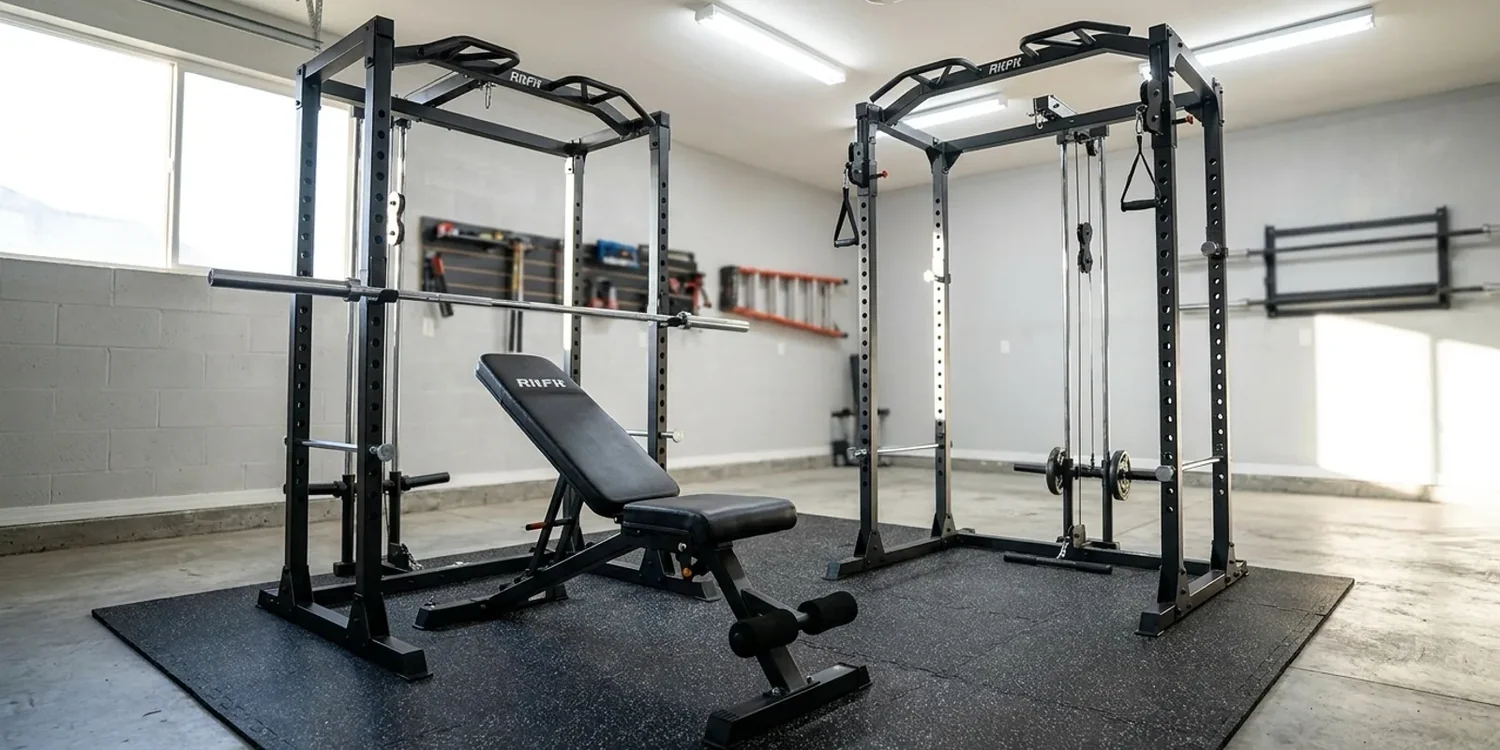

Key Takeaways
- Determine overall power requirements prior to wiring so you can appropriately size circuits, designate dedicated lines for high-watt machines, and prevent overloaded breakers.
- Map zones and place outlets and lighting by activity area, keeping cords out of walkways and ensuring convenient access near racks, benches and cardio machines.
- GFCI and AFCI protection and New Jersey residential codes include appropriate wire gauge, outlet spacing, and post-installation inspection.
- Go with layered LED lighting that has high CRI and is dimmable. This helps reduce shadows, makes mirrors and platforms look better, and saves you energy.
- Leave room to grow with extra dedicated circuits, ceiling and floor power locations, and versatile mounting of task and accent fixtures.
- Plan your outlets and lighting for your garage home gym! Measure ceiling height and clearances, protect against moisture and dust for garage environments, and bypass extension cords with permanent and accessible outlets!
How to plan outlets and lighting for a home gym in a ew Jersey garage details outlet placement, lighting types, and ensuring power needs for a safe, efficient workout space. It discusses circuit capacity, GFCI requirements, outlet spacing, dedicated circuits for heavy equipment, and layered lighting for task and ambient use. Advice on outlet height, conduit access, and LED fixture layout to minimize glare. The meat provides step-by-step planning, code notes, and cost examples.
Plan Electrical Needs
Plan your electrical needs by determining total load, placement priorities, and code constraints before any wiring. This crucial step informs outlet count, circuit sizing, and the right lighting setup to support safe workouts and home gym equipment.
Power Demands
- Catalog each of them with their voltage and amperage. Example: treadmill — 120 V, 15 A motor; rowing machine with display — 120 V, 2 A; space heater — 240 V, 12 A. Note sporadic and continual draws.
- Add twenty to thirty percent headroom for future equipment. If existing gear sums to forty amps at one hundred twenty volts, design circuits and feeders to support a minimum of forty-eight to fifty-two amps.
- Integrate lighting, electronics, and climate loads. LED shop lights might be only 10 to 20 watts each, but a 240-volt heater or mini-split adds a large steady draw. Size feeders so lighting is separate from receptacle loads to keep tools and EV charging available.
- Table for quick reference: * Column A: Equipment
- Column B: Voltage
- Column C: Amps
- Column D: Outlet location
Dedicated Circuits
Designate separate circuits for heavy wattage appliances, especially when planning a garage gym transformation. Heavy machines such as treadmills and 240 V heaters deserve their own circuit to prevent nuisance trips and overheating. Use 12/2 for 20 A receptacle and lighting circuits, and 10/3 or 6/3 for 240 V equipment depending on the rating. Label each breaker clearly in the panel: ‘Gym Treadmill,’ ‘Gym Heater,’ ‘Lighting.’ Include at least one spare dedicated circuit for future equipment or an EV charger. For a detached garage or when adding heavy 240 V loads, plan a subpanel fed from the main. You can run 6 AWG to the subpanel, which is a great way to future proof for a higher-output charger. Strive for a 3% voltage drop on feeders and size conductors accordingly based on panel rating and run length.
Safety Codes
All garage receptacles, from 125 V through 250 V, have GFCI protection without exception. When planning your garage gym lighting setup, check New Jersey residential code for outlet spacing and ceiling heights, as these can influence fixture placement. It’s essential to plan your electrical needs carefully, especially for gym equipment like a squat rack or rower, and take advantage of the AFCI protection wherever code requires it. Select wiring appropriate for garage conditions to ensure safety in your training zone.
Design The Layout
Begin with a scaled floor plan that identifies gym zones, equipment footprints, outlet locations, and lighting setup for your garage gym transformation. Measure your garage length, width, and ceiling height, with a minimum of 8 feet recommended for optimal visibility. Note doors, windows, HVAC runs, and the main electrical panel. For a one-car garage measuring 12 by 20 feet, plan a linear layout along the walls. For a two-car garage measuring 20 by 20 feet, opt for an L-shaped layout and keep a central open area. Display heavyweights such as power racks and bench presses along the back wall, ensuring a safe home gym experience.
1. Map Work Zones
Designate cardio, strength, functional, and storage zones in your home gym. Cardio requires vents in the vicinity and outlets at machine plug height, while strength training necessitates a solid floor area and overhead clearance. Design the layout by designating paths between zones to ensure that gym equipment doesn’t block exits and walking paths remain cord-free. Use a color-coded diagram: one color for outlets, another for lighting, and a third for equipment, which clarifies electrical requirements for each training space. Strategically place mirrors to avoid blind spots and position the right lighting to prevent glare.
2. Position Wall Outlets
To enhance your home gym equipment setup, it’s essential to install outlets at handy heights next to racks, benches, and cardio machines for simple plug access. Design outlets approximately every 6 to 8 feet along walls to accommodate equipment turnover and future requirements, ensuring a well-planned lighting layout. Additionally, install tamper-resistant receptacles and avoid placing outlets directly behind large machines so plugs remain accessible and equipment can breathe, minimizing trip and fire hazards.
3. Set Overhead Power
Design the layout of your home gym equipment effectively. Set up ceiling outlets for hanging trainers, TVs, or fans to keep cords away from the floor. Employ flush or low-profile solutions in garages with lower ceilings to maintain headroom. Locate overhead outlets away from lifting zones so bars and plates cannot reach cords. A well-thought-out lighting plan can help route circuits tidily through joists and envision hiding to reduce visual clutter.
4. Add Floor Boxes
Design the layout for your home gym equipment by integrating floor boxes where wall power is impractical, especially around central stages. Select hard covers rated for foot traffic and equipment weight, ensuring the right lighting is also considered. Always combine them with GFCI protection, as garages can get sweaty, to maintain a safe home gym environment.
5. Wire Climate Systems
Design the layout of your home gym equipment wisely. Don’t overload circuits; instead, give heaters, fans, and mini-splits their own circuits for better control. Install climate controls within easy reach but away from impact zones to enhance safety in your training space. Use wiring rated for garage use and ensure proper ventilation to preserve your gym equipment.
Choose Gym Lighting
A good garage gym lighting design finds the right balance between brightness, color, and placement to aid safety, enhance performance, and inform video feedback. This lighting setup addresses fixture types, layout principles, and pragmatic guidelines for a converted basement or any other similarly compact training space.
- Types of fixtures by lumen output and color temperature: * Low output recessed/pendant: 800–2,000 lm, 3000–4000K for accent or walkways.
- Medium output LED panels/panels: 2,000–5,000 lm, 4000–5000K for general ambient use.
- High output high-bay/strip fixtures: 5,000–10,000+ lm, 5000–6500K for large or high-ceiling gyms.
- Accent strips and spot fixtures: 200–1,000 lm per run/spot, 3000–6500K for decorative and task use.
- Color temperature note: avoid 2700–3000K warm tones and use 5000–6500K cool white for alertness.
- CRI recommendation: choose fixtures with CRI 80+ for accurate color and clear form checks.
Overhead Ambient
Opt for effective gym lighting by installing overhead LED panels or low-profile high-bay fixtures, which provide uniform, glare-free illumination in your training space. Space fixtures according to manufacturer advice and maintain a distance of at least 2 feet from walls to avoid light washing and maintain vertical contrast. For a 200 ft² (approximately 200 square feet) garage gym, aim for a high lumen output of 6,000 to 10,000 lumens total, satisfying the guideline of 50 to 100 lumens per square foot, ensuring your home gym equipment is well-lit.
Pick gym lighting carefully by using dimmable panels, allowing you to adjust intensity for cool-down or high-intensity sessions. Mount fixtures flush or recessed to maximize head clearance and prevent dangerous shadows, adding an extra fixture to avoid under-lighting.
Task Fixtures
Target lighting above squat racks, benches, and lifting platforms minimizes shadows in locations with exacting movement. To enhance visibility during workouts, adjustable spotlights, such as track heads, help you aim light and save your eyes from strain during monster lifts or reading tiny digital readouts on machines. A well-planned gym lighting design requires placing task lighting so that it does not reflect glare on mirrors and camera screens; slightly offset it from the direct line of reflection. Select mounts that pivot or slide, allowing you to relocate targets as home gym equipment is shuffled around. Modular tracks come in handy when you update the gym layout or add a cardio zone.
Accent Strips
Incorporating gym lighting with LED strip lights along mirrors and under storage can enhance safety and visual dimension in your training space. To maintain a clean look, hide wiring behind trim and choose high lumen output options. Utilize RGB or tunable white strips to delineate workout zones, increasing motivation. Pairing these strips with smart controls or dimmers allows for quick scene changes, making your exercise equipment setup both functional and aesthetically pleasing.
Account For Space
To create an effective gym lighting design, start by measuring ceiling height and the square footage available to select the right fixtures and outlet layout. Calculate the area by multiplying length and width, then compare it against your intended use cases. For instance, a single-user mat-and-cardio room typically needs around 10 feet by 10 feet, while a multi-user weight room should measure approximately 12 feet by 15 feet to ensure safe movement around machines. A general lighting goal is to achieve 40 to 50 foot-candles. By multiplying the square footage by your selected foot-candle goal, you can determine the total lumen output required. For example, a room measuring 16 feet by 12 feet has an area of 192 square feet. Multiplying that by 50 foot-candles results in a need for 9,600 lumens, which can guide you in selecting the appropriate fixture types and quantities rather than relying on guesswork.
When planning for equipment footprint and clearance, create a scaled floor plan that includes racks, benches, treadmills, ellipticals, bikes, and storage racks. Ensure that walkways allow for two people to pass comfortably and that emergency egress routes are clear. For multi-user weight zones, aim to maintain a minimum of 36 to 48 inches between machines where possible. Additionally, consider the storage needs for mats, weight plates, and smaller gear. If a bench is positioned against a wall, this may shift outlet requirements, especially if you desire a charging point or fan outlet nearby.
Position outlets strategically to accommodate both stationary and portable equipment. Allocate circuits specifically for high-draw gym equipment, such as treadmills or elliptical machines, which generally require a nearby outlet and sometimes a 20 A circuit. Install low outlets at 12 to 18 inches above the floor for accessories, while higher outlets should be near mirrors or wall-mounted TVs. It’s also advisable to have switched circuits for overhead lights and separate switch zones, allowing you to illuminate only the workout area or the storage area as needed.
Plan for future modifications by running conduit or installing additional junction boxes, making it easier to extend equipment or expand the gym footprint later on. Use a lighting setup that is flexible enough to accommodate different layouts without necessitating new drywall. Consider incorporating a few extra circuits now to avoid the hassle and expense of hiring a licensed electrician to update your panel in just a couple of years.
Lastly, ensure that walkways and emergency exits remain clear under all arrangements. Designate clear paths of a specified width and maintain uniform light levels along these routes. Emergency egress lighting and accessible switches at the door enhance safety. Be mindful not to place fixtures in areas where swinging bars, overhead presses, or jumping movements could result in contact, thus ensuring a safe home gym environment.
Ceiling Clearance
Account for space in your home gym by verifying restricted minimum ceiling heights for lifts, pull-ups, and hanging gear, as these can lead to injuries. Some overhead work may require up to 9 feet . If vertical space is limited, consider using low-profile or flush fixtures to enhance your gym lighting design. Ensure there are no lights or ceiling outlets above racks where bars may fly through, maintaining at least 18 inches ( of free space for safe lifting and circulation.
Natural Sunlight
Take advantage of windows, skylights, or glass doors to reduce energy consumption and illuminate the space. Installing mirrors can enhance visibility and bounce daylight deeper into the gym, reducing the need for gym lights. Additionally, account for space by using UV film or coverings to reduce glare and sun damage to home gym equipment while counterbalancing daylight with reliable artificial light during early morning or evening sessions.
Expert Planning Perspectives
Accomplished garage gym projects demonstrate obvious connections between floor plans, outlets, and lighting design. Learn before you construct your home gym equipment setup. Pay attention to where trainers position power for treadmills, where weight racks inhabit direct light, and how mirrors enhance visibility alongside windows. Most transformations include outlets low along walls for oscillating fans and speakers and higher outlets for wall-mounted TVs or bike trainers. See if there’s anything you can take from the sample flexible conduit runs and switched lighting near the entry, and use the patterns that best align with your training space and traffic areas.
Review successful garage gym transformations for inspiration on outlet and lighting placement
Successful examples often start with zones: wall storage and mounts, a floor work area, and a cardio corner. Outlets track zones, not just walls. For wall-mounted units, anticipate outlets 40 to 48 inches high for TVs and trainers, and 1 to 2 feet above the floor for small appliances. Position GFCI outlets in close proximity to any sink or water source. A well-planned lighting setup is layered: bright overhead for lifting and cardio, task lights for bench or cable work, and accent strips by mirrors to enhance visibility. Note clearance needs: two to three times the equipment depth in front of racks, and at least 8 feet of vertical space for overhead moves. Mock up layouts with tape and temporary anchors to test reach and sight lines before any electrical work is set.
Display must-have features based on training style and equipment needs in a markdown table for organization
| Training Style | Must-have outlets | Lighting needs | Example placement |
|---|---|---|---|
| Strength/Power | Dedicated 20 A circuit for motors, low outlets for fans | Bright focused overhead, anti-glare near mirrors | Outlets at 1–2 ft; 3 LED panels over rack |
In a functional or CrossFit training zone, various circuits for rowers and sleds can be effectively managed with 240 V for heavy motors. The gym lighting design includes durable fixtures that provide a central 12×12 ft open space with 600–800 lux, ensuring high visibility during workouts. For yoga or bodyweight exercises, ambient side lighting at the floor area is crucial, while the cardio section features high CRI overhead lights for safety, enhancing the overall workout experience.
Prioritize flexibility in your electrical and lighting design to adapt to changing workout routines
Design for change by incorporating a lighting plan that includes multiple switched zones and dimmers, allowing you to adjust light levels between heavy lifting and cool-downs. Consider installing garage gym lighting that utilizes modular fixtures like track lighting or surface-mounted LEDs, which can be moved without extensive rewiring. Additionally, ensure you have extra outlets on walls and ceilings for future gym equipment, such as a pulley system or TV, while keeping wiring paths open for potential upgrades.
Document your planning process to streamline future upgrades and maintenance
Mark outlet locations, circuit labels, fixture types, and switch maps to optimize your home gym equipment setup. Keep a zone plan that shows movement clearances: a 6 to 8 foot clear vertical for overhead moves, six by six feet open floor for mat work, and 100 to 150 square feet as a pragmatic minimum for your training space. Take note of door arc radii (30 to 36 inches) and any load-bearing constraints. Ask an engineer if you’re unsure.
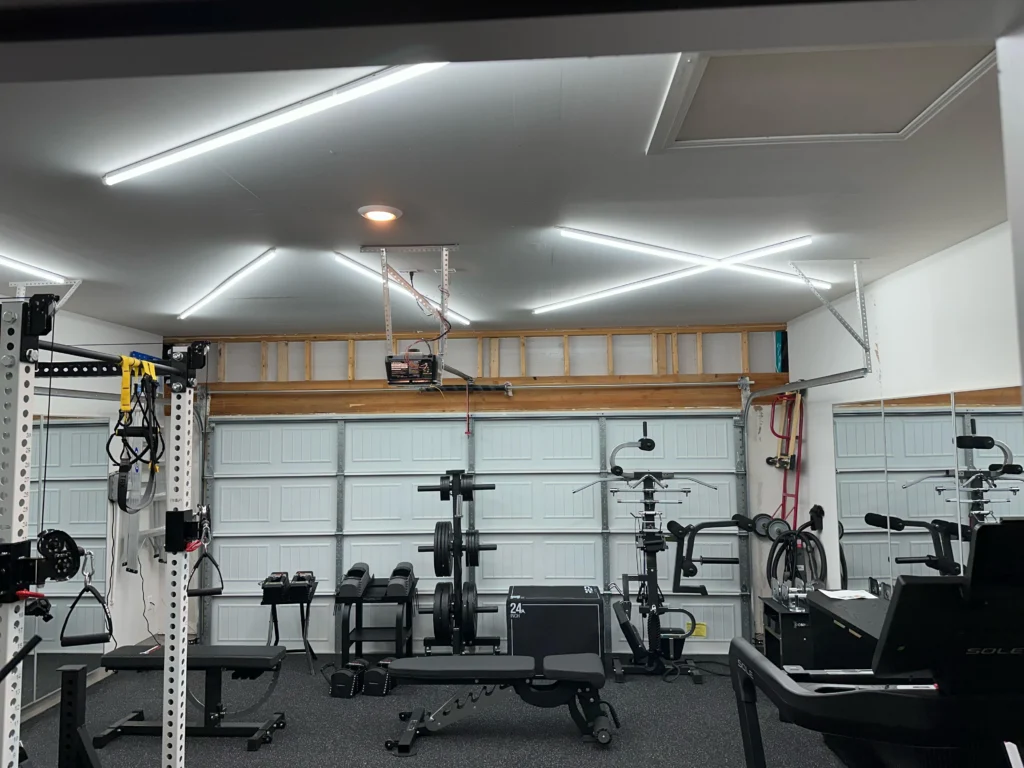
Common Installation Mistakes
Typical garage home gym outlet and lighting planning mistakes come from underestimating everyday use, safety requirements, and future shifts. The list below calls out typical mistakes so you can compare your plans to down-to-earth, safety-conscious benchmarks.
- Insufficient outlet planning
- Incorrect outlet height
- Inadequate GFCI protection
- Inadequate lighting levels
- Overloading circuits
- Poorly planned cord lengths
- Placing fixtures where equipment will block them
- Relying on extension cords or power strips
- Ignoring local building codes
- Failing to plan for future needs
Poor outlet planning leads to clutter and hazards. Count all the home gym equipment that needs power now and later: treadmills, bikes, fans, TVs, speakers, and battery chargers. Properly planning your electrical work ensures a safe home gym.
For garage gyms, outlets should be positioned at a minimum of 48 inches above the floor around workbenches or tool areas. In workout zones, position outlets at heights that keep plugs off the floor yet within reach, ideally between 30 to 48 inches depending on the placement of benches or squat racks. Consider outlet spacing to ensure cords never cross a mat or path, enhancing visibility during workouts.
Incorrect outlet height and placement can create awkward reaches and hazards. Low outlets may be obscured by mats or weight racks, while high outlets are difficult to reach and can lead to dangerous shadows. Install outlets where you will actually plug things in, including some at mid-height for wall-mounted TVs and speakers. Ensure heavy equipment like a treadmill is on dedicated circuits rather than shared ones to prevent overloads.
Partially protected and flat out ignoring code screws shock and fines. Garages need GFCI protection because of moisture and tools. Install GFCI outlets for any equipment within a wet zone and tie in GFCI breakers where needed. Be sure to check your local codes for spacing, circuit requirements and permits, as noncompliance commonly results in rework and added expense.
Installation blunders can compromise safety and functionality. Aim for 40 to 50 foot-candles (430 to 540 lux) throughout activity areas. Avoid installing single-source lights that create harsh shadows; instead, overlap fixtures to ensure no area falls into deep shadow beneath racks or cardio machines. Using diffused fixtures and multiple circuits can create a well-balanced lighting setup for both intense workouts and softer recovery sessions.
Finally, circuit overloads and poor cord planning can lead to fire and trip hazards. Evenly distribute loads between circuits and avoid daisy-chaining power strips. To prevent future issues, always leave room and conduit for upgrades like a charging station or additional home gym equipment.
Conclusion
You see, now you know how to plan outlets and lights for a New Jersey garage gym. Match power needs to gear. High-draw machines get their own circuit. Outlets sit near walls and zones, and GFCI protects wet areas. Position lights to minimize glare and shadows. Use layered light: bright general lights, focused task lights over benches, and dimmable options for classes or cool-downs. Keep room for gear and movement, and plan your wiring routes to stay out of traffic. Find a licensed electrician for code work and permits. Little improvements, such as special circuits for an AC unit or 240 V outlet for a high-powered treadmill, repay you in safety and longevity. Ready to begin? Schedule a site visit with an electrician this week.
Frequently Asked Questions
How many outlets should I install for a garage home gym in New Jersey?
When finishing a basement for your home gym, it’s essential to install at least one outlet every 15 to 20 feet along usable walls, along with additional dedicated outlets for heavy lifting equipment. Planning for 6 to 10 outlets ensures you can support gym equipment, lights, and accessories effectively.
Do I need a dedicated circuit for cardio machines?
Yes. High-power cardio machines, such as treadmills and rowers, should be powered by dedicated 15 to 20 amp circuits to ensure safety and prevent tripping, especially in a home gym with proper gym lighting design.
What lighting type works best for a garage gym?
Utilize bright, even LED fixtures with a high lumen output and a color temperature of 4,000 to 5,000 K. These energy-efficient lights ensure visibility and safety for workouts and video recording.
Should I add dimmers or zones for gym lighting?
Yes. Use dimmers and zone controls to provide bright task lighting during workouts and softer light during recovery or stretching, enhancing the visibility of your exercise equipment.
How high should ceiling lights be in a garage gym?
Mount fixtures when possible to provide even coverage about 8 to 10 feet above the floor, ensuring the right lighting for your home gym equipment. Allow clearance around overhead equipment such as pull-up bars and squat racks to avoid dangerous shadows.
Do I need weatherproof outlets in a garage gym?
Near doors or exterior walls, be sure to use weatherproof and tamper-resistant outlets for your garage gym transformation. Inside the garage, you will want GFCI outlets for safe home gym electrical work where water or cleaning can occur.
When should I hire a licensed electrician in New Jersey?
For a safe home gym, bring in a licensed electrician for new circuits, panel upgrades, or complicated lighting zones to ensure code compliance and proper documentation for inspections.