

Key Takeaways
- Pay attention to electrical warning signs like flickering lights, burning odors, warm switch plates or frequent breaker trips and get them fixed immediately to minimize fire and moisture hazards.
- Recognize that voltage drops, loose connections, or faulty controls can decrease the fan’s moisture-removing ability and manifest themselves as performance changes such as reduced fan speed, delayed starts, or unusual noises.
- Identify moisture red flags such as mold growth, lingering post-shower condensation, musty odors, or water staining in the vicinity of the fan to corroborate poor ventilation.
- Employ safe diagnostic steps. Power off, inspect switches and wire terminations, test voltage with a multimeter, and confirm airflow with a tissue test.
- Take corrective measures like tightening or replacing loose terminations, control-type switching, rewiring with code-compliant materials or upgrading the motor as necessary.
- Put safety first and go pro for difficult electrical repair. Routine maintenance helps avoid wiring failure and persistent moisture problems.
Here are symptoms that your bathroom exhaust fan wiring is creating moisture issues. Bad wiring can slow fan speed, make the fan run sporadically or not when humidity increases. Loose wiring, corroded connections, and improper grounding increase moisture hazard by constricting airflow and creating more condensation. Below are explicit inspections, easy diagnostics, and even precautions for finding and fixing wiring-related moisture woes.
Electrical Warning Signs
Electrical problems in the exhaust fan circuit significantly decrease ventilation and increase moisture, which can result in mold and structural damage if unchecked. Here are the actionable signs to monitor, all of which indicate wiring or circuit deficiencies that may restrict fan capacity and exacerbate moisture issues.
1. Speed Drops
A gradual decrease in fan speed typically indicates that the fan is receiving less voltage than it requires. Compare how long it takes the fan to spin up now versus new. If it whirls slower or can’t quite get up to RPM, jot down when the shift began and other details, such as recent electrical work or storms. Monitor airflow by sensing the draw at the grille or by a rudimentary anemometer. Small, incremental drops in airflow over weeks can indicate wiring resistance or loose connections. If the fan occasionally stalls or doesn’t immediately reach full speed right after turning it on, that sporadic action indicates a faulty connection in the switch or connector.
2. Switch Delays
A lag between flipping the switch and the fan starting can be an early indicator of worn-out wiring or a failing motor capacitor. Timing these delays helps. A half-second lag may be normal for older fans, but multi-second waits that grow longer over months indicate worsening contact or corroded terminals. Be on the lookout for the fan that kicks on only after multiple switch toggles or only when you hold the switch at a specific point. Test other bathroom switches and adjacent circuits to verify that the problem is isolated to the fan circuit. If other fixtures react normally, the issue is most likely local to the fan wiring or switch.
3. Breaker Trips
See how frequently the breaker trips when the fan operates and if there are no trips with the fan off. If breaker resetting brings function back temporarily, the fan could be pulling surge current from a short or motor fault. Observe if other bathroom appliances employ the same breaker. Multiple loads increase trip likelihood. If your fan trips often during humid showers, it’s probably because the fan motor pulls more electricity when under load or that wiring insulation absorbs moisture and forms leakage paths.
4. Heat Build-Up
Warm wall plates or hot switch covers, or a section of the ceiling that’s hotter closer to the fan are all indications of excess resistance or loose connections converting electrical energy into heat. Try a quick test with a non-contact thermometer, measuring the temperature rise during operation. Anything that stays significantly above ambient for extended periods indicates a fault. Continuing hot spots are a fire hazard and typically need immediate expert attention.
5. Strange Sounds
Buzzing, humming, crackling, or popping from the fan or switch usually indicates arcing or a failing motor bearing interacting with electrical faults. Differentiate mechanical noise from electrical noise by listening when the fan is off: crackles that persist with the fan off but switch on are likely electrical. Electrical warning signs are sparks or loud pops that necessitate power being immediately cut and a visit from an electrician.
Moisture and Mould
Moisture and mould in bathrooms usually indicate a ventilation problem, and bad or poorly wired exhaust fans can exacerbate those problems. Details Moisture and Mould Here are obvious warning signs, their implications, formation sites and wiring-related faults.
Spot visible mould growth on ceilings, walls, or around the fan grille.
Any visible mould in proximity to the fan grille or on adjoining ceilings and walls indicates moist air is escaping removal. If wiring faults stop the fan from running full speed, running intermittently or tripping the circuit, humidity lingers and spores settle on paint, drywall and grout. Check for little dark spots that cluster in corners or trace the fan’s exhaust. This can manifest as black specks on the ceiling above the shower, fuzzy patches along the top of shower tiles or mould rings around the fan opening itself. Mould can come back after cleaning if the airflow problem remains, a sure indicator that the fan isn’t working consistently because of wiring or switch issues.
Detect lingering dampness or condensation after showers despite fan use.
If windows, mirrors or painted walls retain droplets of water for 30 to 60 minutes following a shower with the fan running, wiring may be restricting fan power. Rotted wiring may result in lower voltage at the motor, causing the fan to spin more slowly and push less air. It can even cause the fan to shut off too early if attached to a timer that goes haywire. Test efficiency by running your hand over a surface after a shower. The wet ones are your culprits! Practical checks include listening for irregular motor sounds, watching for fan blades that seem sluggish, and testing the fan on a separate circuit or with a replacement switch to isolate wiring issues.
Smell musty odours that indicate hidden moisture problems.
Lingering musty odours almost always indicate mould growing in hidden locations such as behind drywall, within ceiling cavities or inside the fan housing. Wiring issues that prevent the fan from venting to the outside allow humid air to accumulate in those spaces. Odors tend to intensify following steam events and can saturate materials such as towels or mats. Examine the fan housing and ducting for soft, moist insulation or sagging duct joints where moisture collects. If smells linger despite cleaning and drying the surfaces, get an electrician to check wiring and ensure the fan and humidity sensors are receiving sufficient power.
Track recurring water stains or peeling paint near the exhaust fan.
Water stains, paint discoloration or peeling finish around the fan opening indicate recurring wetting over a period of time. Wiring faults that cause occasional power loss, arcing or poor grounding can produce intermittent fan operation or heating that damages paint. Check for circular stains that emanate from the fan or tiered paint flaking on the ceiling. These are classic signs of chronic ventilation failure instead of a one-off leak. Refresh or fix wiring and try keeping the fan on to prevent additional damage.
Root Electrical Causes
Bad wiring diminishes a fan’s capacity to exhaust moisture from the room by decreasing motor torque and airflow. When voltage feeding the motor dips below its design point, fan blades turn more slowly and move less air. Poor circulation lets steam settle on walls, ceilings, and fixtures, raising surface humidity and encouraging mold. Poor wiring can cause intermittent operation. The fan may run at full speed sporadically then stall, leaving moisture events unvented. Faulty grounding or shared neutrals can upset the motor electronics on modern fans, causing shortened run time or erratic control response. In practice, these problems often arise following long wire runs, remodeling that repurposes circuits, or when budget wiring was used to reduce cost.
Root Electrical Causes about: wrongly installed Frequently, the fan is left disconnected from a genuine shortest path to outdoors. Loose ducts, vents dumping into the attic space, or backwards backdraft dampers all conspire with miswired fans to block complete moisture removal. If the fan is wired to a circuit that turns off with other loads or to a timer with a very brief run setting, condensation will persist. Things like fans connected to the light switch that people turn off or fans on overnight timers set too short for a long hot shower. Installation matches wiring, switch, and duct path with the right fan to provide ongoing, sufficient extraction during and after showers.
Root electrical causes
Faulty controls, mismatching switch type, control rating or timer behavior to the fan’s needs can prevent proper fan operation.
About: Root Electrical Causes
Most fans just need an on/off switch or a rated timer. Using a dimmer or audio-style rotary controller will fry the motor or make it run at low torque. Timers that don’t permit a run time long enough to fully dry will leave moisture behind. Controls with worn contacts may not energize the fan to its full extent, leading to slow starts and inadequate moisture clearance.
Tell tale electrical issues of poor connections. Loose terminations add resistance that produces local heating, arcing and voltage loss at the motor. Corroded connectors increase contact resistance and can produce intermittent faults that masquerade as motor failure. Snug, corrosion-free screw terminals or crimped connectors keep voltage steady and the fan running reliably. Proper inspection and tightening to manufacturer torque specifications, in addition to the use of the correct wire gauge, minimizes the risk of overheating and that associated dip in fan performance.
Voltage Drop
| Measured Voltage (V) | Typical Fan Speed | Typical Airflow (m3/h) |
|---|---|---|
| 230 | Nominal | 100–150 |
| 210 | Reduced ~10% | 90–135 |
| 190 | Reduced ~20–30% | 70–110 |
| 170 | Poor/Intermittent | <70 |
Low voltage trashes motor speed and air flow. Long runs or undersized wire result in a drop. As a basic diagnostic, measure the voltage at the fan motor while it is running.
Loose Terminations
Check all connections for looseness or corrosion. Tighten or replace loose screws to reestablish contact.
Loose connections cause intermittent operation and can simulate motor failure. Safe terminations avoid arcing and overheating.
Employ the right connectors and test them again in a few weeks to ensure they are holding true.
Incorrect Controls
Make sure your switch type corresponds to the fan’s control needs. Swap out dimmers or non-LED compatible timers.
Make sure switches are rated for the fan’s load, which is a common cause of bad operation. Block shared controls that disrupt fan operation.
Diagnostic Steps
It is a narrowly targeted diagnostic routine that isolates wiring faults in a bathroom exhaust fan as the root cause of lingering moisture. Here’s a diagnostic checklist and step-by-step guide to inspect switches, test voltage, and check airflow. Be systematic, take notes, and work safe before you poke around.
Inspect Switches
Take off the switch cover and check for discoloration, melted plastic or burn marks on or around the screws and terminals. A blackened area or odor of burnt plastic frequently indicates loose or overheated connections.
Step 1 — Turn off power at breaker first. With cover off and power off, carefully pull on each wire at the rear of the switch. Wires that move or come away easily are poorly terminated. Make tight or reterminate with appropriate wire nuts where necessary.
If the switch is stiff, clicks off and on, or sticks in one position, replace it. A worn switch can create intermittent contact and heat, cutting fan run time and leading to moisture buildup.
Document every finding: photos of wiring, notes on wire colors and terminal positions, and whether the switch was replaced. They accelerate subsequent work by a professional electrician or for warranty issues.
Test Voltage
Make sure the breaker is off prior to hooking up or taking down any connections. Then reapply power only when prepared to measure. With a multimeter set to the proper AC range, measure voltage at the switch terminals and at the fan wiring junction. Log the readings by date and location for each test point.
Use this to compare measured values to expected household voltage, usually around 120 V or 240 V depending on your location. A steady reading close to standard means the supply is probably OK. Much lower readings under load or with large variance are indicative of voltage drop, loose neutrals, or undersized conductors.
If you discover a drop in excess of 10% for load, record the actual figures and the length of the run. Long runs or corroded connections are usually responsible. These specifics direct if repair, conduit replacement, or an electrician visit is necessary.
Verify Airflow
Hold a tissue or a small strip of toilet paper near the grille as you run the fan. It should draw the substance in and remain fixed if suction is sufficient.
- Turn fan on and off to check response time.
- Take out the grille and check the fan blades for accumulated grease, hair, or dust buildup.
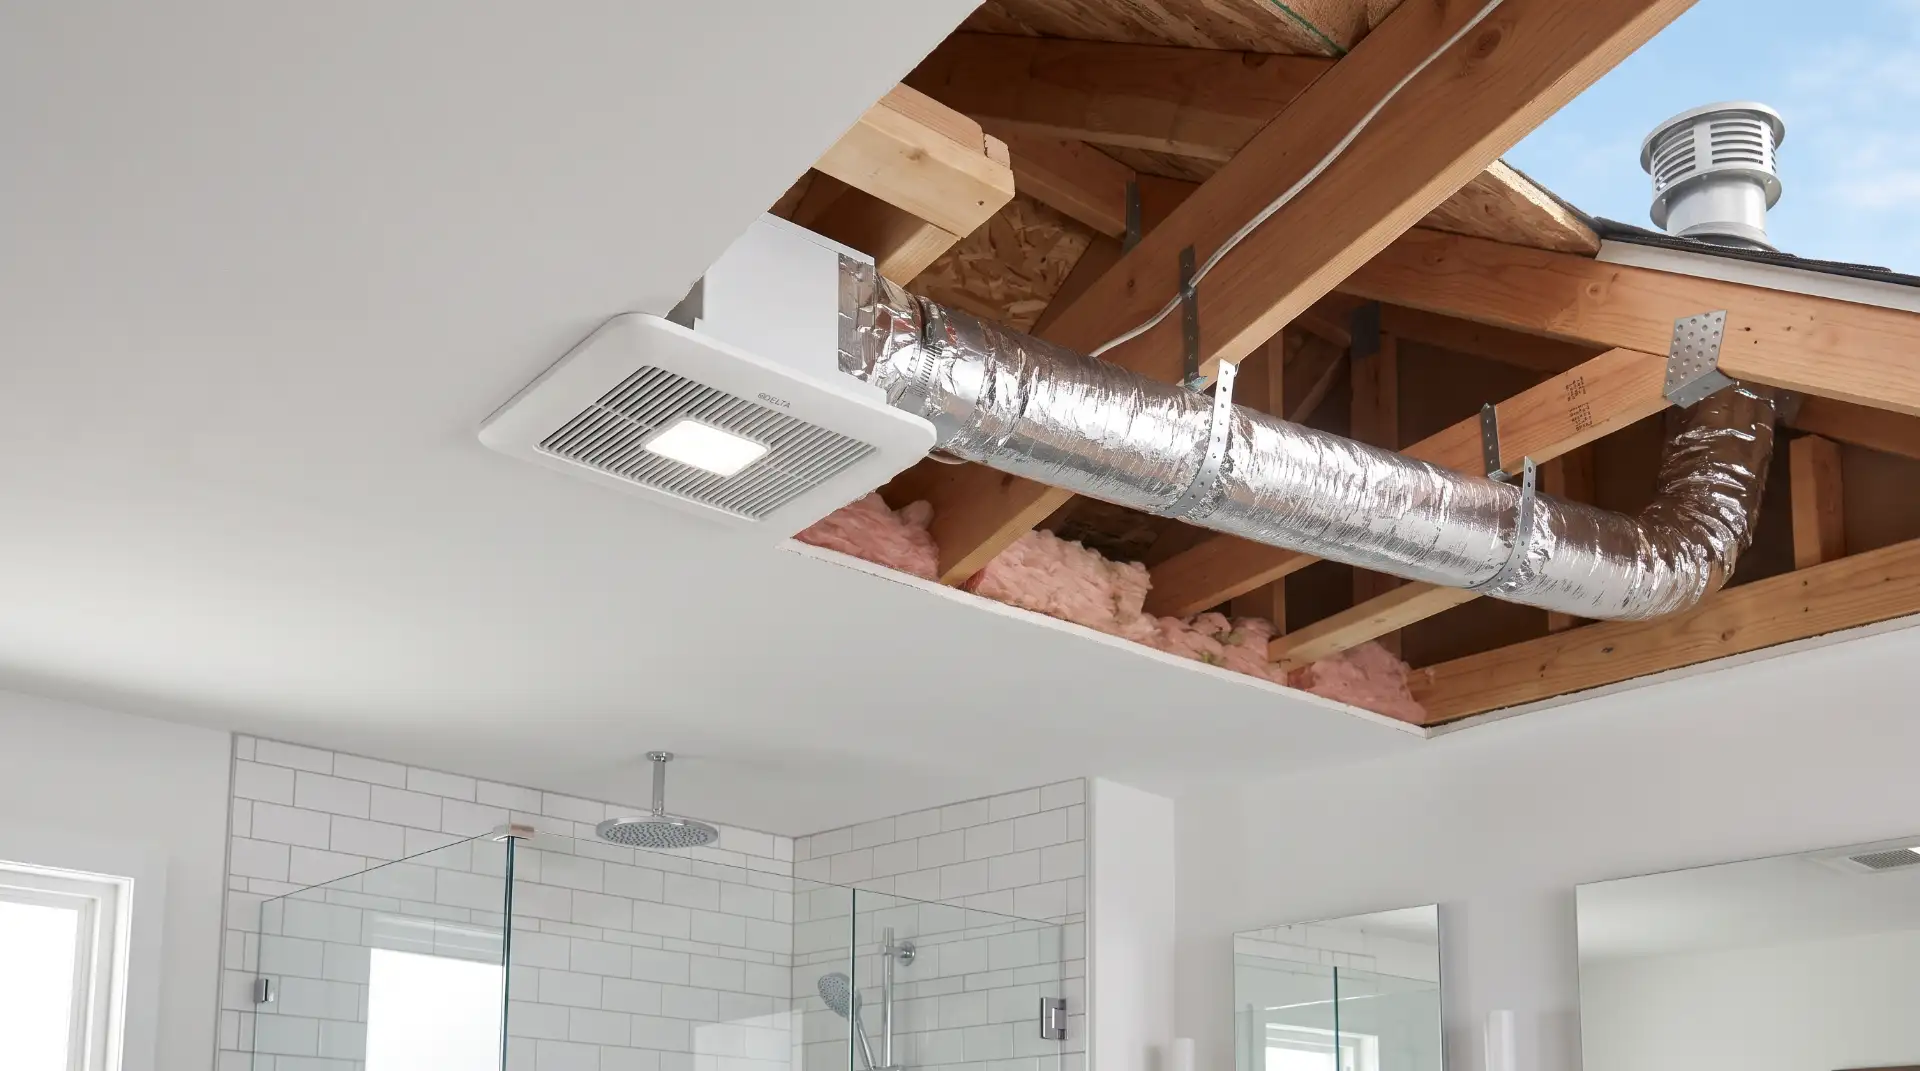
- Check duct from fan to outside vent for kinks, bird nests or collapsed sections.
- Inspect the exterior vent cap for blockage or a stuck flap.
Contrast suction and measured airflow (if you have specs) to the manufacturer’s CFM rating. Clean blades, clear duct blockages, and get that flow back! Record pre and post results in your log.
Unique Industry Insights
Here’s what this section covers: How wiring creates moisture problems, where faults appear, and how industry innovations lower risk.
Bad wiring frequently causes fans to operate inefficiently or not at all, increasing humidity and mold risk. Common mistakes in bathroom fan installations include:
- Using undersized wire or the wrong gauge for the circuit causes voltage drop and weak fan motors.
- Wiring the fan outlet to a light circuit with frequent switching causes short run times and trapped moisture.
- Leaving out a special grounded circuit raises resistance and heat that can warp housing and seals.
- Running your ductwork through an unconditioned attic with no insulation causes condensation on the duct.
- Leaving junction boxes open in wet spots lures in corrosion and flakey connections.
- Utilizing non-rated fixtures or wiring in wet areas leads to insulation failure and leakage current.
Fresh technology reduces energy consumption and moisture risk. Fans powered by electronically commutated motors consume less energy and provide steady airflow even at reduced speeds, allowing them to operate longer without generating noise or wear. Inline fans in conditioned spaces blow warm, dry air through ducts which keeps them warmer and less prone to condensing. Brushless DC motors endure longer and tolerate voltage variations better than the old shaded-pole motors. Corrosion-resistant housings and sealed connectors keep moisture out of electrical contacts, reducing fault rates.
Moisture-resistant wiring and smart controls from inside the industry help sidestep these failures. Plenum-rated and wet-location-rated cables are more frequently used in bathrooms, offering tougher insulation and greater temperature tolerance. Smart controls link humidity sensors to fan speed and runtime, eliminating the need for manual operation and guaranteeing air exchange post-shower. Wi-Fi or Bluetooth enabled fans send alerts when airflow dips under safe levels, assisting owners in repairing duct blockages or motor wear while still early. Built-in timer-humidity controllers and occupancy sensors optimize energy consumption and appropriate ventilation.
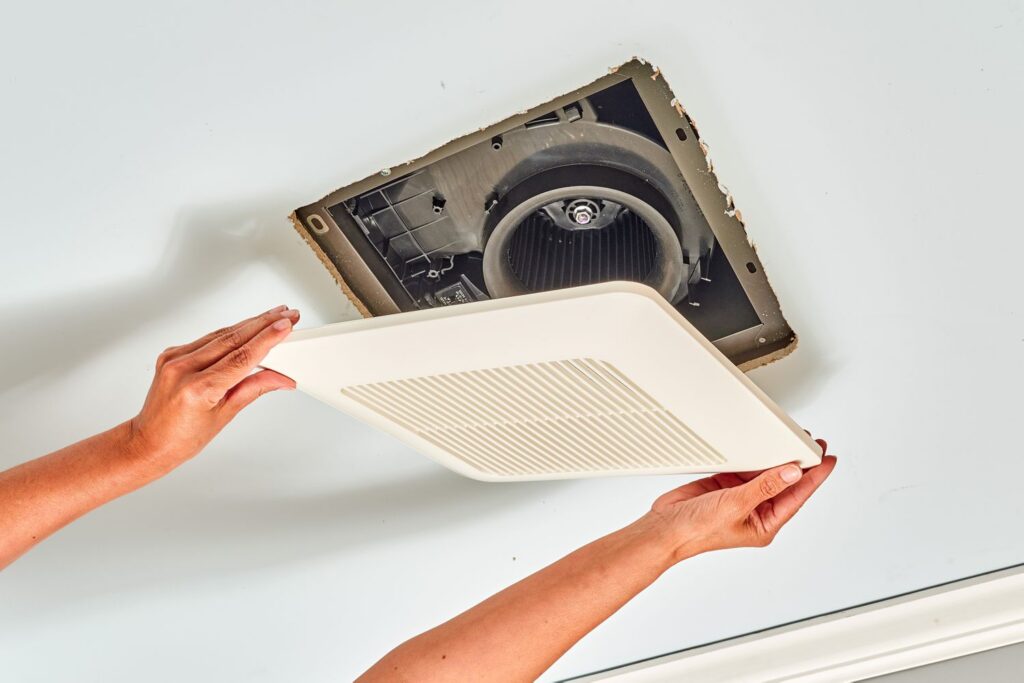
Prolong fan life and avoid moisture woes with these professional tips. Use a circuit sized for the fan’s motor nameplate and a hardwired humidity sensor near the shower. Insulate ducts and use short, straight runs with smooth-wall ducting to reduce condensation. Clean fan grilles and motors every six months to prevent dust accumulation that holds in moisture. When the repair cost reaches around 50% of replacement, swap out old motors with ECM or brushless DC units. Test airflow once a year with a basic smoke or anemometer test and immediately fix any duct leaks.
Corrective Solutions
Wiring-related moisture issues demand a transparent, organized method that harmonizes safety, expense, and decades of functionality. Start with immediate dangers, then address fix priorities, regular maintenance, and possible enhancements. The steps below describe some useful fixes and checks that minimize moisture accumulation associated with electrical faults and enhance fan consistency.
Rewire Unit
Cut power before you begin any rewiring to prevent a shock or fire. Check with a circuit tester to verify power is off and lock out the breaker if you can. Replace worn wiring with code-compliant materials, including copper conductors of proper circuit gauge and wire types rated for damp locations. If the original wiring exhibits brittle insulation, corrosion or heat damage, replace the entire run instead of splicing in short sections.
Label wires so you know how to hook them back up. Record with tough tags or colored heat-shrink and labels in an easy-to-reference diagram. When making connections, use appropriate connectors and proper grounding. A loose neutral or missing ground can generate stray currents that encourage corrosion and moisture-related failures.
Once rewired, run the fan to make sure it operates safely. Verify solid power at the motor, no arcing, and that the fan starts smoothly without hum or vibration. Corrective Solutions Use a clamp meter to measure current draw and compare it with motor ratings. If the draw is excessive, it’s a wiring problem or motor problem. Run the fan while misting the bathroom lightly to ensure the wiring resists any moisture and that the fan pulls air.
Upgrade Motor
Opt for a motor with greater airflow volume to control moisture more effectively. Select a motor in m3/h that aligns with the bathroom size and moisture load. For small spaces, a small increase can reduce relative humidity fast. Think about energy-efficient motors with better sealing to reduce moisture coming into contact with electrical components.
Make sure your replacement motor fits the fan’s housing and electrical specifications. Check physical fit, mounting points, and ensure that voltage, phase, and amperage match current supply. Mismatches stress wiring and controls. If your old fan used a connector or control module, source adapters or compatible parts instead of forced fit!
Adhere to manufacturer guidelines for secure motor mounting. Firmly affix the motor, preserve clearances and employ anti-vibration mounts as recommended. Reconnect wiring as per the motor diagram and recheck grounds. Try the enhanced fan for a quieter, faster, and more efficient performance. Test for air flow and noise, and observe a decrease in run time to clear moisture. If it is still loud, reconsider mounting and ducting, not motor selection.
Address repairs that mitigate immediate hazards as a priority. Then, plan a routine inspection every 6 to 12 months and opt for a professional upgrade if wiring is more than 20 years old or if failures are frequent.
Conclusion
Here’s why bungled bathroom exhaust fan wiring is the culprit behind your moisture issues. Keep an eye out for flicker, tripped breakers, warm switches, low airflow and strange noises. Test circuit connections and amperage to identify loose, incorrect wiring. Remedy poor wiring, incorporate a timed or humidity sensor switch and vent to the exterior to prevent moisture and mold development. For tight corners, employ a dryer-type duct and backdraft damper to keep things flowing.
Do something if you notice wet paint, peeling caulk or recurring mould. Bring in a licensed electrician for wiring fixes and a pro for mould if it covers large areas. Book an inspection this month to safeguard your home and health.
Frequently Asked Questions
What are the top electrical signs that an exhaust fan is causing moisture problems?
Symptoms include tripped breakers, flickering or weak fan motor, warm switch plates, burning smell or fan stopping. These indicate wiring or motor problems that reduce ventilation and increase moisture risk.
Can a faulty exhaust fan wiring cause mould growth?
Yes. Bad wiring can restrict the fan’s speed or even halt its operation. Reduced ventilation keeps humidity high, which creates the perfect environment for mold on walls, ceilings, and grout.
How do I quickly check if wiring is the issue?
Shut off power at the breaker, open up the fan switch and fan wiring, and check for loose connections, burn marks, or melted insulation. If in doubt, call a pro, a licensed electrician, to steer clear of hazards.
Is condensation on the bathroom mirror a sign of wiring problems?
Mirror fog alone is fine. If heavy condensation persists with a fan that runs poorly or not at all, this can be a sign of electrical or ventilation failures requiring inspection.
Can fixing wiring improve bathroom moisture levels immediately?
Yes. Getting the fan working again quickly ramps up air exchange and reduces humidity. Complete drying and keeping mold at bay might still need some airing out and cleaning.
When should I call a professional electrician vs. a handyman?
Call a licensed electrician for wiring faults, tripped breakers, burning smells, or any other unsafe signs. Once wiring safety is confirmed, a handyman can take care of the fan replacement!
What long-term solutions stop moisture problems caused by wiring?
Have it rewired properly, install a fan of the correct size that is ducted to the outside, install a humidity-sensing switch, and schedule routine electrical and ventilation checkups to prevent this from happening again.