
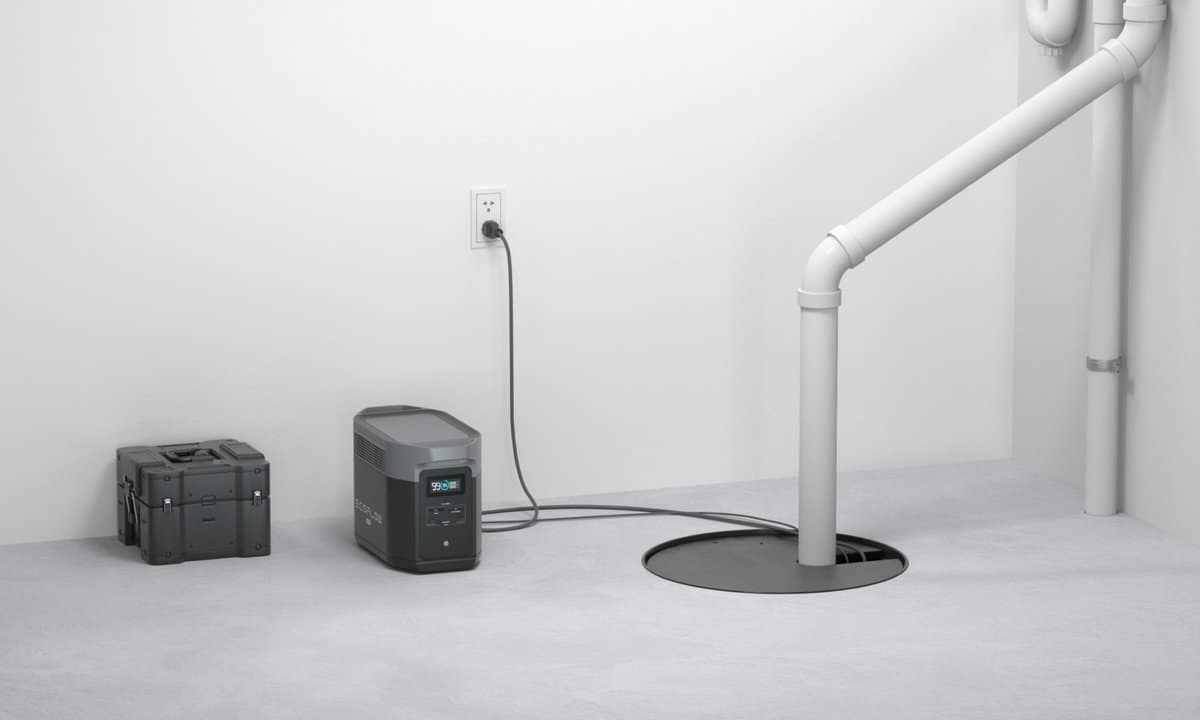

Key Takeaways
- Add a dedicated circuit for sump pump backup in New Jersey basement. Calculate total and startup amps and select breaker and wire gauge accordingly.
- Add GFCI protection, moisture-resistant materials, and elevated or waterproof electrical boxes to minimize the risk of shock and corrosion in basements that are susceptible to water exposure.
- Follow manufacturers’ instructions for the pump, backup, battery, check valve, and discharge pipe compatibility and assembly to avoid mismatched parts and failed operation.
- Identify and segregate cables for the main pump, backup pump, and battery system. Employ wet-location rated cable and conduit. Mount wiring to prevent contact with standing water and mechanical harm.
- Develop a detailed installation checklist and test the float switch, backup activation, and discharge flow monthly. Record findings in a maintenance log.
- Wear protective gear, use a voltage tester before touching circuits, and have a professional perform inspections every few years to root out lurking problems before they wet your basement.
How to add a dedicated circuit for a sump pump backup in a New Jersey basement describes how to hook up a separate line for a backup pump. It touches on local code basics, sizing the circuit and breaker, wire types, proper grounding, and GFCI. It describes permit requirements in New Jersey and when to bring in a licensed electrician. The main body gives you step-by-step instructions and safety checks.
Required Equipment
A dedicated circuit for a sump pump backup system requires both electrical and plumbing components, along with basic workbench materials. The list below breaks these into easily digestible items, noting their importance and providing examples of popular options. Follow the manufacturer’s instructions to properly connect the backup pump, float switches, and battery to the primary sump pump model.
- Required Electrical Breaker & Panel Items . . * Single-pole 20‑amp, 120‑volt breaker preferred. Use 12 AWG copper wire from panel to outlet. A 15‑amp/14 AWG run is the minimum for a few small pumps, but a 20‑amp breaker provides headroom and aligns with NEC 422.12 advice for fixed motor appliances. * A panel‑level GFCI breaker is preferred over a GFCI receptacle for reliability. NEC 422.5(A) requires GFCI protection for pumps that are less than or equal to 150 V. Make sure the breaker fits your panel make and model.
- Line and outlet hardware . . * 12 AWG NM-B or THHN in conduit as local code requires, cables rated for wet locations where exposed to moisture. Mark conductors for main pump, backup pump, and battery charger to maintain circuits free during install and subsequent service. * Single-receptacle outlet mounted within 5 ft of the basin, on the dedicated circuit (one outlet, one device per circuit).
- Sump pit plumbing and pump fittings.
- PVC discharge pipe (typically 1¼–2 in), appropriate fittings and a dependable check valve sized to pump discharge specialized hardware such as
- 7.2.2.2.2.
- 6.4.2.1.
- 6.4.2.2.
- 6.4.2.3.
- 5.5.1.3.
- 6.4.2.1.
- Mounting brackets, hose clamps and a dedicated discharge path meeting local drainage regulations.
- Pump manual – USE solvent-weld PVC / threaded fittings.
- Necessary line components include a battery backup unit sized to pump draw and run time, a compatible battery (typically deep-cycle 12 V), and a charger. Verify backup float switch compatibility and wiring harness as per manufacturer.
- Miscellaneous tools and materials . . * Conduit, conduit fittings, wire nuts, grounding connectors, junction boxes, cable clamps, and weather-rated boot or grommet where wiring goes through foundation. * Concrete or block rated fasteners and anchors, silicone sealant for pipe/penetrations.
Basic Hardware
Gather mount screws, anchors, wire nuts, outlet boxes, and conduit. Choose a backup system for a sump pump that includes a float switch, check valve, and discharge pipe fittings sized according to the manufacturer’s instructions. Ensure all hardware is rated for damp basements and splash exposure.
| Item | Purpose | Example |
|---|---|---|
| Mounting screws & anchors | Secure boxes, pumps, brackets | Concrete sleeve anchors |
| Outlet box & receptacle | Connect pump to dedicated circuit | Single‑receptacle, weather‑resistant |
| Check valve | Prevent backflow | 1½″ PVC swing or ball check |
| Float switch | Activate backup pump | Compatible model per pump manual |
Electrical Cables
Select 12 AWG copper for a 20 amp circuit and ensure that you use 14 AWG only for 15-amp minimum installations. For a reliable backup system for a sump, make sure the required equipment uses cable or conductors rated for wet locations, running in conduit where necessary. All cables should be trimmed to fit runs from the panel to the pit, leaving service loops and clearly labeling the cable as to its purpose.
Protective Gear
Put on insulated gloves, safety glasses, and non-slip shoes — you’re dealing with water and live circuits! To prevent water damage, double check with a voltage tester that power is off before you touch any wires. Work in dry conditions, keep equipment on hand for later repairs, and shun any puddles during all installation steps.
Step-by-Step Installation
This part gets down to the nitty gritty about how to install a backup system for a sump pump in your basement. Take your time and follow the manufacturer’s instructions at each stage, and use the checklists below to keep progress moving and prevent missed steps.
1. Calculate Load
For step 1, begin by recording the nameplate amperage for both your primary sump pump and backup pump, in addition to the battery charger load. Don’t forget the controllers or alarm panels. Consider motor startup surges: pumps often draw three to five times running current for a short time. Size the breaker and conductor to withstand that surge without nuisance tripping. It’s advisable to keep the backup system for a sump on a dedicated circuit to prevent issues during power outages. Write down your calculations and assumptions, including supply voltage of 120 V or 240 V and the conductor ampacity you chose. Bookmark this information with installation pictures for your next upgrade or troubleshooting.
2. Mount Box
Install the electrical box above the anticipated high water level and well above the sump pit rim. Anchor the box to a stud or solid concrete with the proper anchors. Vibration and occasional handling in service demand a sure mount. Make sure the box interior will accommodate the back-up controller, outlet, and conductor bends. Code usually demands sufficient free space for safe terminations. Mark the box location clearly with a label and include a simple maintenance note: pit diameter minimum 18 in., gravel bed 4–6 in., pump sits flat and lid secured.
3. Route Cable
Run cable from the main panel to the mounted box with conduit or protected cable clamps. To ensure a reliable backup system for a sump, avoid tight bends and keep wiring away from water pipes and the pit edge. Anchor cables at intervals, and use sleeves where they pass through masonry. Tag each cable end for identification and future work. Maintain all horizontal cable runs sloped where they cross the pit to prevent pooling towards junctions, especially during power outages.
4. Wire Outlet
Plug into a GFCI outlet per manufacturer and local electrical code. NEVER use an extension cord. To ensure safety, connect hot, neutral, and ground with proper polarity and secure terminations. Ground the metal box and outlet for safety. Test the outlet with a plug-in tester and by tripping the GFCI before hooking up the primary sump pump or backup battery system. Make sure the discharge pipe is a minimum of 1-1/2 inches in diameter with a check valve and union. Drill a 3/16 inch hole between the pump outlet and check valve to help prevent air lock.
5. Connect Breaker
Choose a breaker appropriate to the calculated load and surge sizing, and install it in the main panel after disabling power. Make secure terminations and torque to manufacturer specifications. Mark the breaker with a label that reads “backup system for a sump.” Before commissioning, recheck all connections, float switch wiring, unions, and discharge fittings for leaks or looseness. Ensure that horizontal discharge runs slope to prevent standing water and freezing, which can lead to pump failures.
Safety Standards
Having a dedicated circuit for a sump pump backup system lessens the overload risk and allows the backup pump to perform as intended. This is crucial in preventing water damage during power outages, ensuring that the primary pump operates effectively when needed. Here is a brief table of main standards and their importance, followed by guidance on essential defenses against damp risks.
| Standard / Guideline | Requirement | Why it matters |
|---|---|---|
| NEC 210.11 / | ||
| 210.23 | Dedicated branch circuit for specific loads | Prevents overloads from other devices sharing the circuit |
| NEC 422.12 | Separate branch circuits for fixed motor appliances | guarantees that motor inrush won’t trip unrelated loads.
| NEC 422.5(A) | GFCI for pump less than or equal to 150 V | Protects against ground-fault shock in wet areas
| Circuit rating | 20‑amp circuit with proper conductor size | Manages pump startup current and avoids overheating | | Conductor size | No 14 AWG on 20‑amp breakers | Stops wire from getting too hot and causing a fire | | Outlet placement | Within 5 ft of sump basin | Keeps cord length short and limits shock risk |
| Water resistance | Wet box, raised outlets, seals | Keeps corrosion and short circuits at bay, enhancing the reliability of the backup system for a sump pump.
GFCI Protection
Install a GFCI protected receptacle or GFCI breaker to the dedicated 20-amp sump pump circuit. NEC 422.5(A) requires GFCI for pumps 150 volts or less. Verify pump nameplate voltage and employ a GFCI sized for the circuit. Test following installation with the included test button and with a receptacle tester that simulates a fault. The unit should trip and cut power immediately.
Make sure any non-GFCI outlets in the sump area are replaced with GFCI-protected units. If a separate backup system or battery charger is on the same circuit, refer to the manufacturer’s wiring notes and GFCI recommendations to prevent nuisance trips. Add GFCI inspections to your regular maintenance. Log test dates and any trips so you can identify repeat faults that indicate wiring or gear issues.
Moisture Hazards
Maintain all outlets and junctions above probable flood level and at least 1.5 meters (5 feet) from the sump pit where feasible. Use weatherproof boxes and tight gaskets on covers even indoors if the location is damp. Elevated mounting and sealed conduits minimize exposure to splashes and humidity that cause corrosion.
Check for water stains, rust, or loose connections at least once every three months. If you notice any corrosion or moisture in boxes, turn off power and fix with replacement parts rated for wet locations. If you have basement leaks, poor grading, or clogged drains, deal with them immediately to minimize repeated exposure. Adhere strictly to pump and backup battery manufacturer instructions regarding wiring and enclosure ratings in order to maintain warranties and comply with safety regulations.
Common Mistakes
There are a few common mistakes that we see with adding a dedicated circuit for a sump pump backup in a basement, mistakes that introduce safety issues and reduce reliability. Underneath is a distilled checklist of the most frequent errors, followed by concentrated discussion and cases to illustrate what to look for and why.
- Using 14 AWG wire on a 20 amp breaker is a code violation.
- Not providing a dedicated circuit for the sump pump.
- Using a shared circuit with other devices or lights.
- Neglecting to include the GFCI protection as specified by NEC 422.5(A).
- Mistaking the placement of the outlet more than five feet from the sump basin.
- Incorrect location of backup pump, float switch or check valve.
- Failing to consider high startup current when sizing the circuit.
- Skipping permit, inspection, or verification of circuit specifics.
- Loose connections, inadequate grounding, or leaks at fittings.
- Not double-checking wiring polarity and breaker labeling.
They’ll omit a dedicated circuit and instead tie the pump into an existing branch. That leads to voltage drop, nuisance trips, and can overload lighting or receptacle circuits. A sump pump should have its own circuit so its high startup current doesn’t mess up other loads. For the majority of sump pumps, a 20-amp circuit is recommended, which means a minimum of 12 AWG copper. Not to mention, running 14 AWG on a 20-amp breaker is super unsafe and a code violation. Match breaker size with proper gauge.
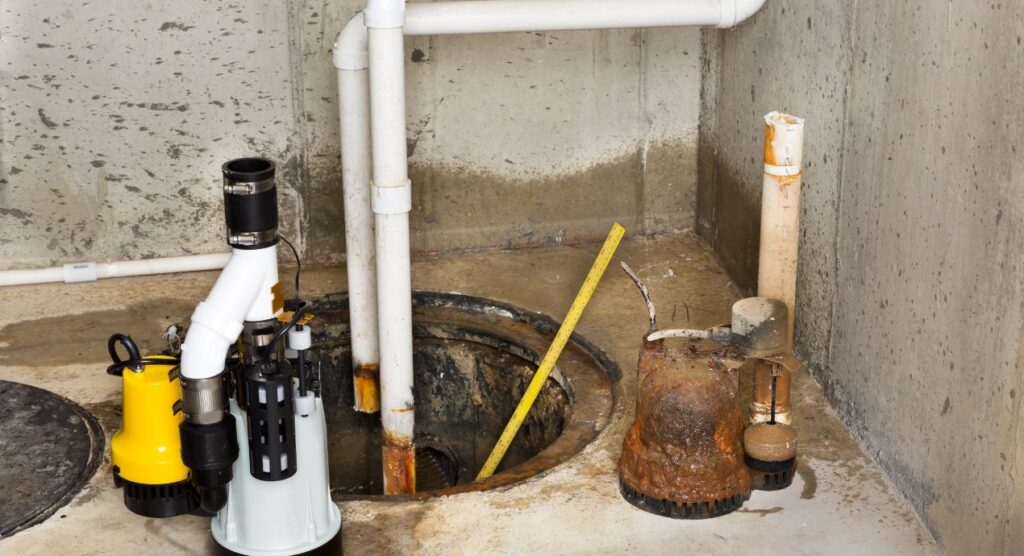
GFCI protection gets overlooked. NEC 422.5(A) mandates GFCI for sump pumps 150 V or less. Absent it, the risk of electric shock in flood conditions increases exponentially. Mistakes include installing a GFCI-protected outlet or a GFCI breaker and testing it after wiring. Grounding needs to be constant and reliable. A floating or absent equipment ground poses a greater risk in wet occurrences.
Outlet placement is yet another repeat offense. It should be within 5 feet of the sump basin to prevent long cords and awkward cord routing. Long extension cords and outlets in the wrong places cause trip hazards and the risk of water getting to connections. Don’t put the outlet in a pit or where water can collect, either.
Mechanical placement errors count. Secure the backup pump, float switch, and check valve so they operate unimpeded. A float that chafes on the basin wall or a check valve installed in reverse will cripple the system. Leaky check valves cause backflow and repeated cycling of the pump.
Last, don’t blow off permit and inspection. Even inspectors check circuit size, wire gauge, breaker rating, GFCI, and outlet placement. Professional oversight detects screwups you’ll skip over and makes sure the installation complies with local code. Double check all fittings, tighten electrical connections, and pressure test plumbing to prevent leaks and loose wires.
Expert Perspectives
A committed circuit for a sump pump backup connects electrical safety, system dependability, and water protection. Here, we discuss the fundamental motivations for using a dedicated circuit, guidelines to observe, maintenance and inspection requirements, and new product innovations that are transforming the way homeowners design protection for their plumbing systems.
A dedicated circuit protects from overloads and ensures the primary sump pump is running when it counts. When other high-draw devices run on the same breaker, a pump can trip or lose power at critical times. Dedicated conduit and a breaker sized to the pump’s rated load safeguard wiring, cut nuisance trips, and prevent the pump motor from overheating. For homes in frequent rain or high water table locales, that dependability shields flooring, drywall, furnishings, and the electrical system from potential water damage. Breaker and conductor sized to pump full load amps and controller/charger loads are essential, as per local code for circuit labeling and location.
Follow the manufacturer’s instructions for every component: primary pump, battery backup system, charger, and smart controller. Manufacturers recommend voltage, battery type, charge current, and testing cycles for safe and long life. A battery backup powers a DC pump and battery bank apart from the house AC, so install the charger and transfer system just as specified. Wrong battery sizing or charger settings can reduce run time or ruin the battery, leaving the backup system for a sump unprepared to manage longer outages.
Have professional inspections on a schedule to catch lurking problems early. A licensed electrician can certify correct breaker sizing, grounding, and GFCI/AFCI needs, while a certified plumber or pump tech can test float switches, inspect discharge pipes, and ensure check-valve functionality. Visually inspect batteries quarterly and conduct full-load run tests multiple times a year. Technicians find corrosion, loose terminals, or control faults before they result in water damage.
Think capacity and matching when choosing pump and backup pump worst-case flow rates based on pump head and inflow. In high-flow or deep-sump scenarios, a more powerful primary pump or parallel backups might be necessary. Select battery capacity to span the outage time anticipated. List the pump amp draw and run time required, then add a 20-30% margin. Routine maintenance consists of cleaning the sump pit, float testing, and exercising the backup pump under load.
Newer backup options: smart controllers and 12 V systems change planning. Intelligent controllers report battery condition, operational history, and are capable of delivering notifications through Wi-Fi. Twelve-volt DC backup pumps provide simpler, lower-voltage configurations that minimize inverter losses and typically operate longer per battery amp-hour. Both options still require a dedicated AC circuit for the main pump and compliant wire for any charger or inverter.
System Maintenance
Regular maintenance of the backup system for a sump pump is crucial to keep the sump pump backup primed and minimize the risk of malfunction during torrential downpours or power outages. By following the manufacturer’s instructions for inspections and basic fixes, you can enhance system reliability and ensure safety.
- Monthly functional test of pump and float switch
- Inspect and clean sump pit and check valve
- Check electrical connections, circuit breaker, and ground fault protection
- Test battery backup charge and load capability
- Replace battery per manufacturer (typically every 2–5 years)
- Clean battery terminals and secure connections
- Check the discharge pipe and outside outlet for clogs or ice.
- Keep a test, battery, repair, and parts log.
- Schedule predictive checks when possible (voltage, amperage, run time)
- Keep spare parts, tools, and instructions accessible and dry
Regular Testing
Test monthly by pretending you’ve lost power. De-energize at the dedicated circuit or test switch on the backup unit and fill the pit with water until the float lifts. The pump ought to turn on and push water through the discharge line without cavitation. Check run time and listen for abnormal noises that might suggest bearing or impeller wear. Make sure the check valve stops backflow and that the discharge outlet pumps water away from the foundation. If there is a dribble, check for kinks, frozen pipes, or half-blockage at the outside head.
Document every test in a maintenance log, noting the date, run time, issues observed, and corrective measures. Address problems quickly: replace worn floats, tighten loose electrical connections, or clear pipe obstructions. Predictive maintenance tools, whether simple voltage and current checks or more advanced run-time trend logs, help identify falling performance before a failure.
Battery Care
Charge new batteries fully after installation and test under load to confirm they can support the pump. Monitor charge level monthly and run a simulated outage to measure how long the battery sustains operation. Replace batteries per the maker’s guidance, commonly every 2 to 5 years, sooner in high-use or high-temperature environments. Clean terminals with a baking soda solution and a brush if you see corrosion. Then apply a thin film of petroleum jelly to slow future corrosion.
Keep spare batteries, replacement fuses and the product manual in a labeled, dry location near the unit. System maintenance includes keeping a note of battery age and replacement dates in your maintenance log. Good battery maintenance makes batteries less likely to fail unexpectedly and therefore less expensive in the long term since you won’t be paying for emergency replacements and equipment damage.
Conclusion
Here’s how to install a dedicated circuit for a sump pump backup in your New Jersey basement. Include a GFCI-protected 20 A circuit on its own breaker. Wire 12 AWG cable from the panel to a weatherproof outlet by the pump. Elevate the battery backup or battery-charged pump onto a raised stable pad. Test the system by killing the main power and watching the pump run for at least 15 minutes. Follow New Jersey code and grab a permit if the local authority demands it. Bring in a licensed electrician for panel work or if you start to really expand the project.
Next, check your local code online, list parts from the Required Equipment section, and mark a start date or book a professional.
Frequently Asked Questions
What type of breaker size is typically required for a sump pump backup circuit?
Most sump pumps require a 15 A or 20 A dedicated circuit, and it’s crucial to check the pump’s nameplate for amperage. Additionally, ensure that you set up a battery backup system according to the manufacturer’s instructions to prevent water damage during power outages.
Can I add a dedicated circuit myself in a New Jersey basement?
If you’re a licensed electrician, New Jersey has to follow NEC and local permits. For safety and code compliance reasons, a licensed pro is highly recommended.
Do I need a separate GFCI outlet for the sump pump backup?
Yes. Sump pumps in basements or near water may need GFCI to reduce shock risk and protect against water damage, as required by the manufacturer’s instructions and local codes.
Where should the backup battery or generator be located?
Position batteries and small inverters in a dry, ventilated space away from the sump pit to ensure proper function of the backup system for a sump pump. Generators must be outdoors with appropriate clearance, and it is essential to observe the manufacturer’s instructions and local code ventilation and placement guidelines.
How do I size the battery or inverter for a backup sump pump?
Calculate the running and peak start watts of the primary sump pump, adding a safety margin of 20 to 30 percent to ensure the battery backup system can accommodate the pump’s start surge and runtime needs.
What inspections or permits are needed in New Jersey?
For most installations, including a backup system for a sump pump, you’ll need an electrical permit and a final inspection. Code is different in each town, so check with your local building authority prior to beginning work to be sure.
What are common mistakes to avoid when adding a dedicated circuit?
Say no to undersized wire, shared circuits, and improper conduit. These issues can lead to pump failures and water damage. Always follow the manufacturer’s instructions and have a licensed electrician install a backup system for a sump to ensure safety.