
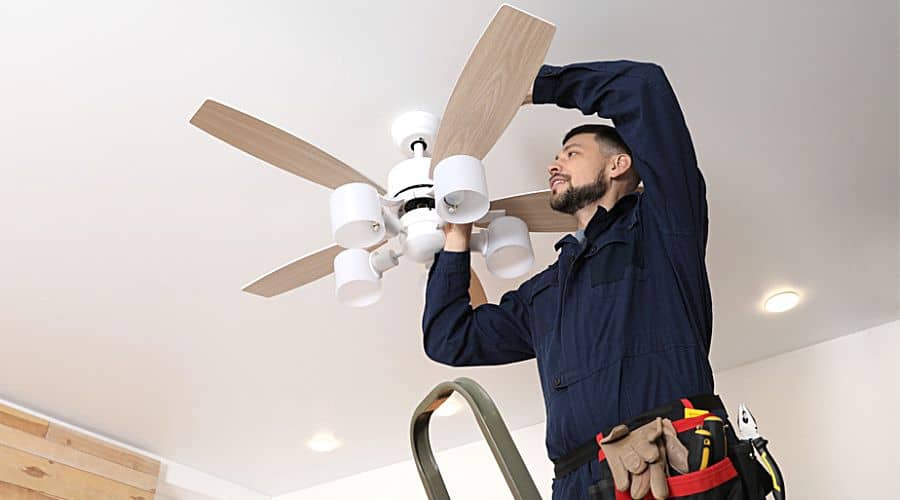

Key Takeaways
- Position and support come first. Ensure guaranteed even airflow and solid mounting. Check joists or add an expandable brace before cutting or wiring.
- Select the wiring technique suited to your ability and home configuration. You can tap from an outlet, extend from a switch, install a new circuit, or go wireless.
- Follow safety and code steps. Turn off power, use a voltage tester, wear protective gear, and check local permit requirements before handling electrical work.
- Install a UL-listed fan box or an appropriately rated expandable brace. Verify box stability and test mounting strength prior to finishing wiring and assembly.
- Choose DIY or a licensed electrician depending on your experience, available time, and local code complexity. Consider long-term benefits like warranties and energy savings.
- Look into smart fans and Energy Star models for better control and reduced energy consumption. Prepare upgraded or surface raceways for vintage homes to reduce messy ceiling work.
Ceiling fan installation without existing wiring is the process of fitting a fan where no electrical circuit exists in the ceiling. It frequently employs battery powered remotes, plug-in kits, or surface-mounted conduit for code and safety.
Pricing depends on your method and layout of your room. A standard project usually takes a few hours up to a day. Homeowners can contract with a licensed electrician for hardwired options and permits.
Pragmatic options and decisions ensue below.
Essential Planning
Good planning means a safe, professional ceiling fan install where no wiring currently exists. Think about ceiling height, wiring access, fan size and weight, and if your electrical panel requires upgrading. Verify joist orientation prior to cutting.
Cable runs, attic access, drywall cuts, and the right fan-rated box or expandable brace are essential. A good plan doesn’t include trying to overstuff a little box, or wires chafing on rough metal, or blades that are too low. With good preparation, a simple install can require just an afternoon.
Location
Opt for the center of the room for even air circulation and a clean appearance. For large rooms, think of using two fans or a space-sized fan. A fan with a 122 cm (48 in) blade span fits small rooms, while a fan with a 132–152 cm (52–60 in) blade span is suitable for medium rooms.
Measure from the walls and floor to keep the blades at least 2.1 m (7 ft) above the floor and allow 30–45 cm (12–18 in) from the walls for proper sweep. Steer clear of low ceilings and areas directly under attic braces or air-blocking obstructions. Use a stud finder to mark joist locations.
Knowing the direction of the joists prevents cutting errors and reveals where your support alternatives will be effective.
Support
Make sure your ceiling structure can support the fan’s weight and motor vibration. Contemporary fans can weigh anywhere from 5 to 15 kg. Utilize a UL-listed fan box or fan-rated pancake box. Plastic light boxes don’t cut it.
If no sturdy backing is present, attach an expandable fan brace that extends between joists or secure a hanger that fastens directly to the framing. Check box rating and capacity twice. Ensure it accepts the correct conductor count and leaves room so wires are not crowded.
Think metal edges and protect conductors from chafing with bushings or grommets.
Permits
Check if your local municipality needs an electrical permit to install a fan and new wiring. Most do. Look over national and local codes, including NEC-style rules on box fill, cable type (NM-B, etc.), grounding, and more.
Collect necessary plans, product specifications, and panel information prior to laying out. Plan inspections accordingly and anticipate an inspector to check box rating, conductor type, routing, grounding, and secure mounting.
Catching code early avoids rework and safety issues.
Wiring Methods
What wiring method you choose influences what tools you need, how long the job will take, and if you even need to hire a pro. Typical options are tapping from an outlet or switch, running a new circuit from the panel, or employing wireless control and surface raceways. All have trade-offs in cost, time, aesthetics, and code compliance.
Cut the hole properly, install a fan-rated box secured to framing, and run power by fishing cable from above or mounting a receiver in the canopy. Don’t cram a bunch of conductors into tiny boxes.
1. From an Outlet
Branch off a convenient outlet circuit, provided it can handle the fan’s motor and light. Inspect circuit load initially in case plugs currently run heavy loads. Adding a fan may trip breakers or cause a code problem.
Use either cable through walls or a surface raceway to the ceiling. Fish cable from the outlet up the wall cavity, punch a clean hole in the ceiling, and install a UL-listed fan-rated box braced to a joist or with an attic brace.
Add a wall switch if you want local control. Wiring practices use the right connectors and pigtails in the outlet box, and don’t stuff 15 wires into a 2 x 4 box. Overstuffing is prevalent and hazardous.
Wiring method takes 1 to 4 hours for a DIYer with attic access, and it takes more time if walls are finished and fishing is difficult.
Pros: lower cost, uses existing circuit. Cons: may overload circuit, more splice points.
2. From a Switch
Find a switch that controls a light or outlet and run wiring from that switch box to the fan. More about wiring methods. Use proper gauge conductors and color-coding: 14/3 for separate fan and light control on a 15A circuit, and 12/3 for 20A circuits.
Open up the switch box and double check power is off. Run your cable through the walls or an expandable brace and pancake box for tight areas. Label the switch for the fan so you don’t get confused later.
Here, it’s all about wiring methods. This keeps control intuitive and can require 2 to 5 hours when you’re fishing cable and mounting a fan-rated box. So it’s a job of moderate skill.
Pros: switch control, cleaner wiring runs. Cons: may require multiple conductors and careful labeling.
3. New Circuit
Run a separate circuit from the breaker panel for high-powered fans or multiple fans. Determine total amps, install a UL-listed metal fan box reinforced between joists, and run cable via attic or wall with limited ceiling cut.
Get a permit, adhere to NEC guidelines, and a listed box rated to support fans is required. This is the most durable, but the most labor-intensive and expensive—think 3 to 6 hours and up, and inspections.
4. Wireless Solutions
Go with a remote controlled fan and put a tiny receiver in the canopy, or opt for battery wall remotes for placement freedom. Wireless eliminates the requirement for new wall wiring and performs great in completed areas or masonry ceilings where fishing cable is difficult.
With any exposed cable, employ surface raceway and a pancake box.
Pros: fastest install, minimal drywall work. Cons: remote batteries, possible range limits, receiver space in canopy.
Installation Guide
Installation guide for installing a ceiling fan to an unwired location. It includes sections on safety, mounting, wiring, and assembly with particular comments on code compliance, attic access, equipment selections, and frequent errors.
Safety First
BEFORE STARTING ANY ELECTRICAL WORK, TURN OFF POWER AT THE BREAKER. Verify power is off with a reliable voltage tester. Test both the circuit and any adjacent feeds that may share conduit.
Wear safety goggles and gloves to shield eyes and hands from dust, insulation fibers, and sharp metal. Anchor the ladder on level, firm ground. If you’re working from attic access, be certain attic flooring can support your weight. It may be necessary to lay down a wide board to distribute the load.
Check local electrical codes such as NFPA 70 (NEC) before beginning. Codes dictate box fill, grounding methods, and circuit requirements. If unsure, consult a local electrician to confirm compliance.
Assess attic access early. Limited access often means using an expandable brace from below or running cable through a short hatch rather than full attic work.
Mounting
Select a fan-rated box sized and rated for the fan’s weight. These are usually rated up to 31.8 kg (70 lb). Never mount a fan to a drywall-only box or cracked plaster without backing.
Install either a fan-rated metal box mounted to a joist or an expandable brace between joists. An expandable brace can be introduced through a tiny hole in the ceiling and popped open to provide load-bearing support in the event you have bad attic access.
Make sure the box is flush and centered where the fan will hang. Install with the manufacturer’s screws and mounting hardware, which are rated for vibration and weight.
Test the box stability by carefully pushing and pulling the bracket with power off. This support test exposes loose fasteners or improper seating. Don’t overfill tiny boxes with too many conductors; that is how you violate box-fill rules and heat things up.
Wiring
Strip insulation cleanly to the length recommended by the fan guide. Match conductors: black for hot, white for neutral, and green or bare for ground.
Route cable so it does not chafe on rough metal edges, with grommets or bushings where cable enters metal boxes. Make sure connections are secured with adequately sized wire nuts and tape if your local code requires it.
Connect the ground to the box or grounding screw to close your circuit. Plan cable routing before final mounting: run cable through joist bays, secure with staples, and leave extra length in the box for safe handling.
Tuck wires to one side so the canopy may seat without pinching conductors. Typical errors are pinched wires, too little slack, and leaving the box floating.
Assembly
Mount the bracket according to the manual. If reasonable, put together blades, light kits, and canopy on the ground to minimize ceiling work.
Hang the motor on the bracket with the temporary hook or slot provided, then wire it up. Lock the motor with locking screws and tighten to torque guidance.
Balance the blades post-installation with a kit or basic weights to minimize wobble. Normal install time is one to five hours based on attic access, brace usage, and wiring difficulty.
DIY or Professional
DIY or Pro. To install a ceiling fan yourself or hire a licensed electrician. Here are targeted tips to guide your selection, with actionable examples and detailed steps you can apply now.
Your Skillset
Evaluate your comfort level with tools and wiring and working at heights. If you regularly wield a drill, wire stripper, and ladder, you might manage a simple install. Otherwise, budget for assistance.
Check the fan’s installation guide up front. If the diagrams and steps are clear and fit your ceiling type, that’s a good sign.
Working from the attic and installing a fan brace is the most forgiving path for the first-time DIYer, because it sidesteps cutting drywall from underneath and allows you to screw into joists. An expandable brace installed from the room below or a low-profile fan box with surface raceway can work where attic access is limited.
Drill a small pilot hole from below to verify the fan center prior to making big cuts. Do not check joist direction prior to cutting. Locate and mark joists, so the brace can be anchored correctly.
Know when wiring or structural changes are beyond your scope. Complicated runs, new switches or routing cable through firewalls are indications to call in a pro. Simply mounting a fan on cracked plaster is dangerous.
If your ceiling material is poor, a professional will know how to shore up the area or safely replace the box. A pro guarantees a code-compliant, safe outcome when in doubt.
Project Cost
- DIY upfront costs include the fan unit (USD), basic tools, mounting brace, wire, connectors, and patching materials. Long-term benefits include lower labor spending, learning new skills, and potential energy savings from an efficient fan.
- Professional rates: Electrician hourly plus materials. Most pros offer a labor warranty and promise code compliance. It’s more expensive up front but can save on mistakes and liability avoided.
- Energy savings: Installing an energy-efficient fan can cut cooling load and lower AC use, offsetting some installation costs over time.
- Hidden costs include time spent learning, buying tools, potential ceiling repair if errors occur, and repeat visits.
| Item | DIY (upfront) | Professional (upfront) | Long-term benefit |
|---|---|---|---|
| Labor | Low | High | Pro warranty vs. DIY savings |
| Materials | Moderate | Included/Moderate | Same |
| Risk of rework | Higher | Lower | Affects total cost |
| Energy savings | Same | Same | Depends on fan choice |
Time & Safety
Initial DIY installs generally require 2 to 6 hours based on approach and experience. Working from the attic with a brace can reduce time because you can nail to joists directly.
DIY or Professional: using an expandable brace or surface raceway can add time but avoid attic work. Plan time for prep: locating joists, drilling a pilot hole, wiring, mounting, and patching.
Safety first. Utilize a firm ladder, put on eye and hand protection, and turn off power at the breaker.
Pros have liability insurance and bring peace of mind for tricky work or when local codes necessitate a permit. Others will hire a pro for safety or because they’re not electrical-savvy.
Modern Considerations
Hanging a ceiling fan where there’s no wiring currently requires more than a ladder and a drill. New fan technology, older building realities, and energy impacts all influence decisions. The subtopics below discuss what to consider and how to proceed, so you can design a secure, optimal installation that satisfies code and users.
Smart Fans
Smart ceiling fans pair with thermostats or home systems to boost comfort and conserve energy. Select models that explicitly support Z-Wave, Zigbee, Wi-Fi, or a particular smart thermostat. Verify power requirements and if the fan has its own control wire or pulls from the same circuit.
App controls allow you to schedule, adjust speeds remotely, and connect fan operation to temperature or time-based scenes. Voice assistants offer hands-free on/off and scene recall. Check your fan’s cloud or local integration for reliability. Many smart fans use DC motors.
These run quieter and draw less current than AC models, which matters when running new wiring. If you’re going for smart features, plan wiring that can provide constant power and, if necessary, a 14/3 cable for separate fan/light control so the app and wall switch work in tandem.
Older Homes
Before any electrical work, check attic framing and old boxes for cracks, loose nails, or damp rot. By upgrading knob-and-tube or cloth-insulated wiring to modern cable and grounding it where local code requires, you can ensure safety.
Add grounding and GFCI protection if the circuit serves wet locations or outdoors. Resize undersized boxes and verify support loads. Don’t depend on ancient boxes to support fan weight.
For minor ceiling damage, surface raceways run cable across the ceiling to a new point or fit a pancake fan box where flush mounting is not an option. Replace support with attic braces, expandable fan braces, or a full fan brace between joists. A quality fan brace is more secure than relying on an old box.
Many older homes require a new circuit or circuit upgrade, so local codes and NEC are the ones to follow.
Energy Use
Opt for ENERGY STAR-rated fans and DC-motor varieties to reduce kilowatt-hour consumption. ENERGY STAR fans satisfy DOE efficiency standards and sometimes circulate more air per watt. Set fan rotation and thermostat wisely.
Reverse the fan for winter to move warm air down and allow a higher thermostat by about 2 degrees Celsius (4 degrees Fahrenheit), which lowers heating costs. In summer, employ higher fan speeds to raise air-conditioning setpoints without sacrificing comfort.
We track energy savings by comparing meter readings or utilizing smart plugs and apps over months to justify upfront costs. Think about room size, blade sweep, speed settings, and optional light kits so the fan corresponds with load and comfort requirements. Proper sizing minimizes energy overhead and enhances effectiveness.
Troubleshooting
When a ceiling fan is put in where there is no wiring, troubleshooting is about power delivery, mechanical support and performance. Keep the manufacturer’s instructions handy. Use the checklist and bullet list below to troubleshoot common faults methodically.
- Checklist: Verify breaker and switch positions. Verify conductor count (14/2 versus 14/3) for separate fan/light control. Check fan-rated box load rating. Test voltage at box.
Troubleshooting: Check mounting bracket and joist support. Secure all bolts. Balance the blades.
Troubleshooting: Check clearances (minimum approximately 46 cm from walls/furniture). Refer to parts list and replace damaged items.
- Diagnostic steps in point form:
- Ensure circuit breaker is ‘ON’ and no AFCI/GFCI tripped.
- Test wall switch and feed conductors with non-contact voltage tester.
- Take down canopy and check wire nuts, bare conductors and backstabbed wires.
- Check fan-rated box label for weight limit (most are approximately 32 kg). If the fan is heavier, install a brace.
- Verify conductor count: separate fan/light switching requires 14/3.
- Measure blade clearance: aim for at least 18 inches (46 cm) from walls or cabinets.
- Note costs: basic DIY fan install materials $100–500. Running new wiring typically adds $200–700+.
No Power
Circuit breakers and wall switches should be the first to check. A tripped breaker or a switch wired backwards is the most frequent culprit. Verify wiring with a volt tester at the fan box to ensure line voltage. If there is no voltage, work back to the switch or junction upstream.
Troubleshooting
Look for loose connections inside the fan canopy. Loose wire nuts or bad splices cut off power. If it’s a fan with separate light and fan control, make sure you have a 14/3 cable and that it’s hooked up properly.
Swap out bad switches or outlets if you have no feed. If the house is not wired with a proper feed, running cable will add cost but usually fixes it.
Wobbling
Eliminate play by tightening all mounting screws and blade brackets. A little wobble can be natural initially, but too much shaking generally indicates either bad balance or loose mounting hardware.
Verify that your fan box is rated for fan weight and anchored to a joist or brace. Most fan-rated boxes are rated for up to 32 kg, but check the label.
Balance blades with supplied weights or a balancing kit, and even swap pairs of blades if imbalance continues. Make sure blades have uniform pitch and a minimum of 18 inches clearance from walls and cabinets.
Tweak blade alignment and spacing to minimize vibration and noise.
Noise
| Noise type | Likely cause | Fix |
|---|---|---|
| Clicking | Loose screw or blade bracket | Tighten screws, retighten brackets |
| Rattling | Loose canopy or motor housing | Secure canopy, check motor mounts |
| Buzzing | Poor wiring or switch | Tighten connections, replace switch |
| Grinding | Worn bearings | Lubricate if allowed or replace motor |
Troubleshooting loose screws, canopy parts or unbalanced blades. Grease the motor only if the manufacturer allows it.
Troubleshooting replace worn or defective parts for quiet performance. In summer, make sure the blades rotate counterclockwise to create a cooling breeze.
Conclusion
Installing a ceiling fan without pre-existing wiring may seem daunting. It separates into straightforward steps. Locate the fan and power source. Select a wiring option that suits your room and code. Use the correct box, mount the fan, and carefully wire every connection. Test the fan and controls prior to sealing up. Easy quick fixes are remote kits or surface-mounted conduit. For old homes or complicated runs, hire an electrician. Small jobs you can try include swapping a light fixture box, running a short cable in attic space, or fitting a wireless control. Both reduce heat and save energy while adding comfort. Prepared to proceed? Consult local codes, collect components, and begin with an easy test fit or call in a pro for a safety inspection.
Frequently Asked Questions
Can I install a ceiling fan where no wiring exists?
Yes. If there are no existing wires, you can run new ones from the nearest source or utilize battery or remote-powered fans. Installing new wiring is code compliant and supplies dependable power but can potentially involve cutting access holes or bringing in an electrician.
What wiring method is safest for adding a fan without existing circuits?
It’s safest to run a new circuit from your panel. This guarantees breaker protection and proper grounding. Use normal 230 or 240 volts or 120 volts as locally needed and local codes or employ a licensed electrician.
Can I use an existing light circuit to power a new fan?
Usually yes, if the circuit capacity and wiring condition are sufficient. Check breaker size and load. If in doubt, have an electrician check that installing the fan won’t overburden the circuit.
Are wireless or battery-powered ceiling fans a good alternative?
They’re great for a little wiring or temporary use. Battery and plug-in fans sidestep rewiring, but don’t have as much power or features as hardwired fans. Take into account noise, runtime, and control features.
Do ceiling fan installations without wiring require permits?
Most jurisdictions need permits for new electrical circuits. Permit regulations differ. Verify with your local building codes or an electrician to be sure it is code-compliant and safely inspect.
Is it OK to run wiring through walls and ceilings myself?
You can do it if you know wiring codes, conduit requirements, and fire stopping techniques. Errors can lead to shock and fire. If you need new circuits or complicated routing, hire a licensed electrician.
How do modern fans affect installation choices?
Today’s fans come with built-in LED lights, smart controls, and DC motors. These may require neutral wires, separate switches, or compatible remotes. Select wiring to accommodate the fan’s electrical and control needs.