

Key Takeaways
- Find out the type of water heater first. Then run quick checks like breakers, pilot light, and visible error codes to avoid wasting time and unnecessary repairs.
- Check power and gas, relight the pilot safely if applicable, and make sure thermostats are at the right settings for initial troubleshooting.
- Troubleshoot electric elements and test gas controls when there is no hot water. Replace defective parts after taking safety precautions.
- When these usual remedies fail to return the hot stuff, investigate sneaky problems like sediment, a snapped dip tube, or airlocks and give your tank a flush or swap out that tubey bit.
- Listen for weird sounds and test the water, because noisy sediment, corrosion, and failing components tend to expose themselves and damage heaters prematurely.
- Consider age, recurring issues and energy efficiency when choosing repair versus replacement. Always hire a licensed technician for gas, electrical or significant leak repairs.
It’s a typical household emergency — a water heater not heating water — precipitated by defects in the tank, heating element, thermostat or fuel supply.
Most instances display cold taps, reduced hot water output or strange noises from the unit.
Troubleshooting usually includes verifying power or gas, examining the pilot and checking thermostats or elements.
Repair options can be as easy as resets and part swaps or professional service for leaks or corrosion.
Common Culprits
A water heater that ceases to produce hot water typically breaks down for common, easily diagnosable causes. Begin with generic tests and then focus on component failures or capacity boundaries. The advice below encompasses power and gas supply, pilot systems, thermostats, heating elements, and gas controls, along with associated concerns like sediment, tank size, age, and safety valves.
1. Power Source
Identify if the unit is electric, gas, or tankless before troubleshooting. For electric tanks, check the breaker or fuse box for tripped breakers and reset only after making sure nothing else is pulling current. Try an outlet near the unit with a lamp or hair dryer to eliminate more encompassing electrical problems.
Make sure any wall switches to the heater are on. Tankless electric units often need dedicated high-amperage circuits. A tripped breaker there masquerades as a dead heater. Note that if multiple breakers trip repeatedly, call a licensed electrician.
2. Pilot Light
For gas water heaters, a blown-out pilot light is an obvious failure. Check if your pilot is on. If it is out, adhere to manufacturer relight instructions and maintain a safe distance from gas lines. Frequent outages usually indicate a draft in the proximity of the pilot, a damaged thermocouple, or an unstable gas supply.
A bad thermocouple cannot detect the flame and will cut off gas flow. This is a frequent and cheap fix. Check flame color: blue is normal combustion, while yellow or orange suggests incomplete combustion or debris in the burner area.
3. Thermostat
Turn the thermostat down to the suggested 49 °C (120°F) and test output with a tap thermometer. A lower reading indicates a misset or malfunctioning thermostat. Dual element electric tanks have upper and lower thermostats. If one lets you down, you might get just tepid water.
Swap out an unresponsive thermostat. Minor variations between setting and output can arise from heat loss in long piping runs or a thermostat miscalibrated by a couple of degrees.
4. Heating Element
For electric heaters, blown elements are a common culprit. With a multimeter, test element continuity. If there is no continuity, replace the element. Elements in hard water areas typically display heavy mineral buildup that decreases heat transfer and causes early failure.
Always turn off the power at the breaker before getting to elements. If both elements fail or scale is heavy, look into tank flushing or replacement instead of repeated part swaps.
5. Gas Control
Check the gas valve and feed line. Ensure the gas shutoff is open and the valve has no corrosion or damage. Newer units might flash error codes or blinking lights that indicate control problems. See the manual.
Unsteady burner ignition, low flame, or frequent shut-downs usually indicate the gas control or valve requires servicing. If repair costs are more than roughly half the price of a new unit and your heater is older than eight years, replacement is usually the better deal.
System-Specific Checks
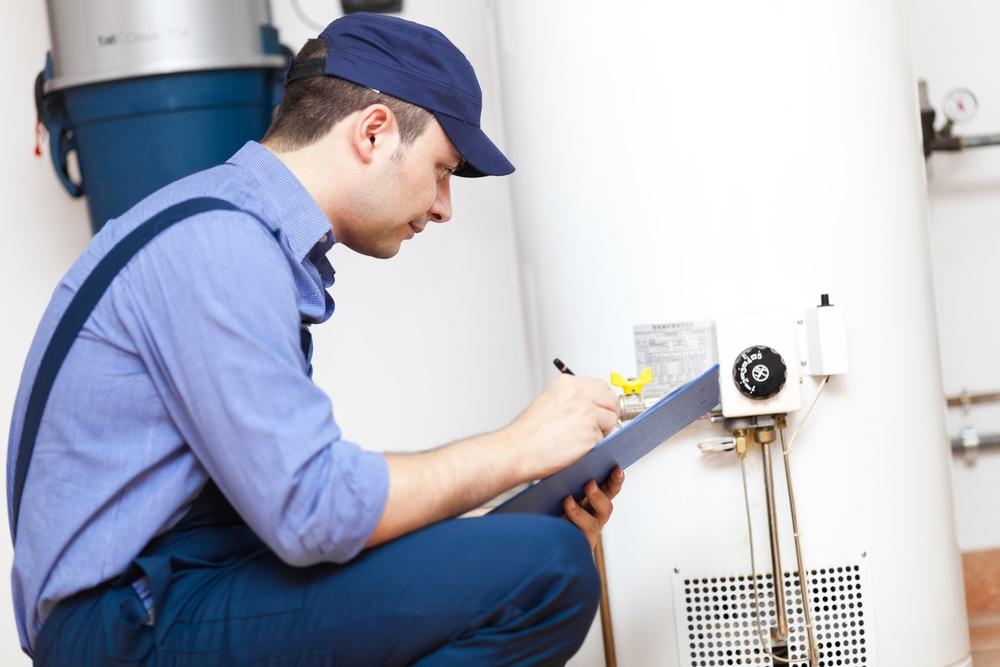
First, locate the heater type and age, and write down the model and serial numbers on the tank or nameplate. Check for manufacturing date, capacity, and service stickers. These specifics inform parts ordering and technician troubleshooting.
Maintain a checklist that covers safety, basic operation, and component tests for electric, gas, and tankless systems. Include routine maintenance items: check the temperature and pressure (T&P) relief valve yearly, flush the tank annually to remove sediment, and replace the anode rod every 3 to 5 years to limit corrosion.
If the unit is more than 8 years old, weigh repair costs against replacement. If repairs are more than 50 percent of the price of a new unit, replacement is usually warranted.
Electric Heaters
Check that the breaker for the electric water heater hasn’t tripped. This is common and easily fixed. Reset the breaker and test the water temperature after approximately 30 minutes.
Make sure your thermostat is set between 120 and 140°F (about 49 to 60°C). Incorrect settings can masquerade as heating failures. If the unit has shut down from overheating, press the red reset button on the thermostat.
If this trips often, you have a faulty component that requires the attention of a service dealer. Look for damaged wiring at the access panel. Specifically check for wear, burning, or loose terminals.
Be sure to turn power off at the breaker before laying a finger on any wiring. Test both upper and lower heating elements for continuity with a multimeter. A busted element or a bad high-limit stat will cause cold-water cycles even if power is delivered.
Change components in matched sets if both are worn or if sediment caused early burnout.
Gas Heaters
Make sure the main gas supply is turned on and the shutoff valve is open. For any pilot relighting, switch the gas control knob to “OFF” and wait 5 to 10 minutes to let gas subside before trying to ignite as a safety measure.
Check the burner assembly for dirt, rust, or anything that prevents steady ignition. Clean with a soft brush and vacuum as needed. Hearing clicking over and over indicates multiple attempts to ignite, not overheating.
Persistent clicks typically indicate a faulty ignitor or control module. Inspect the thermocouple and gas control valve as well. A weak thermocouple won’t hold the pilot flame and will shut the gas off.
If the burner lights but the flame is weak or yellow, check ventilation and air shutter settings, and verify the venting path is unblocked.
Hidden Problems
Hidden problems are the ones that develop slowly or remain out of sight and reduce heating efficiency and shorten a water heater’s lifespan. Check tanks, fittings, and adjacent areas for leaks, rust, collected water, or a gas odor annually. Having ruled out the obvious (tripped breaker, pilot outage, cold weather supply), employ an elimination approach to isolate subtler failures such as sediment, dip tube holes, and airlocks.
Sediment Buildup
Sediment builds up on the tank bottom and coats heating elements, which reduces heat transfer and increases recovery times. Drain and flush the tank once a year to remove mineral deposits. In hard-water areas, flush twice or fit a softener to slow redeposition.
Banging, hissing, or rumbling noises when heating indicate steam pockets trapped under sediment layers. More than just causing longer waits for hot water or lukewarm output during heavy demand are typical signs. Inspect element condition on electric units if performance continues to deteriorate.
If heating elements keep burning out, sediment stress could be the culprit. Flush and catch the drained water. Cloudy or gritty flow indicates a dense accumulation and you need to clean it more often.
Faulty Dip Tube
The dip tube directs incoming cold water to the bottom of the tank so hot water stays on top. A cracked or disintegrated dip tube sends cold water into the hot outlet and causes sudden hot water loss.
Sudden drops in hot supply, particularly early in a shower, typically indicate that the dip tube let go. Check for small plastic bits on fittings and in strainers. If you find them, the tube is breaking down.
Swap out that dip tube for a part appropriate for the heater model and inlet size. If the length or material is wrong, you will have the same issue. Older tanks, over about 10 years, are more susceptible to dip tube degradation and other hidden failures, so incorporate age into the diagnosis.
Airlocks
Airlocks trap air in hot lines and impede flow, causing sputtering faucets or uneven temperature at fixtures. To clear an airlock, shut off the heater, open all hot taps beginning closest to the heater, allow water to run until the flow becomes steady, and use a bucket under fixtures when bleeding lines to catch spills.
Good system fill practices during installation minimize air entrapment. If it keeps happening, you have an internal leak or a bad valve allowing air in. Regular maintenance and correct temperature settings help.
Incorrect thermostat settings can mask or mimic airlock symptoms, so verify temperature before replacing parts. Preventive checks for rust, corrosion, and water pooling around the tank will catch conditions that cause these hidden faults.
Heater Whispers
Heater whispers are the hints and signals a water heater emits before it dies or becomes inefficient. These clues, such as sounds, altered water quality, and slower times to heat, assist in pinpointing issues including sediment, scale on elements, thermostat malfunctions, or impending rust.
Listen and note what you hear, notice, and how much time heating requires. That information directs easy repairs or indicates expert help.
Strange Noises
Most of us have experienced or heard of heater whispers, rumbling, popping, or gurgling when the unit cycles. Popping and rumbling often indicate that sediment has accumulated on the tank bottom. Sediment, on the other hand, traps heat beneath it, creating steam pockets that pop their way out, and over time this cuts efficiency and can even damage the tank.
A high-pitched whining could emanate from scale on electric heating elements or a failing gas valve. This noise typically changes with load and can increase as the mineral coating becomes thicker. Hissing or sizzling can indicate minor leaks or condensation striking hot surfaces and, should it be in proximity to gas fittings, requires prompt action.
Note when the sounds begin, how long they persist, and if they correspond with heat cycles. A tank flush will typically quiet popping and rumbling. Swap out heavily scaled elements or have a tech professionally clean when necessary.
Water Quality
Water discoloration, taste or smell frequently can indicate internal corrosion and rust on the tank lining. Brown or rusty water indicates rusting metal; a metallic flavor or sulfur odor hints at failed anode rods or bacteria.
Cloudy or gritty water means sediment or mineral debris is circulating from the tank. If you’re unsure, test for hardness to see if minerals such as calcium or magnesium are building up. Hard water accelerates scale formation and reduces element life.
Add a softener or point-of-use filter where required. Swap the anode rod at the suggested intervals, usually every 3 to 5 years, depending on your water chemistry, to extend corrosion and cut back on rust whispers.
Heating Time
Measure the time from faucet open to hot water arrival and compare to historical performance. Longer delays can indicate a burnt-out heating element, inefficient gas flames, or thick sediment insulating the heater.
Minor thermostat faults can cause the unit to cycle weird and whisper when turning on or off, so check and calibrate the settings. Avoid temperatures over 49ºC to prevent scalding.
If sluggishness continues post-flush, check the elements and adjust the thermostat. Upgrade to a more efficient model or go tankless to satisfy demand and cut energy waste.
Safety Protocols
When a water heater runs out of hot water, safety is first. Prior to any inspection or servicing, shut off the power or gas to the unit. For electric heaters, switch off the circuit breaker and verify the power is off with a non-contact voltage tester. For gas units, turn the gas valve off at the appliance or main and make sure the pilot is extinguished.
If you smell gas, get out and call 911 or the gas company before you do anything. Wear safety gloves and glasses when working with hot water, razor blades, or chemicals. Rubber or heat-resistant gloves protect your hands when draining the tank or loosening fittings. Safety glasses block splashes during valve tests or when flushing sediment.
Long sleeves and closed shoes minimize burns and cuts. Safety protocols include keeping wet surfaces away from electricity and using insulated tools. Protect the area around the water heater from flammable materials and obstructions. Don’t store any paint, solvents, cardboard, or rags inside within at least 0.6 to 1 metre of the unit, and maintain a path for ventilation and service access.
Blocked vents or clutter can trap heat or fumes and increase the danger of a fire or carbon monoxide buildup in gas units. Be sure to check venting pipes and air intakes periodically for lint, bird nests, or debris and clear anything that restricts air flow. Test the T&P valve every year to make sure it opens freely.
Open a big bucket underneath the discharge pipe, pull up the valve lever for a moment until the water flows, and then let it go so it reseats. Safety comes first. The T&P valve releases pressure if the tank overheats and prevents explosions. Replace it immediately if it sticks, leaks, or won’t reseat.
While testing, note the water temperature. The thermostat should be set to about 120°F (49°C) to balance scald risk, energy use, and recovery time. Perform regular maintenance to avoid breakdowns. Flush the tank annually to expel sediment that decreases heating efficiency and can lead to overheating.
Inspect for leaks because if there is any pooling of water at the base, you’ll need to turn off the power and water and call a professional. Check your circuit breaker and reset button if hot water is not consistent. Have a licensed technician conduct a comprehensive inspection every 1 to 2 years to catch problems early and ensure safe operation.
Repair or Replace
Make your decision by considering age, condition, and cost. If the water heater is more than 10 years old, replacing it usually makes more sense, especially if a repair is more than half of a new install’s cost. Models between 8 and 12 years that display repeated or escalating problems should be approached with suspicion.
Multiple technician visits are symptoms of waning reliability and increasing total cost of ownership. If your tank has any visible corrosion, leaks, or rusted-through fittings, generally replacement is the safer and more cost-effective option since corrosion spreads and tanks can fail suddenly.
Think repair cost versus replacement cost in very concrete terms. Obtain a written repair estimate and a written quote for a new comparable unit and installation in the same currency. If repair costs get close to or above 50% of a new unit’s price, lean toward replacement.
Include indirect costs such as downtime without hot water, potential water damage from leaks, and expected future repairs. For newer units, which are less than eight years old, small malfunctions like a bad thermostat or heating element are typically repairable, as long as the tank lining and anode rod remain intact.
Look at energy savings and incentives. New high-efficiency models can lower energy consumption significantly. Many homeowners experience a 20 to 50 percent efficiency gain over 10-year-old units.
Translate that into money: calculate current annual hot water energy spending and apply the expected efficiency gain to estimate yearly savings. Consider any rebates or incentives for efficient models. Certain locations or utilities provide subsidies that reduce the net replacement cost.
Use simple payback math: the net cost after rebates divided by annual energy savings gives years to break even. Foremost, be safe and know when you need a pro. Major leaks, a gas smell, soot or electrical faults need a licensed plumber or certified technician.
A pro can check for hidden rust, sediment and leaky fittings and talk anode rods. There are a few regular maintenance items, like annual flushing and replacing the anode rod every 3 to 5 years, that keep many common failures at bay and extend tank life.
Maintain records of maintenance. They assist technicians in predicting how much useful life is left and in making a business decision on repair versus replace. Record your decision and schedule next steps.
If replacing, select a capacity and fuel type appropriate for household needs and take into account the latest efficiency standards. If repairing, establish a limit for when to quit repairing and replace instead to prevent repeated disturbances.
Conclusion
A cold shower can indicate a plethora of obvious defects. Check the breaker and pilot first. Pay attention to other potential signs such as bizarre noises and hot pipes. Check the tank for leaks and the anode rod for severe wear. For tankless units, clean the filter and inspect the flow sensor and burner. Tackle scale build-up and sediment with a flush if you notice diminished output. Follow gas and electric work safety steps. Little things, a reset, new thermostat, or a $20 sacrificial anode usually bring heat back. Significant rust, frequent breakdowns, or a damaged heat exchanger warrant replacement. If you want assistance, book a licensed tech. Receive a quote, explore alternatives, and choose the one that suits your house and budget.
Frequently Asked Questions
Why is my water heater not producing any hot water at all?
Water heater not hot – Check power or fuel first. For electrics, test the breaker and elements. For gas, check that the pilot or ignition works and the gas valve is on. If components are fine, call a licensed technician to safely diagnose.
Why is my water heater producing only lukewarm water?
Lukewarm water usually indicates a burnt out heating element, a clogged dip tube, or incorrect thermostat settings. Check the thermostat and element for electric heaters or the burner and thermostat for gas heaters. Professional testing can quickly identify the problem.
Why does hot water run out quickly?
Short hot-water supply typically indicates a tank that’s too small, sediment build-up reducing capacity, or a defective thermostat. Flush the tank to restore capacity. Consider a bigger tank or a tankless upgrade if demand exceeds supply.
Why is my hot water smelly or discolored?
Sulfur or metallic odors typically stem from bacteria in the tank or a corroded anode rod. Discolored water means you have rust in your tank or pipes. Flushing and swapping out the anode rod typically resolves this. Call a pro if it continues.
Why does my water heater make banging or popping noises?
Banging or popping means you have heavy sediment build-up under the element or burner. Sediment traps heat and makes noise. Flushing the tank usually stops the noise and restores efficiency. Have it serviced periodically to avoid it happening again.
Is it safe to try repairing my water heater myself?
Elementary things (power, pilot, breakers) are secure. Skip the D.I.Y. On gas lines, high-voltage electric elements, or internal tank repairs. For anything beyond basic checks, call in a licensed technician to prevent injury and code violations.
When should I replace rather than repair my water heater?
Replace if your tank is more than 10 to 15 years old, is heavily rusted or leaking, or repairs are more than 50 percent of replacement. Replacement can increase efficiency and decrease future failure. A trusted plumber can give you a cost-benefit recommendation.