

Key Takeaways
- These appliances require dedicated circuits to prevent overloads and reduce fire risk. Determine which appliances should have their own circuits prior to beginning your work.
- Add a dedicated circuit for your appliances. Calculate total wattage and amperage and match those needs to the correct breaker and wire gauge to ensure safe, reliable appliance performance.
- Adhere to NEC and local code standards, apply GFCI or AFCI protection as necessary, and secure permits or inspections when needed to ensure compliance.
- Work safely, de-energize the panel, use insulated tools and testers, and make final checks for proper voltage, grounding, and connections.
- Plan and future-proof. Map appliance locations, route direct wire paths, and add spare circuits during remodels to support upgrades and smart appliances.
- Hire a licensed electrician for panel upgrades, complex wiring, or if you don’t have experience. Confident DIYers can tackle lighter work like installing a special outlet or branch circuit with necessary precautions.
How to add a dedicated circuit for appliances is the act of installing a unique circuit to provide power to one or more high-draw devices. This means selecting the right breaker size, gauge of wire, and outlet type to match appliance needs.
Local electrical codes and permits come into play in terms of placement and safety measures. You should certainly hire a licensed electrician for complicated installs, but basic projects can sometimes be the domain of an experienced DIYer with the right tools and safety tests.
Why Dedicated Circuits?
Dedicated circuits separate one appliance or a specific load so the equipment has a steady, reliable source of power. This minimizes overload exposure, fulfills current code standards, and prevents other circuits from being compromised by substantial, consistent draws.
These subheadings address safety, performance, and planning specifics that demonstrate why circuits dedicated to kitchens, laundry rooms, garages, and EV charger locations are important.
Enhanced Safety
Dedicated circuits reduce the risk of overload and electrical fire by keeping high draws off of general wiring. Electric dryers, water heaters, and other similar appliances run at high current over long periods of time.
Separate circuits prevent wiring and outlets from overheating and reduce insulation breakdown. When a large appliance shares a circuit with lights or receptacles, the combined load can stress the breaker and cause nuisance tripping or, even worse, wiring that gets dangerously warm without tripping.
Breaker trips generally mean the circuit is overloaded or the wiring is undersized. Separate circuits comply with safety rules. The National Electrical Code (NEC) and California code require dedicated circuits for refrigerators, freezers, microwaves, and ovens.
Title 24 specifies that continuous loads, which are considered to be any running three hours or more, shall be fed from circuits sized at 125% of the nameplate. Common hazards prevented by proper dedicated circuit installation include:
- Overheated wiring and junctions
- Melting of outlet components
- Electrical arcing and fire starts
- Damage to insulation and conduit
- Unexpected breaker failures during critical times
Appliance Performance
A dedicated circuit provides consistent voltage and amperage, which ensures appliances operate as designed. Voltage drops on common circuits cause motors to run hotter, compressors to cycle incorrectly, and control electronics to reset.
A refrigerator on its own 15 to 20 amp circuit, for example, will keep compressor duty cycles in check and prevent the short cycles of death that reduce life. Smart appliances and sensitive electronics need stable power because surge and sag from shared loads can damage control boards or corrupt data.
Appliances on dedicated circuits experience less wear from repeated restarts due to low-voltage or brownout conditions. Over time, this consistent supply goes a long way in prolonging the lifespan of expensive equipment such as ovens, HVAC parts, and heat pumps.
Future-Proofing
Install additional circuits during remodels to accommodate future appliances or smart-home expansion. Install extra dedicated circuits for potential upgrades such as EV chargers, induction ranges, or additional freezers so you don’t require invasive rewiring down the road.
Evaluate new appliance watts and amps, and ensure the circuit is appropriately sized. Keep in mind the 125 percent rule for continuous loads. Below is a simple planning table of current and anticipated loads:
| Appliance | Typical wattage | Suggested circuit |
|---|---|---|
| Refrigerator | 500–800 W | 15–20 A dedicated |
| Electric range | 3,000–12,000 W | 40–50 A or higher |
| EV charger (Level 2) | 3,300–7,200 W | 32–40 A dedicated |
| Microwave | 1,000 to 1,800 watts | 20 amp dedicated |
Assessment and Planning
Assessment and planning establish whether a home can safely support a new dedicated circuit and show what upgrades, permits, or professional help are needed.
Appliance Audit
List all major and countertop appliances including make, model, rated wattage and amp draw. Think fridges, ovens, microwaves, dishwashers, washers, dryers, space heaters and anything smaller with a high draw like countertop induction cooktops.
Older 1960s–70s homes were built with appliances that consumed far less power and newer counterparts can demand substantially higher loads. Look for signs of overloaded circuits: flicker or dim lights when an appliance starts, frequent tripped breakers, warm outlets, or burning smells.
These symptoms indicate an urgent need for dedicated circuits. Note which outlets and fixtures are on the same circuits and label which appliances currently share them. Think first of appliances that are required to be on dedicated circuits—electric range, water heater, HVAC compressor, and occasionally fridges or freezers.
Map appliance locations on a basic floor plan to figure out cable routes and breaker placement. Documentation accelerates decisions regarding panel access and cable runs and assists a licensed electrician in estimating labor and material requirements.
Load Calculation
Sum the wattage of listed appliances to obtain total demand. The watt-to-amp conversion is amps equals watts divided by voltage (most homes have 230 V for large appliances and 120 V for small). Assume continuous loads by circuit sizing at 125 percent of continuous load per common code practice.
Match calculated amperage with proper wire gauge and breaker size: 14 AWG for 15 A, 12 AWG for 20 A, 10 AWG for 30 A, 8 AWG for 40 A, and larger as needed. Undersized wire or breaker poses a danger of overheating and fire.
| Appliance | Voltage (V) | Watts | Amps |
|---|---|---|---|
| Refrigerator | 120 | 700 | 5.8 |
| Electric stove (element) | 240 | 3000 | 12.5 |
| Electric water heater | 240 | 4500 | 18.8 |
Don’t belittle aggregate loads from several appliances on common circuits. Together, use can blow past amperage ratings even when each alone appears harmless.
Code Research
Consult the NEC and local amendments for dedicated appliance circuits and minimum branch-circuit requirements. The NEC establishes requirements for kitchen countertop outlets, hardwired appliances and continuous loads.
Local codes may include additional details or higher minimum service ratings. Check manufacturer instructions for every appliance. Some specify breaker size, wire gauge, and whether a dedicated circuit is required.
Verify bathroom, kitchen, and laundry specific requirements. Verify if permits and inspections are necessary in your area. Most do require them. Use different agencies, such as a municipal building department.
A licensed electrician can review load calculations, recommend panel upgrades, and provide compliance and safety input. Professional input helps you avoid expensive rework and lowers the risk of fire.
The Installation Process
You’ll need a dedicated circuit run to satisfy safety rules and local codes. Installation steps below show you what to do, why it matters, and where to watch for common pitfalls like limited panel space, aluminum wiring, or a need for a panel upgrade. Collect tools, materials, and permit info prior to install to save headaches.
Easy installs take a couple of hours, while complex runs are more expensive and might require a professional.
1. Safety First
De-energize the main breaker and confirm with a voltage tester that the panel and target circuits are dead. Working on live circuits is dangerous and should be avoided. Employ insulated tools, safety glasses, gloves, and, as necessary, insulated mats to reduce shock danger.
Put up warning signs or inform other family members that you’re doing electrical work so they don’t inadvertently switch power back on. Verify all terminations a second time after tightening because loose lugs can cause arcing and heat failure.
If you come across aluminum wiring, know that there are special anti-oxidant compounds and rated connectors needed. Some areas actually request a licensed electrician to do it.
2. Path Planning
Map out the straightest, code-approved path from panel to appliance, taking note of walls, floors, and other impediments that add time and wire length. For outlets and junction boxes, map out locations by measuring appliance cord reach and placement for service access.
Map your wire lengths and minimize bends. Extended runs increase voltage drop, so for distances over a few tens of meters, go with larger gauge. If the route traverses living areas or fire-rated assemblies, choose suitable conduit or protected cable and allow inspection access.
3. Breaker Installation
Select breaker amp size based on the appliance’s wattage and manufacturer recommendation. For instance, many ranges and dryers require 30 to 50 A breakers. Make sure the breaker is appropriate for your panel type and bus configuration, as incompatible devices can short out or void warranties.
Install the breaker into the panel with proper torque on the terminal and label it clearly on the directory. If panel space is tight or older, a subpanel or panel upgrade may be necessary prior to installing new breakers.
4. Wire Pulling
Installation, too—use the wire gauge matched to ampacity and distance. Run cable in conduit or with proper clamps to protect it. No kinks or sharp bends that compromise insulation.
Provide secure routing with staples or straps, maintain clearance from heat sources, and leave a service loop at devices for future work. Aluminum conductors need special connectors and handling.
5. Outlet Connection
Match outlet style to the appliance. A lot of them need 240 V receptacles with good pin alignment. Install clean, crisp terminations and utilize GFCI/AFCI devices where code demands.
Check voltage and polarity prior to plugging in the appliance. Incorrect wiring can blow breakers or fry equipment.
6. Final Checks
Code check all work, energize and load test the circuit while watching for buzzing, tripping, or heat. Record the new circuit on the panel directory and maintain permit and inspection records.
Costs vary. DIY materials range from $50 to $200, professional installations range from $200 to over $800, and a full circuit typically costs between $300 and $600. Permits and inspections may add fees. If you’re not sure, have a licensed electrician do the work.
Essential Tools
A separate circuit powers just one device or appliance, minimizing overload hazards and enhancing safety. For these high-power machines, electric dryers (dedicated 30-amp, 240-volt), ranges or wall ovens (40–50 amps) and appliances drawing 1,000 watts or more, proper tools and testing gear are essential.
Here’s a streamlined set of gear and why it matters, with more specific definitions in the testing, wiring and safety sub-categories.
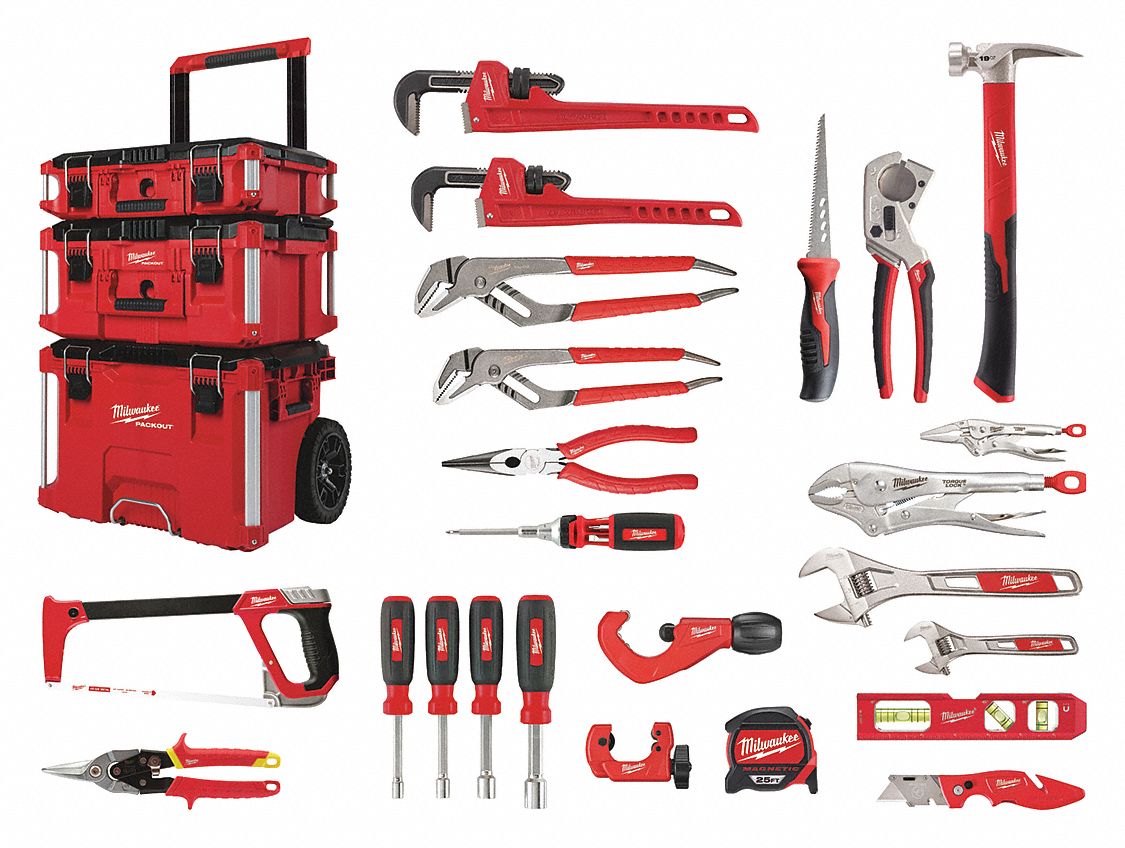
- Insulated screwdrivers and nut drivers (various sizes)
- Wire strippers and cable cutters are essential for bigger gauge wire.
- Voltage-rated needle-nose pliers and crimping tool
- Fish tape or wire puller for runs in walls or conduit.
- Conduit bender and conduit fittings (where applicable)
- Circuit breakers appropriately sized for the appliance (15 to 50 A as needed)
- Breaker lock-out/tag-out kit
- Multimeter (true RMS preferred) and non-contact voltage tester
- Circuit analyzer and GFCI/AFCI tester
- Electrical tape, heat-shrink tubing, and wire nuts with the right amp rating.
- Cable clamps, strain reliefs, and junction boxes
- Insulated gloves, safety glasses, dust mask, and sturdy footwear
- Fire extinguisher rated for electrical fires
- Portable work light and labels for circuit identification
- Tool tote or checklist binder for organization
Go for quality in your tools and keep work sharp and secure! Good wire strippers and cutters save time and minimize nicks that weaken conductors. A good multimeter and a true RMS model provide precise voltage and current measurement readings on contemporary machinery.
For bigger gauge wires found on 30 to 50 amp circuits, use tools rated for those sizes. Common household pliers could break or crush conductors.
Testing Equipment
Non-contact voltage testers indicate if a circuit is live prior to you touching something. They’re the initial check and rapid to deploy. Once de-energized, verify with a multimeter for voltage and continuity testing.
Multimeters verify proper grounding which is essential for the safety of appliances. Circuit analyzers identify wiring defects such as open neutrals, reversed polarity, or high resistance that trigger nuisance tripping.
Test outlets for refrigerators, washers, or air conditioners. Test GFCI and AFCI features with dedicated testers. These need to work where code calls for protection, including kitchens, laundry, and garages.
Wiring Tools
- Fish tape or wire pullers are used to snake wire through studs and conduit runs.
- Wire strippers for 14 to 6 AWG, depending on circuit ampacity.
- Screwdrivers, nut drivers, and torque tools for panel and breaker terminals.
- Electrical tape, heat-shrink, and wire nuts rated to the circuit’s amperage.
Fish tape accelerates pulls for deep runs. For tight bends, conduit and a lubricant assist. Torque drivers satisfy those panel specs and avoid the loose terminations that create heat.
Safety Gear
Insulated gloves and safety glasses protect against shocks and flying debris during drilling or cutting. A dust mask restricts breathing when you’re opening walls.
Hard, stable protective boots are a must. You don’t want to slip around ladders and panels and fall to your death. Keep a Class C or multi-purpose fire extinguisher within reach in the event of sparks or wiring malfunctions!
Common Pitfalls
A dedicated circuit adds security and safety for high-draw appliances. Errors in planning or installation can negate those advantages. These are the most frequent failures, hazards, and expensive rework causing pitfalls and what to verify to avoid them.
Sizing Errors
Wire or breakers that are too small for the appliance load can overheat and cause fire. Calculate the appliance wattage and convert to current using the metric-friendly formula: current (A) equals watts (W) divided by volts (V). Many appliances over 1,000 W will need their own circuit.
For continuous loads, size breakers at 125% of continuous current where codes require. Include circuit length: long runs need larger gauge to offset voltage drop. A motor or heater far from the panel may need one gauge size larger than a short run.
Example: a 20 A circuit requires 12-gauge copper normally. Using 14-gauge for that load is unsafe. Under-sized breaker and wire combinations result in nuisance trips, heat at connections, and slow damage to motors and electronics.
Consult NEC tables or the local standard when selecting wire gauge and breaker size for individual appliances and add overhead for startup currents on compressors and pumps.
Code Violations
It’s expensive and hazardous to neglect code. Usual violations are tying numerous high-powered appliances to one general-use circuit, having outlets too close to sinks, and missing required GFCI/AFCI devices in wet or kitchen areas.
False: Not pulling permits or skipping inspections risks fines and may void homeowner insurance if a claim involves unpermitted work. Common Pitfalls label all new circuits clearly in the panel.
Engage a licensed electrician who knows the code. Do-it-yourself work without that expertise can create non-compliant installations and open the homeowner to liability.
Poor Connections
Loose or shoddy connections generate heat and arcing, a common source of fires. Use the right connectors: appropriately sized wire nuts, crimp sleeves, or terminal screws, and tighten to the proper torque.
Examine all splices and junctions prior to closing walls or finishing the panel. One loose strand or back-stabbed connection can spark trouble. Always keep wiring neat and bundled with proper support.
Messy runs conceal stress points and make future upgrades a nightmare. Don’t rush termination steps. Rushing or cutting corners in tightening or insulating connections is more likely to cause shock, failure, or fire.
Inspections on a regular basis can detect decaying connections before they become critical.
Professional vs. DIY
A dedicated circuit prevents a single appliance or group of related loads from overloading a breaker, which reduces heat. Choosing between a professional and a DIY method is a matter of safety, local code, the difficulty of the job, and your ability. Here are some distinct pros and cons and useful tips to decide which way to go.
Licensed electrician: benefits and risks
Hiring a licensed electrician will give you code compliance, proper load calculations, and safe installation. Electricians size breakers and conductors by precise ampacity, choose the appropriate breaker type, and make modifications at the panel, like installing a new breaker space or upgrading bus capacity.
They know when something needs its own 20 A or 30 A circuit, like how laundry rooms typically require a minimum of a 20 amp dedicated line and electric dryers tend to require bigger circuits. They take care of permits and inspections and minimize liability and insurance concerns.
The biggest negative is price; it depends on your location and how complicated the job is and lead times to get on the schedule.
DIY: benefits and risks
A homeowner can save money by doing basic work, such as replacing an outlet or wiring a short branch circuit in a panel that has electric room. Self-assured DIYers who know how to do load calculation, wiring methods, grounding, and junction-box rules can install circuits for less insistent loads.
Small workshops outfitted with light tools or a dedicated circuit for a fridge in a garage are examples. Risks include mis-sizing wire or breaker, bad connections, and forgetting permits. Mistakes can cause overheating, nuisance trips, and fires.
Be aware that appliances with 1,000 watts or greater, or that run for extended periods, such as electric fireplaces and dryers, tend to need a dedicated circuit and are less DIY friendly unless you have solid experience.
When to call a pro
Call a pro for panel upgrades — switching out fused panels for modern breakers, multi-wire branch circuits, or adding high-amperage circuits for dryers, ranges, or HVAC. Hire one if new circuits need running through walls, installing new subpanels, or aluminum wiring.
If you use heavy power tools—air compressors, power saws, large drills—in a garage or workshop, a pro can design dedicated circuits that prevent voltage drop and protect tools. Permit and inspection necessities frequently require a licensed electrician.
Tasks suitable for confident DIYers
Skilled homeowners can do outlet replacement, add a short-run 15 to 20 amp branch circuit for lighting or receptacles, and mount a new dedicated outlet when the panel has space and no changes to the main service are needed.
Assess your skill honestly: if you are unsure about breaker sizing, conductor ampacity, or local code, stop and call a licensed electrician.
Conclusion
Dedicated circuit protects household appliances and the wiring system. Follow a clear plan: check the appliance label, pick the right breaker and wire size, map a short and direct route, and use proper boxes and connectors. Test each step with a meter and a GFCI or AFCI where code requires one. Beware of loose neutrals, shared neutrals, and overloaded panels. For complicated panels, daisy-chained wiring, or any hesitation, bring in a licensed electrician. A pro saves you time and reduces risk.
Example: A 3.5 kW electric water heater usually needs a 16 A run. Plug it onto a 20 A breaker with 12 AWG copper wire and a straight feed to the heater box.
Consult local code and schedule an electrician or collect components and plunge in with a solid plan.
Frequently Asked Questions
What is a dedicated circuit and why do I need one for an appliance?
A dedicated circuit feeds one appliance from a single breaker and wiring. It prevents overloads, tripping, and protects the appliance. Numerous manufacturers and building codes require dedicated circuits for safety and reliable performance.
How do I determine the correct circuit size for my appliance?
Look at the appliance nameplate for amps or watts. Multiply amps by 125 percent for continuous loads per code. Determine the corresponding breaker and wire size. For example, 15 to 20 A uses 2.5 to 4 mm² copper. If you’re unsure, check the appliance manual or with an electrician.
Can I install a dedicated circuit myself?
If you’re truly strong in electrical experience and local permit knowledge, you can in select areas. For safety and code reasons, engage a licensed electrician for high-power appliances, meter connections, or complex panel work. This typically requires permits and inspections.
What permits and inspections are required?
Everywhere, you need a permit and final inspection for new circuits. Rules differ depending on where you live. Be sure to get in touch with your local building department before beginning so that you’re in the clear and don’t run into safety and insurance problems.
How much does installing a dedicated circuit usually cost?
Prices depend on your area, your appliance, and your panel’s status. Anticipate anywhere from the mid hundreds to a few hundred or more in local currency, depending on wiring run length, breaker style, and labor. Get several quotes from licensed electricians for precision.
What common mistakes should I avoid?
Don’t use undersized wire, the wrong type of breaker, shared circuits, and don’t skip permits. Don’t overload the circuit or terminate using the wrong methods. These errors not only create fire hazards but also safety hazards.
When should I upgrade my electrical panel for a dedicated circuit?
Upgrade if the panel has no spare breaker slots, is old (fused or worn), or cannot support increased load. A load calculation by a professional will indicate whether an upgrade indeed increases safety and adds future capacity.