

Key Takeaways
- Know your generator, fuel type, and manual before testing to adhere to manufacturer guidance and prevent any damage.
- Your safety comes first, so only test in well ventilated locations, don protective equipment, and always keep the unit disconnected from household power prior to inspection.
- TEST: Follow this test routine to test your home generator. Inspect the generator for any visible damage. Check all fluids. Run the generator for 15 minutes without load. Test the transfer switch. Gradually put the generator under load. Monitor the system and record readings.
- It’s still best to match your home generator to your household needs by totaling up appliance wattages and surges so you don’t overload your generator or fry sensitive equipment.
- Maintain test logs, treat anomalies immediately, refuel once cooled, and store tools and records for routine upkeep and simpler pro servicing.
- Fuel, battery and environment best practices include rotating and stabilizing fuel, checking battery health, and responsibly disposing of fluids and parts.
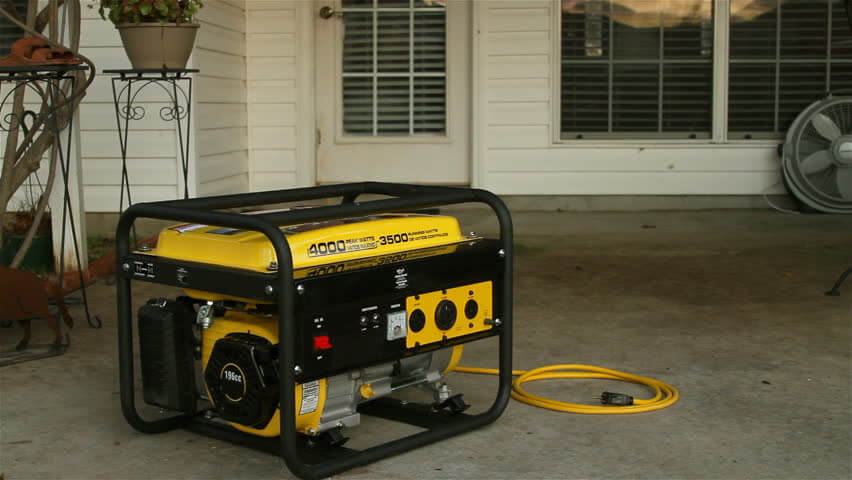
How To Test Your Home Generator is a checklist and series of steps to verify it operates dependably and securely.
Routine testing detects fuel, battery, oil, and transfer switch problems prior to outages. Common tests include a no-load start test, a short load test with some appliances, a fluids and filters inspection and an automatic start check.
The steps below detail tools, timing and safety notes for each test.
Essential Preliminaries
Just essential preliminaries before any actual test driving: verify generator model, manufacturer, and fuel type. Mark down serial numbers and service history. This directs which parts and procedures are relevant.
Check the owner’s manual for model specific warnings, torque specs, and maintenance intervals. They’ll often provide you with required clearances and the precise exercise cycle for the unit. Maintain three to four feet (1 to 1.2 meters) of clear space around the generator for ventilation and easy access.
Safety Protocols
Use safety gloves and eye protection when working with fuel, batteries, or electrical terminals. Carbon monoxide is a huge danger. Never operate portable units inside garages, basements, or other enclosed spaces.
Verify the generator is off and isolated from household circuits. Open the main breaker or transfer switch to avoid backfeed. Have a fire extinguisher and rudimentary first aid kit close at hand during the test.
Start tests, battery maintainer or disconnect the battery if you have to work on electrics. If testing under load, lay extension cords and loads where they will not be tripping hazards.
Verify local rules for outdoor location and noise restrictions, in particular for standby units that start automatically.
Tool Checklist
- Voltmeter (AC/DC capable)
- Clamp ammeter or true-RMS amp meter
- Test light and circuit tester
- Insulated screwdrivers and pliers
- Battery charger and multimeter
- Spare fuses and batteries
- Extension cords rated for outdoor use
- Fuel container and engine oil
- Fuel filter spares and basic gasket kit
Check meters and gauges are calibrated and working. A faulty reading can throw diagnosis. Have extra fuses and batteries ready to switch out if a test goes bad.
Bring fuel and oil for topping off. Running low in the middle of an exercise cycle can skew results.
System Familiarity
Find and identify the battery, main breakers, voltage regulator, and the transfer switch. Clear labels expedite testing and minimize mistakes.
Trace wiring routes from the generator to the transfer switch and then to house circuits so you know what circuits will be powered during a test. Differentiate standby systems, which are hardwired and auto-start on outage, from portable generators that you have to hook up and place safely.
Identify the circuits in the home you want to cover while testing: kitchen circuits, refrigerator, heating system(s), and vital medical equipment. Schedule loads accordingly.
These 12-20 minute exercise runs, ideally 15 to 20 minutes under load, simulate real outages and help you catch problems early. Monthly inspections catch those little issues and an annual professional service should change your fuel filters and provide an oil change every 100 hours or at a minimum, once per year.
The Test Procedure
About the test procedure. Testing verifies the generator will provide dependable backup power, discovers issues pre-storm, and educates you on safe operation. The test procedure below is incremental. Plan your tests for safe weather and include cooldown and shutdown time. Check off with a checklist and log in the maintenance log.
The test starts by turning the mainline breaker off to isolate utility power.
1. Visual Inspection
Look for corrosion, fuel or oil leaks, and frayed wiring around terminals and control panels. Inspect fasteners. Loose bolts at mounts or around the alternator can induce vibration and wear.
Inspect hoses and belts for cracking or fray. A snapped belt can lead to instant stall under load. Clean debris from cooling vents and exhaust outlets that may impede airflow. Leaves or dust hamper cooling and increase operating temperature.
Make sure all of the indicator lights and display panel are operational. A dead gauge masks issues during successive steps.
2. Fluid Levels
Check oil, coolant and fuel before ignition. Low oil or coolant risks severe engine damage during the test and in real use. Top off fluids to recommended amounts, use the manufacturer’s grade and record the exact quantities in the log.
Examine fluid color and odor. Milky oil may indicate coolant contamination and a diesel scent in the coolant is a dealbreaker. Log initial levels and any post-run fluctuations so patterns emerge over time and upkeep becomes prescient.
3. No-Load Run
Begin the generator once you have verified the mainline breaker is OFF and the transfer switch isolated. The unit might run a few seconds before the transfer switch clicks. That’s normal, but keep track of it.
Run with no household loads connected to check idle behavior and basic function. Listen for any weird knocks, clatters, or over-vibration. Measure voltage and frequency with a meter and allow the unit to warm up for about 10 minutes so readings stabilize.
4. Transfer Switch
Test procedure: Simulate a utility outage to check the transfer switch. Check response time and if the switch powers only circuits it is supposed to.
Test to see that the automatic or manual switch goes back to utility power when you turn the main breaker back on. Record any trespass, non-isolation, or surprise energized circuits — safety concerns.
5. Load Application
Start adding appliances, recording each item and its wattage in relation to your generator capacity. Track which circuits run using a simple table: appliance, wattage, circuit.
Monitor for voltage drop or frequency sag as loads increase. Cease prior to going over the tested maximum.
6. System Monitoring
Read voltage, frequency, and amperage on the fly while under load. Watch for flicker, uneven lights or engine speed changes.
Record readings periodically to compare afterward and identify trends.
7. Cooldown and Shutdown
Take off loads, let the generator run unloaded for a few minutes, then follow the manufacturer shutdown sequence.
Post shutdown, check for leaks, odd odors, or heat. Make any final notes and follow up if problems seem.
Understanding Load
About load understanding generator output to household power needs is the first step in safe, reliable backup power. A generator that is too small will overload and trip, while one that is far too large may be inefficient and expensive. Review nameplate ratings and continuous versus peak (surge) power so the unit can handle both running and startup needs.
Check fuel or oil levels, battery charge, and wiring prior to any test to prevent maintenance oversights from generating false failures.
Why It Matters
Proper load calculation avoids overloading and prolongs generator life. Overload strains the engine and alternator and increases the likelihood of failure when you really need it. Trust me, I know: consistent testing, running a standby generator under load for 20 to 30 minutes a month as many makers recommend, instills faith that the set will hum to life when required.
Run portables every 2 to 3 months and perhaps a more complete inspection quarterly, particularly prior to seasonal risk windows. Load management safeguards delicate electronics. Surge protection and line conditioners minimize spikes in voltage and frequency drift.
Frequent testing brings to light fuel issues, battery weakness, or wiring faults in advance so repairs can be planned, not crammed, during an emergency.
Calculating Needs
- Refrigerator: 600–1,200 W (1,800–2,400 W start surge)
- Window air conditioner (3.5 kW): 700 to 1,500 W running, 2,000 to 4,000 W start
- Central AC (small): 3,000–5,000 W running, 6,000–12,000 W start
- Well pump: 800–2,500 W running, 2,400–7,500 W start
- Lighting (LED): 5–15 W per fixture
- Electric range: 2,000–5,000 W per element
- Sump pump: 600–1,200 W running, 1,500–2,500 W start
- Home router/modem and small electronics: 100–300 W total
Add total running watts, then include the highest surge value among motor-driven appliances to identify minimum generator capacity. Plan a 20 to 30 percent margin of safety for future loads.
Create a simple comparison table: the left column lists calculated household need (running and surge), and the right column lists actual generator output (continuous and peak). If generator output is less than requirements, try load re-sorting into must versus may categories.
Simulating Outages
Test automatic and manual start sequences by performing a full simulation. Turn off utility power or activate the transfer switch. Fire her up and run at no load for at least 3 to 5 minutes.
Then load it up and give it 20 minutes under load. See how fast they come back on and whether anything blinks or crashes due to voltage dips or frequency shifts. Note lag or errors, then reprioritize loads or install staged loads to minimize startup surges.
In humid or debris-laden locations, increase test frequency and check air inlets and outlets more often.
Interpreting Results
Interpreting the test results connects the raw measurements to real-world decisions on repair, maintenance, and safety. Examine results for trends, compare to manufacturer specs and historical data, and identify anomalies indicative of malfunctions.
Then convert into a concise actionable summary for maintenance review.
Sound Analysis
Listen for knocking, rattling, or whining with the generator running under load for at least 20 minutes. A new whine may indicate bearing wear in the alternator or fan assemblies, while a thumping or deep knock can signify loose mounts or piston problems.
Pay attention to when the noises begin during your run—right away versus after a warm-up, as this timing helps point to specific causes. Contrast today’s notes with previous sound logs to identify patterns.
If the noise has increased slowly, schedule a component check-up. If the change is sudden following some event, search for recent maintenance or load changes that might account for it. Note if sounds fluctuate with load. Load-sensitive noise generally points to the alternator or cooling system.
Make good entries into the maintenance log — date, duration, load level, short descriptor. Over time, this makes it easier to tell if a small whine is turning into a serious flaw and to justify component replacement.
Exhaust Clues
Watch exhaust color and smell during that same 20-minute load test. Thin blue smoke indicates oil burning and worn rings or guides. Thick black smoke indicates an over-rich fuel mixture or injector faults.
A gasoline odor around the outlet may indicate a fuel leak, whereas a pungent burning smell could indicate insulation or wiring faults. Look for heavy smoke at idle versus full load.
Smoke only under heavy load can indicate other causes than smoke at any speed. Check exhaust ports for soot deposits, leaks, or obstructions following each trial. Constricted flow increases backpressure and can harm engine longevity.
Record observations with photos if possible and document the conditions. Cold starts can generate some condensation and harmless white vapor. Persistent white smoke can be a sign of coolant intrusion.
Voltage Stability
Check output using a calibrated voltmeter over the operating range and under different loads, recording results. Think about meter accuracy. Device error can run from ±0.25% to ±2% and impact your conclusions.
Monitor voltage throughout the 20-minute run and observe for any drops, spikes, or flicker. Difference readings to manufacturer specs and previous tests, the regulator type and anticipated system range (for example, single phase 240 V versus three-phase).
Flickering lights are usually a sign of regulator issues. A failing regulator, with an average lifespan of 7 to 10 years, can deliver unsafe, irregular voltage and must be fixed to prevent equipment harm.
Voltages, regulator condition and recommendations are summarized in an easy to read report that lists anomalies, urgency and dates for follow-up calibration or service.
Post-Test Actions
Post-Home Generator Test For each home generator test, conduct a quick review to ensure safe operation and maintain preparedness. Make certain you look for any loose connections, debris, or fluid leaks prior to completing your documentation and clean-up. Tackle anything strange that you discovered during the test immediately to prevent it from becoming a bigger issue.
- Check and fasten electrical and mechanical objects. Inspect terminal connections, breaker screws and quick-connects for looseness, tightening to the torque values in the manual where specified. Check for oil, coolant or fuel drips and wash spills. Minor leaks can turn into major dangers if unrepaired. Clean leaves, dust and insect nests from vents and air intakes. Blocked intakes decrease cooling and can lead to overheating. Test the transfer switch. If you saw transfer delays or false transfers, tag the unit and call a tech. Stubborn warning lights or erratic performance need professional care.
- Reset controls, breakers. Return all manual switches, circuit breakers, and transfer switch to normal position. Reset tripped breakers after verifying the load is disconnected. Switch the control panel through its usual start and stop positions to verify readouts resume standby. Identify any switches or breakers flipped in the course of testing to household members so they know normal positions.
- Cool down and refuel. Let the generator cool completely before refueling. Hot parts and gas create a fire hazard. For portable units, wait 30 minutes or adhere to the manufacturer’s instructions. Refuel with the appropriate fuel type—gasoline, diesel, or propane—only. Fill ports ought to be clean, so look for spills and wipe down. Log fuel added and capacity left in the log to track trends.
- Clean, put away tools and consumables. Store tools, funnels, gloves, rags, and spare filters in a storage box or cabinet near the generator but away from heat sources. Change rags and absorbent pads for fluid cleanup. Maintain a basic spares kit: oil, fuel stabilizer, fuses, and a charged battery pack if applicable.
Record Keeping
Keep a log for each test date with findings, run-time, fuel used and any faults. Record run time and load performance, as they back warranty claims and identify wear trends. Employ postings to detect common failures or trends and generate comments for mechanics. Save manuals, receipts and service reports in a folder and a mirrored digital copy for easy access.
Refueling
Refuel after the generator cools. Spray the manufacturer’s fuel specification, test caps and lines for leaks. Record gallons added and residual fuel. Standby: load run of 20 to 30 minutes once a month, portable every two to three months.
Professional Service
Plan quarterly inspections and pre-seasonal risk times. Ask for battery, wiring, and voltage regulator checks. Call a licensed technician for transfer switch failures, persistent codes, or unstable output. Save service records with the test log for history and warranty assistance.
Beyond The Manual
About Beyond The Manual This part provides actionable tips and background that extend beyond the standard tutorial. It covers the things owners frequently overlook, how to debug tricky issues, how to collaborate and educate with other users, and how to optimize testing to your home’s unique electrical blend.
Fuel Longevity
Fuel in approved containers and rotate stock. Maintain smaller, time-stamped containers and use the oldest first. Label with purchase date and fuel type. For standby systems, arrange for a semiannual swap so fuel doesn’t sit more than six to twelve months without treatment.
Add fuel stabilizer to gas or diesel to extend shelf life. Follow the stabilizer maker’s dosage instructions, usually several milliliters per litre, and stir before storing. For diesel, use biocide treatment if water or microbial growth is a concern in warm climates.
Keep a close watch on fuel quality, particularly if you’re using a standby generator that doesn’t run often. Look for cloudy sediment or water in the bottom of the tank. Scoop some into a transparent cup and allow it to settle. The water will separate and reveal itself. Smell can inform you if gasoline has gone bad.
Discard old or fouled fuel in accordance with local regulations. Many towns and gas stations take old fuel and filters. Don’t pour fuel down drains or onto the ground. Call your local waste authorities for safe disposal.
Battery Health
Verify charge and connections to the battery before performing each generator test. Check resting voltage with a digital multimeter. A 12 V lead acid battery should read around 12.6 V when fully charged. Load testing provides a nice reality check when voltage seems marginal.
Clean battery terminals and replace corroded components as needed. Disconnect negative first, then positive. Use a wire brush and baking soda solution to remove corrosion. Rinse and dry thoroughly before reconnecting. Apply a thin coat of dielectric grease to slow future corrosion.
Test electric start to assure dependable crank during outages. Run a quick start sequence once a month, no load. Pay attention to slow cranking or irregular noises. They are usually indicative of low charge, weakening starter or worn solenoid.
Sub out aged batteries per manufacturer spec. Average life for standby unit batteries is three to five years. Make a note of installation dates and any performance notes so you know when it’s time to replace.
Environmental Impact
Run generators in accordance with local noise and emissions rules. Location. Don’t put units where exhaust and noise will disturb neighbors. Obey setbacks. Install mufflers or sound enclosures if needed.
Go easy on the environment by selecting propane or efficient diesel models. Propane burns cleaner than gasoline and stores indefinitely with less degradation. For diesel, seek out modern low-emission engines and keep them well maintained to keep emissions low.
Help avoid fuel spills and leaks for soil and groundwater protection. Utilize secondary containment trays and inspect fittings, hoses, and tank seams regularly. Immediately clean spills with suitable absorbents and dispose of waste properly.
Recycle used oil, filters, and batteries after servicing. A lot of centers will take them. Hang on to receipts and adhere to local hazardous-waste regulations to avoid fines.
Conclusion
Trying out a home generator provides tangible evidence of condition and prevents shock. Conduct a full-load test for 30 to 60 minutes to monitor voltage, frequency, and fuel consumption. Look for strange noises, hot spots, and weak breakers. Take log readings for every run, as well as any drop in output or fuel use increase. Address fuel, oil, or filter problems first. Tighten loose wires and clean vents. If an issue persists, give a certified tech a ring and send him your logs. For quieter inspections, apply a smaller load and inspect the battery and transfer switch. Routine testing every 3 to 6 months keeps the unit primed. Give it a test this month and include the results in your maintenance plan.
Frequently Asked Questions
How often should I test my home generator?
Test your home generator monthly under load and for 30 minutes. Conduct a full-load test once a year or after significant servicing to ensure dependability and fuel system health.
Can I test the generator without connecting house circuits?
Yes. You can run the generator with its internal load bank or with portable resistive loads. This prevents backfeed and makes testing safe when you are unable to isolate house circuits.
Is any special equipment required for a proper load test?
A clamp meter, multimeter, and a useful load bank or heavy-duty space heater are key. These allow you to measure voltage, current, and frequency during the test.
What safety steps should I take before testing?
Turn off your main breaker, isolate your generator from the grid if you have it, use your manufacturer’s checklist and put on some basic PPE. Never test without isolation to avoid dangerous backfeed!
What do abnormal voltages or frequencies indicate?
These typically point to regulator, governor, or alternator issues. Low voltage and frequency indicate overload or a weak engine. High values indicate regulator faults. Look and fix before you trust the generator.
How long should a load test run to be meaningful?
Run a load test for a minimum of 30 to 60 minutes at a representative load. This tests cooling, fuel delivery, and sustained performance, not just startup behavior.
When should I call a professional technician?
Call a certified technician if you notice any consistent voltage or frequency issues, strange noises, smoke, fuel leaks, or if you don’t have the tools or experience. Certified technicians provide precise diagnostics and secure repairs.