

Key Takeaways
- Keep an eye out for obvious warning signs such as frequent breaker trips, sparking or heat at an outlet, burning smells, and scorch marks. Contact an electrician right away if you notice them to minimize fire hazard.
- Check outlets and lights for warmth, buzzing, flickering, intermittent operation, or shocks and record which rooms or circuits exhibit problems to assist in troubleshooting.
- Think about your home’s age, previous renovations, and any old wiring that might be in place. If you have knob-and-tube or aluminum wiring, or a house that’s more than 40 years old, you’re likely in need of rewiring.
- Get a professional electrical inspection and follow through on the recommendations. Take written estimates and keep all documentation for insurance and resale value.
- Get ready for rewiring. Plan a timeline, make a room or circuit list to upgrade, budget for wall repair, and coordinate temporary power needs.
- Future proof your wiring when you rewire by adding circuits and RCD protection, supporting higher loads and smart devices and keeping materials up to code.
As to how to know if your home needs rewiring, there are some signs and tests you can use to determine whether your electrical system is outdated or unsafe. Some of the telltale signs are breaker trips, flickering lights, warm outlets, and discolored wall plates.
Houses constructed prior to 1980 typically contain wiring that does not meet current safety codes. A licensed electrician is your best bet to check circuits, test grounding and insulation, and provide cost estimates.
The body describes steps, risks, and upgrade options.
Critical Warning Signs
Homes don’t just fall down without warning. The following assist in detecting electrical problems early and determining whether a complete rewiring is necessary. Read each numbered warning and check the examples and causes.
1. Breaker Behavior
- Monitor tripped breakers, especially during routine appliance use, to identify overloaded circuits or bad wiring. If your trips are frequently going off when you’re running a fridge, washer, or heater, your circuit is overloaded or has a short.
- Troubleshooting Tips: 1) Unexplained or occasional tripping – this is the most indicative warning sign of some underlying wiring or electrical system issue that requires attention. Intermittent trips can mask loose connections or failing breakers that degrade.
- Make a list of which circuits or rooms tend to have breakers that trip often to identify trouble zones. Keep a log: date, appliance in use, and which breaker tripped. Patterns tell an electrician where to look.
- Verify what type of fuses your panel utilizes. If it’s old fashioned fuses as opposed to circuit breakers, then it is time for you to upgrade your panel. Homes older than around 40 years may still have fuse boxes or 60 to 100 amp services that struggle under modern loads.
2. Outlet Issues
- Sense for heat, humming or vibration at receptacles, indicating loose connections or overheated wires. Warm outlets and loose faceplates are critical warning signs that a socket needs repair or replacement.
- Check for discoloration, scorch marks, or melted plastic on sockets as indications of faulty wiring that might be hazardous. Any burn marks around a plug or switch need to be shut off immediately and reviewed by a professional.
- Check for dead outlets or those that only function sporadically, indicating potential wiring damage or loose connections. Dead outlets, particularly two-prong ungrounded ones, indicate the system is old and more dangerous.
- Please don’t plug stuff into outlets that electrocute you. That’s just plain wrong! Shocks may indicate the ground is missing or insulation has deteriorated due to age or rodent damage.
3. Light Performance
- Pay attention to constant flickering or dimming of lights, particularly when major appliances are running. This is a sign of overloaded circuits.
- I’m going to advise you to replace bulbs before assuming it’s a wiring problem. If the flicker persists, expand tests.
- Pay attention to more than one light flickering, as that indicates a system-wide wiring issue and not just a couple of bad fixtures.
- Buzzing sounds emanating from light fixtures are caused by loose wiring or a faulty connection that can result in arcing.
4. Sensory Clues
- Sniff for burning smells around outlets, switches, or your electrical panel that can indicate overheating wires.
- Be on the lookout for any strange buzzing or crackling noises coming from walls or outlets, indicating electrical arcing.
- Touch switches and outlets to see if they’re too hot, a sign of unsafe wiring.
- Experience tingling or mild shock upon contact with appliances. This is a sign of inadequate earthing or defective wiring.
5. Visible Damage
- Check for damaged wires with insulation that is frayed, cracked, or exposed in attics, basements, or around outlets.
- Detect broken or missing outlet covers that increase shock hazards.
- Check the electrical panel for rust or corrosion or signs of aluminum wiring. Aluminum from the 1960s to 70s frequently loosens and requires specialty repair.
- Look for rodent-chewed wires and reliance on extension cords, both indications that the system cannot keep up with existing demand.
Historical Context
Old wiring and the consistent increase in household electricity consumption make re-wiring many homes necessary. What this means is the unique way a house’s age, previous remodeling, and insurance needs can intersect with safety and performance. Read the symptoms below to catch when a complete electrical upgrade is imminent.
Home’s Age
Figure out what year your house was built to estimate wiring type and probable risks. Pre-1955 houses might still have lead-insulated cables. Up through the ’60s, they’d often use fabric or rubber. By the ‘60s through the ‘80s, wiring practices changed, but a lot of homes from those decades still can’t handle modern loads.
| Decade/before | Common wiring types | Associated risks |
|---|---|---|
| Before 1955 | Lead‑ins, cloth insulation | Insulation breakdown, shorting, fire risk |
| 1950s–1960s | Rubber or fabric insulated cable | Insulation rot, brittle cores |
| 1970s–1980s | Early PVC, non‑twin earth, aluminium in some homes | Overheating, poor grounding, corrosion |
| 1990s onward | Twin earth PVCu, modern copper wiring | Generally safer if properly installed |
Homes that are 40 years or older are tempting targets for a full rewire. Insulation may be aged, there might be aluminium wiring, and original installations were never sized for today’s loads. Nearly every home over 25 years old might require partial or complete rewiring.
Find out from check records whether wiring was ever updated. Original systems often don’t have circuit breakers, earthing, or RCDs (residual current devices).
Renovation Impact
Check your renovation records to find out if electrical upgrades were part of the scope. Work like renovations that added kitchens, HVAC, or home offices often spiked demand without appropriate panel or circuit upgrades.
Minor adjustments can mask major issues. New fixtures could be tied into old circuits. DIY work sometimes employs improper connectors or undersized cable, which creates fire risks.
- Kitchen or bathroom remodels incorporated high-draw appliances without new circuits.
- New lights wired to old two-core cable or ungrounded outlets.
- Garage or workshop outlets tacked on with no separate circuit or ground.
- Plugging multiple high‑power devices into a single old circuit.
Check all exposed junction boxes and have the electrician pop open any hidden ones where patched wiring may lurk behind drywall. Recording is not sufficient; physical inspection counts.
Insurance Demands
Check if your insurer needs an electrical safety check or evidence of rewiring. Insurers see aluminium wiring, old panels, and visible hazards as a risk. They might raise your premium or refuse coverage.
Pulls up certificates of upgrade with dated invoices, compliance certificates, safety reports, and more to qualify for lower rates and rebates. Failure to demonstrate compliance may result in claims being denied after an electrical fire or flash incident.
Maintain detailed records and conduct scheduled inspections to remain in accordance with insurer stipulations and minimize costs over time.
The Silent Risks
Old wiring issues continue to be the hidden danger. A lot of homes constructed 30 to 40 years ago weren’t designed for today’s device onslaught. Issues like decayed insulation, concealed damage, overloaded circuits, and code gaps can advance without obvious symptoms. They need to be regularly checked by a qualified electrician because some risks never knock before they strike.
Insulation Decay
Inspect attics, basements, and behind panels for brittle, cracked, or powdery insulation on wires. Cloth-insulated and primitive rubber-insulated power cables dry out and crumble with age. When insulation breaks down, bare conductors can come into contact with framing or with each other, creating short circuits and sparks that can ignite adjacent materials.
Replace decayed sections immediately. Usually, total rewiring is best when decay is extensive. Examples include a cloth-insulated run in a 1950s house that flakes when moved or a hidden run in a crawlspace with rodent damage exposing copper. Both need repair or replacement to meet modern safety norms.
Overloaded Circuits
Heavy reliance on power strips, extension cords or finding that many of your appliances are plugged into the same outlet indicates overload risk. Include high-wattage items such as ovens, heaters, air conditioners, and EV chargers, and how many are on a given breaker.
A basic load test can tell you if your 60 to 100 amp panel is being overloaded; today’s homes require something closer to 200 amps. Overload might not flip breakers immediately, but it will increase wire temperature, degrading insulation and connections over months or years.
Watch out for breakers that trip during peak use, lights dimming when big appliances fire up, or warm outlets. The solution is to install dedicated circuits or to upgrade the panel instead of resorting to stop-gap solutions like long-term extension cord use.
Code Non-Compliance
Contrast your system to existing local and national codes, particularly in older homes that were built before the 1970s. Common violations to watch for include:
- Ungrounded two‑prong outlets where grounding is now required
- Aluminum branch wiring without proper connectors
- Lack of GFCI outlets in wet spaces
- Outdated panels rated 60–100 amps for modern demand
- Open junction boxes or splices without proper covers
Failing to do so can nullify insurance, boost liability following an electrical fire, and endanger occupants. Aluminum wiring from the 1960s to 1970s oxidizes and resists flow, heating connections and increasing fire risk.
Remedial work or replacement is typically required. Focus on systems upgrade to save lives and property.
The Rewiring Process
Rewiring is a project that replaces the old wiring, upgrades the protection, and gets a home up to new safety standards. It starts with evaluation and finishes with review and recording. Anticipate major derailment, a defined strategy, and trades organization.
Professional Assessment
Schedule an electrical inspection by a licensed electrician to check the wiring and hazards. Request a comprehensive report identifying antiquated elements like cloth-insulated cables, aluminum wiring, or two-prong ungrounded outlets and highlighting urgent hazards including hot outlets, blown fuses, or burning odors.
Insist the inspector use proper testing gear: insulation resistance testers, continuity meters, and circuit tracers to find hidden faults, decayed insulation, or loose connections. Ask for a written proposal for suggested work, which should itemize labor, materials, and timeline.
Full-house rewires run about $3,000 to $4,000 for small, $4,000 to $10,000 for medium, and $10,000 or more for large, with outliers from around $2,000 to $12,000 depending on size and complexity. Even copper wires can last decades; casings, switches, and plugs do not have to.
Project Planning
Develop a clear timeline that shows phases: prep, wiring removal, new wiring run, consumer unit install, testing, and finish works. List rooms, circuits, and fixtures to be rewired or updated so no spot is overlooked.
Kitchen circuits, bathrooms, and outdoor lighting usually require extra care. Arrange for electricians with minimal disruption in mind, prepare for short-term power outages, and be sure to schedule work when you can stay elsewhere if necessary.
Factor in additional refurbishment including patching walls, decorating, and upgrading old fuse boxes to consumer units and RCDs. In certain areas, you will require signed approval or permits before significant work commences. Verify local regulations ahead of time.
Work Execution
Have the crew rip out the old wiring safely and replace it with code-compliant cabling and conduits. Replace it with a new consumer unit, modern circuit breakers, RCD protection, and correct earthing where absent.
Name each circuit to assist with later service. Test every circuit and outlet under load and with proper equipment before closing up walls and restoring full power. This step diminishes the risk of latent defects down the road.
Rewiring an average house requires anywhere from two days to two weeks depending on scale and access.
Final Inspection
Book a certified inspector to perform inspections as per codes. Keep thorough records, including photos of work in progress, test results, and compliance certificates for insurance and resale.
Test the restored-in-full system under real load to verify stability and no stray faults. Go over any warranties and maintenance recommendations offered by the electrician.
Professional Necessity
Rewiring is a technical profession and frequently results in an electrical service upgrade and numerous safety inspections. A good evaluation from a licensed electrician informs you which circuits, breaker capacity, and panel work need to be done. Homes older than roughly 40 years often require complete or partial rewiring. A professional will check the age and condition of wiring, outlets, and panel and provide a scope and price estimate.
Anticipate professional quotes to be based on home size and complexity. Standard rewiring falls somewhere between $2,000 and $12,000, but a site visit is the only way to get the definitive number.
Employ master electricians to save losing! Experienced contractors understand how to route new cables, size breakers, and strategically place outlets for modern load demands. They adhere to local electrical codes, employ proper wire gauges, and examine every circuit upon completion.
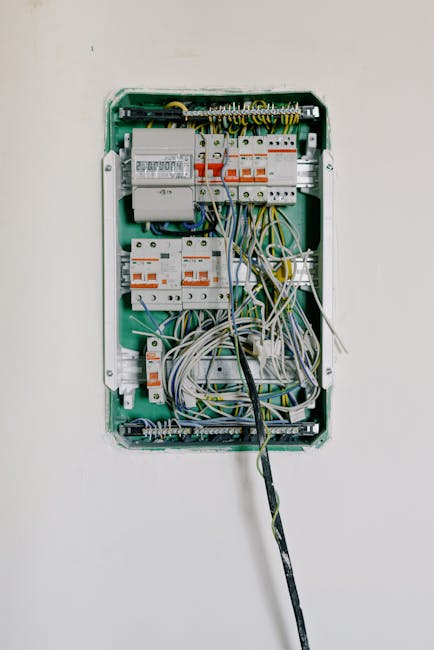
Examples include replacing knob-and-tube in an older home, adding dedicated circuits for kitchen appliances, or upgrading from a 60-amp to a 200-amp service, all of which require experience to do right. Bad decisions drive rework that can exceed the original install in cost.
Rely on the experts to deal with complicated wiring configurations, code restrictions and safety risks. A licensed electrician will identify unseen issues like damaged insulation, overheated connections, or grounded metallic systems that require repair. They can recommend when the electrical service needs to be upgraded since additional circuits add load.
Professionals record work with permits and inspection reports, which you’ll require for resale and insurance purposes. Whether it’s a rusted panel older than 20 years or loose connections that can ignite under load, having a professional handle these issues is crucial.
Enjoy the warranties, insurance, and peace of mind that comes with professional rewiring. Established companies offer craftsmanship warranties and have liability coverage, so both bug fixes and unintended damage are taken care of. This matters where incorrect rewiring later causes a loss.
Electrical fires in one country can cause hundreds of deaths and millions in property loss each year. Install it right or you might end up with a device that malfunctions, causing injury, fire, or insurance denial.
Don’t DIY rewire — it’s a code violation, a fire risk and an insurance claim denial. DIY projects frequently end up taking months longer, derail your life for weeks at a time, and skip important testing stages. Errors can require a professional to fix, sometimes more than it would have cost to employ one in the beginning.
Professional evaluation and installation conserve time, reduce risk, and guarantee compliance.
Future-Proofing Your Home
All too often, older wiring just can’t keep up with today’s power needs. If your home was built more than 40 years ago, you may have cloth-insulated cables, knob-and-tube or other systems that don’t have grounding and are no longer safe. Ideally, a home should be rewired every 30 to 40 years.
A full rewiring provides an opportunity to future-proof your plans, instead of just putting band-aids on issues as they arise.
Upgrade wiring to support modern appliances, smart devices, and future electrification needs like EV chargers or heat pumps
Newer appliances pull more constant power than older ones. A heat pump or EV charger might require its own high-powered circuit, while smart-home hubs and networked devices thrive with solid, grounded wiring. If you’re flickering or dimming lights, that can indicate an unsteady supply and hint at wiring that can’t handle our current loads.
If you’re rewiring, pick cable sizes and circuit layouts that support larger continuous loads and provide space for future circuits so an EV charger or heat pump can be installed without having to rip up walls again.
Install additional circuits and outlets to accommodate growing electrical demand and reduce overload risks
One telltale sign you need additional capacity is regularly tripped breakers or dependence on extension cords and power strips. Include separate circuits for kitchens, laundry, HVAC and home office.
Add additional outlets to rooms to prevent daisy-chaining and position outlets at convenient heights and places for devices and home offices. A whole-home rewiring can take a few days to a few weeks depending on house size and complexity, so schedule room-by-room work to keep disruption minimal.
It’s much less expensive to add circuits while you’re already doing a full rewire than to retrofit it later.
Choose energy-efficient wiring and components to lower energy bills and qualify for eligible energy rebates
Utilizing low-resistance wiring, modern breakers, and energy-smart components decreases line losses and increases system consistency. Many areas provide rebates for efficient upgrades.
Find out what your local programs are and compare offers using equipment specs based on the same metrics. Energy-efficient wiring with smart breakers and submetering monitors usage and reduces waste, which helps reduce bills and could make projects eligible for incentives.
Plan for future home energy upgrades, such as solar panels or advanced consumer units, during the rewiring process
Position conduits and space in your consumer unit (panel) for solar inverters, battery storage, and smart meters. Consumer unit with spare ways for future breakers and room for bi-directional metering.
Planning keeps expensive changes for later installs to a minimum and makes those installs faster as well. Typical rewiring costs range anywhere from $1,100 to $13,000, so add future-proofing choices to quotes to weigh lifecycle value and safety advantages.
Rewiring keeps you from shocks, fires, and other hazards, which is especially important for older homes.
Conclusion
A quick peek at your wiring can save you time, money, and stress. Old cloth-insulated wires, constant breaker trips, flickering lights, warm outlets, or a smell of hot plastic all indicate a very real need to do something. A trusted electrician can check wiring, locate loose connections, and trace circuits. Rewiring is about more than just eliminating hazards. It allows you to introduce power for new appliances, smart devices, and enhanced lighting. It increases home value and peace of mind as well.
For a rough check, glance at the panel label date, outlet types, and any scorch marks. For a complete response, schedule a safety inspection. Are you prepared to make an appointment with an electrician or want a checklist to bring with you?
Frequently Asked Questions
How can I tell if my home needs rewiring?
Be on the lookout for frequently tripped breakers, flickering lights, burning smells, discolored outlets or antique fuse boxes. These are good indicators that your wiring could be dangerous and should serve as an impetus for a professional inspection.
Are old homes automatically in need of rewiring?
Not necessarily. Age makes you more at risk, but condition is what counts. If your home still has cloth-insulated wires, knob-and-tube wiring, or a fuse panel, prepare to rewire to modern safety standards.
Can I test my wiring myself?
You might conduct simple tests such as checking for damaged outlets or smelling for a burning odor. For safety and diagnosis, hire a licensed electrician with testing tools and certification.
How long does a typical rewiring take?
The majority of typical homes require anywhere from a few days to a couple of weeks. Time depends on house size, ease of access to wiring, and if walls are plaster or drywall. Your electrician will provide a custom timeline.
Will rewiring increase my home’s value?
Rewiring enhances safety, updates electrical capacity to code, and comforts purchasers. It can add value to the property and make it more insurable.
How much does rewiring usually cost?
Prices depend on house size, wiring complexity, and local labor rates. Obtain several quotes from licensed electricians. Consider long-term safety and fire risk reduction when thinking about cost.
Do I need to move out during rewiring?
Might have to keep out of certain rooms during work. Total relocation is occasionally necessary for deep projects. Talk about living arrangements and safety concerns with your electrician in advance.