Key Takeaways
- Making sure your smart thermostat is compatible with your HVAC system is critical for a hassle-free installation and dependable performance.
- Collect your tools and safety measures, like flipping the power switch off, to safeguard yourself and your hardware during installation.
- Mark and connect wires per manufacturer’s directions to make sure it functions correctly and to prevent common wiring errors.
- Finish the setup, connect to Wi-Fi, and use the companion app to personalize settings and activate remote controls.
- Test the system after installation and troubleshoot power loss or connectivity failures with documented procedures and manufacturer help.
- Leverage sophisticated features, including eco-friendly scheduling and home automation compatibility, to maximize convenience, sustainability, and value for your household.
Smart thermostat installation guide provides detailed, step-by-step instructions for installing a smart thermostat in a residence or workplace. These guides include steps for checking wiring, powering off systems and mounting the device.
Others demonstrate how to connect the thermostat to Wi-Fi and mobile apps. To reduce energy use and maintain comfort, many of us make the jump to smart thermostats.
The following sections provide simple tips and clear steps for seamless setup.
Pre-Installation Checklist
A cautious pre-installation checklist keeps the smart thermostat setup seamless and secure. This step saves time and avoids errors that can impact system performance. It goes over system compatibility, tool collection, safety precautions, and scheduling, ensuring all aspects are prepared prior to beginning.
System Compatibility
Review the specifications of your new smart thermostat and your HVAC system. Confirm they are a match before proceeding. Most smart thermostats will specify the heating and cooling systems that they support. Not all systems work, so verify the manufacturer’s website or printed guide.
For instance, some older homes have high-voltage systems that aren’t compatible with many smart thermostats. Determine if your home has a single-stage, multi-stage, or zoned HVAC system. Check your existing thermostat, wiring, or system manual.
Check the wire types, stranded or solid, as some smart varieties need solid. It’s typical to verify whether you have a C-wire, as many smart thermostats require this wire for consistent power. Snap a picture of the wiring on your existing thermostat before you unplug it.
This simplifies wiring to the appropriate terminals on your new unit. Verify your wall and wiring are ready for the upgrade. Just be sure the wall is sturdy and the wires aren’t frayed or corroded.
Necessary Tools
Collect all installation tools ahead of time. At least have a screwdriver, voltage tester, and wire nuts on hand. These are necessary to uninstall the previous one and install your new thermostat.
For mounting, you might need a drill, particularly if you have to drill new screw holes. A stud finder prevents you from drilling into wiring or pipes hidden in the wall. It’s important that you use a level to make sure the thermostat sits straight.
This not only looks better but helps the internal sensors work right. A few folks forget a flashlight, yet it’s handy to peep behind wires or into wall voids. Have your iPhone handy to check instructions or Google troubleshooting steps if you get stuck.
Safety First
Turn off power to your HVAC at the main circuit breaker before you begin. This is the easiest way to avoid shocks or other accidental damage. Test all wires with a volt tester before touching them, even if you think the power is off.
Errors in this stage can cause harm. Wear safety goggles when screwing or drilling into the wall so small bits don’t fly into your eyes. Adhere to all other safety directives from the thermostat’s manufacturer, as these may differ by brand or location.
Check the wall location for anything dangerous such as wires, studs, or pipes before you drill. Drill pilot holes first so you don’t crack or crumble the wall.
Installation Timeline
Prepare a timeline, allowing enough time for each step from power-off to mounting and testing the thermostat. The majority of installations require 30 minutes to an hour. If problems arise, additional time might be necessary.
Verify that all components are included in the box prior to installation. Missing pieces can really hold you up, so check that screws, wall plates, and the manual are all there.
Understanding Thermostat Wiring
Smart thermostat installation begins with knowing your HVAC wiring. Thermostat wires extend into your heating and cooling equipment, delivering commands to activate or deactivate systems. Types of thermostats include low voltage and high voltage.
Low voltage models, which are typical in the majority of homes, tend to involve thin wires and can work with most smart thermostats. High voltage thermostats operate at 120 or 240 volts, are commonly marked as such, and typically control electric baseboard heaters.
Turn off power at the breaker before touching any wires. Snap a good picture of your current wiring and contact labels before you remove the old thermostat to prevent any screw-ups and to have a reference during installation. Wiring diagrams in your thermostat’s manual are helpful to ensure you match the right wire to the right terminal.
Common Wires
Nearly all thermostats rely on a handful of standardized wires to control HVAC functions. R provides power, W is for heating, Y is for cooling, and G is for the fan. A lot of them have a C-wire, which delivers constant power, particularly for smart thermostats.
A few configurations have jumper wires or unoccupied wires, so look for these and record their locations. Label every wire as you disconnect it. This step makes for an easy hookup to the new thermostat.
Certain systems have additional wires that can go unused in some installations. If you find any damaged or frayed wires, replace them prior to mounting your new thermostat. Certain thermostats do not support stranded wires, so verify the wire type in advance. Taking a clean photo saves hassle and confusion down the road.
The C-Wire
The C-wire (common wire) provides smart thermostats with a consistent 24-volt power supply. Not every home has a C-wire so check your wiring to see if a blue or black wire is attached to the C terminal.
If your configuration doesn’t have a C-wire, the majority of smart thermostats are compatible with a power extender kit or adapter. Locating that C-wire is as simple as looking for the right markings or consulting your HVAC system’s manual.
If you need to retrofit with a C-wire, power extender kits are available for most systems, complete with step-by-step instructions.
Voltage Check
A volt meter is the key to a safe installation. Check voltage across the thermostat wires with a multimeter before you start. Safe voltage for low voltage thermostats is commonly 24 volts AC.
High voltage wires, such as those in line voltage thermostats, must be treated carefully. If it reads 120 or 240 volts, halt and verify your thermostat is designed for high voltage. Record each voltage.
These notes are useful for future troubleshooting or if you ever swap thermostats down the line.
Installation Process
A smart thermostat is a great addition to nearly any home or office, but the installation process requires foresight and a meticulous attitude. Before you begin, make sure your thermostat is compatible with your HVAC system and collect the tools you’ll require.
Most work requires a drill, flathead screwdriver, Phillips screwdriver, and occasionally a wire stripper, pencil, or hammer. Prepare the space around your old thermostat and keep the manufacturer’s instructions nearby for model-specific guidance. For most people, the entire process will take around 45 minutes, but go slow to avoid errors.
Typical installation steps:
- Prepare the area and your tools.
- Power off electricity at the breaker.
- Remove the old thermostat.
- Mount the new plate.
- Connect the wires.
- Attach the faceplate.
- Power on and test the system.
1. Power Off
Turn off the electricity at the breaker box before you do anything and label the breaker for later. With the power off, use a voltage tester to ensure that there is no live current at the old thermostat.
Notify others in your household or office about the power shutdown to avoid any confusion or accidental power reactivation.
2. Remove Old Unit
Remove the old thermostat’s faceplate to expose the wires. Unscrew it from the wall and gently pull it out. If you’re replacing an existing switch, snap a picture of the wiring for reference.
Some units might contain dangerous parts, so throw them away according to local recycling or e-waste guidelines.
3. Mount New Plate
Line up the new thermostat’s backplate with the wall opening. The optimal location for your thermostat is approximately 1.5 meters (5 feet) above the floor, away from drafts, windows, and sunlight.
Use a level to keep the plate level. If mounting on drywall, apply wall anchors for additional hold. Fasten the plate so it is flush with the wall.
4. Connect Wires
Attach the wires according to your photo and the new thermostat labels. Match colors and terminals and cap connections with wire nuts to keep everything snug.
A few configurations may require adapters, such as a “power extender kit” or “add-a-wire” adapter, particularly if you have an older system. Double check connections prior to proceeding!
5. Attach Faceplate
Line up the faceplate and snap or screw it in. Be certain wires are hidden away and the display is convenient to view and operate.
Secure the faceplate.
6. Power On
Flip the breaker back on to energize. Observe the thermostat screen for instructions or configuration steps and try out the touch or button controls.
Listen for any funny noises coming from your heating and cooling system. If the thermostat doesn’t start, inspect all wiring, verify that the power source is operational and refer to manual troubleshooting.
Post-Installation Setup
PRO TIP: Post Installation Setup is the secret to maximizing your smart thermostat’s potential. The objective is to ensure it operates seamlessly, links to your household network and integrates into your daily life. By programming in heating schedules for weekdays and weekends, you will save energy and make your home more comfortable.
Several models allow you to include features such as geofencing or scheduling, which can reduce energy consumption when no one is home. Pairing the thermostat with a mobile app or other smart devices allows you to control it all remotely.
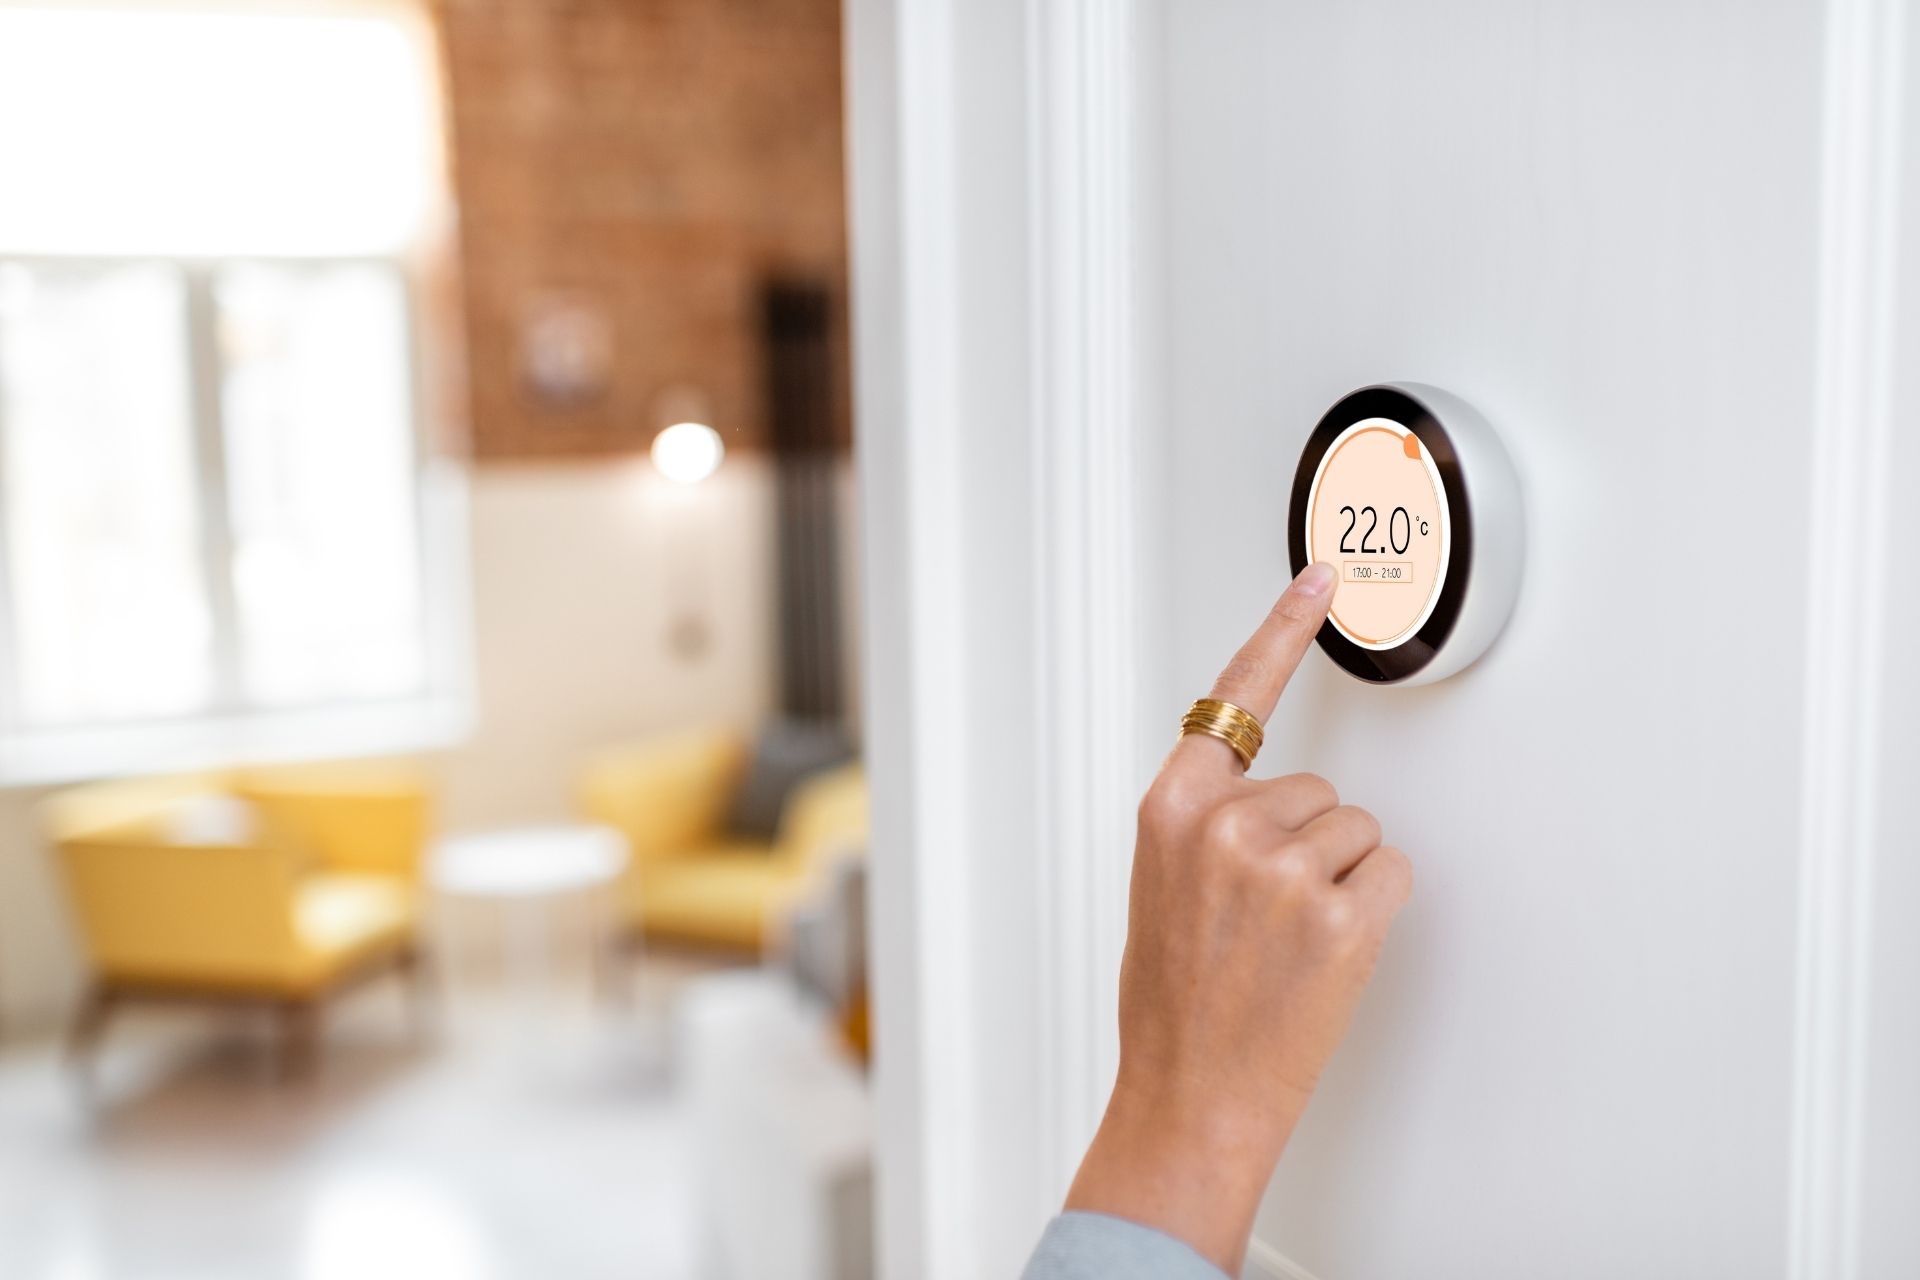
Wi-Fi Connection
Open Wi-Fi settings on the thermostat. Scan and select your home network. Enter your WiFi password, just make sure it’s correct or you won’t connect. Certain thermostats display a signal strength bar, so choose a location that offers a strong signal if this is the case.
If the thermostat can’t connect, check the router’s settings. Occasionally, network security or firewalls can block new devices. Try restarting the router or bringing the thermostat closer to see if that resolves the weak signals.
For dual-band Wi-Fi models, select the appropriate frequency. Two point four GHz is typical for many smart thermostats. After connecting, ensure the thermostat is online, confirming its status either in the app or on the device screen.
It should now communicate with other smart devices in your home, such as voice assistants or home automation hubs.
App Configuration
Install the thermostat’s companion app on your smartphone or tablet. Nearly all brands have free versions on both Android and iOS. Open up the app and it will prompt you to pair it with your device, generally by inputting a code from the thermostat or scanning a QR code.
Once paired, configure temperature preferences and create heating or cooling schedules within the app. Most apps let you separate settings for weekdays and weekends. Check out features such as energy usage reports, maintenance reminders, or rapid temperature change alerts.
Pair the thermostat to other smart home systems if you’d like. Certain apps allow you to integrate with Google Home or Alexa, so you can control the temperature hands-free with voice commands. If you encounter problems, consult the user guide or explore the manufacturer’s web-based assistance.
System Testing
| Test Criteria | Expected Outcome |
|---|---|
| Power turns on | Thermostat screen lights up |
| Temperature adjustment | HVAC responds within seconds |
| App remote control | Settings change instantly |
| Error/alert display | No errors, clear status shown |
Flip the breaker power back on if you haven’t already. Turn on the temperature. Heat or A/C should come on quick. If not, verify the wiring. A picture of your old setup is useful.
Monitor the temperature on your device and in the app. They need to correspond with actual room temperature. Keep an eye out for error messages or warnings.
If you encounter errors or the system behaves unexpectedly, refer to the manual or official online troubleshooting resources.
Common Installation Issues
Installation Issues – Smart thermostat installations can run into issues that delay or halt setup. Most of these problems stem from basic errors or overlooked inspections. Be prepared to identify and address issues to maintain installation flow and safety. Below are the most common problems and hands-on solutions to fix them.
- Wiring goofs, like switched wires, always break the system.
- Leaving the power on during installation can cause electrical dangers.
- Locating thermostats in kitchens or hallways will cause them to read incorrectly because of heat and drafts.
- Old systems often don’t have this so-called ‘C-wire’ and that will be a problem.
- Incorrect calibration means the thermostat shows the wrong temperature.
- Hazard: If you install the thermostat too high or too low on the wall, it might not read correctly.
- Failing to confirm compatibility with your HVAC system could cause blank screens or disconnection from the Wi-Fi.
- Weak wifi or wrong password can kill connectivity.
- Loose or damaged connections often lead to unresponsive thermostats.
- Documenting errors helps with future troubleshooting.
- Manufacturer guides provide helpful instructions for troubleshooting installation-specific problems.
No Power
Smart thermostats that don’t appear to have any power require meticulous checking. Tripped breakers are a common culprit, so begin at your electrical panel. Reset any breakers controlling the HVAC system.
Next, look over all wiring at the thermostat base. Improper or loose wiring, particularly if swapped, can bring the entire system to a halt. This is the number one cause of installation failure. Go over every wire again to make sure it matches the labeled terminals in the manual.
If the wires appear secure, check for voltage at the stat terminals using a voltmeter. No voltage indicates that the power issue is probably at the HVAC system or electrical source, not the thermostat. A few smart thermostats require a C-wire for stable power. Many older homes do not have this wire. If absent, the thermostat won’t even turn on. In those scenarios, consider a C-wire adapter kit or professional help.
System Unresponsive
If your thermostat is unresponsive, you should inspect the software and wiring. First, check for software updates because certain models need the latest firmware in order to function fully. If it’s screen-frozen, a hard reset can often bring it back to life. Shut power off at the breaker, wait a couple of minutes, and flip it back on.
Loose or damaged wiring can cause the thermostat to fail, even if it’s powered. The first thing to do is inspect each connection for tightness and wear. Other problems arise from compatibility issues between the thermostat and HVAC system, such as blank screens or system errors.
Always consult your user manual for model-specific steps, particularly when attempting a reset or advanced troubleshooting.
Connectivity Failure
These issues are usually caused by weak Wi-Fi or incorrect passwords. First, ensure the Wi-Fi network is operational and the signal is strong in the vicinity of the thermostat. Devices such as microwaves, baby monitors, or thick walls can interfere with the signals. Relocating the router or minimizing interference can help.
If the thermostat is unable to connect, re-type the Wi-Fi password carefully. Typos or old passwords are typical. If problems persist, reset the thermostat’s network settings. This usually fixes sneaky bugs.
If the device still won’t connect, see if there are firmware updates available or go wired if supported. Troubleshooting ProTip: Document error codes and messages to include in support calls or save for future fixes.
Beyond Installation
Ok, so a smart thermostat can do more than install. Once installed, there are countless ways its features can help you save money, conserve energy, and enhance comfort for the masses. Taking advantage of these features entails understanding what your smart thermostat is capable of and how to configure it for your lifestyle.
Energy Optimization
Saving energy with schedules is one of the quickest ways to trim those utility bills! Adjust your thermostat to lower heating or cooling when you’re typically away from the house. Devices enable you to have separate weekday and weekend schedules in most cases. These habits keep your energy consumption under control without having to consider it every day.
Geofencing capabilities leverage your phone’s location to understand when you’re out of the house. The thermostat will then control temperature so you don’t warm or cool an empty house. This tool is nice for people with irregular schedules or frequent travelers.
About beyond installation, most smart thermostats provide energy usage reports. These reports provide information on daily or weekly usage and assist in identifying patterns. By auditing the numbers, you can identify periods where energy consumption surges and adjust settings to conserve more. A few brands compare to previous months or like households.
Most utilities have energy-saving programs of their own. These could provide rebates, time-of-use rates, or remote management of your thermostat during peak hours. Enrollment, which can frequently be completed through the app or website, may result in additional discounts.
Smart Integration
Going beyond installation, by integrating your thermostat with other smart home networks, you can achieve more seamless control. It can be connected to smart lights, plugs, or security systems. For instance, you can establish a routine where the lights dim as the temperature drops overnight.
Popular ones include Google Home and Amazon Alexa. That is to say, you’ll be able to control your home’s temperature via voice, rather than the app or the device. Go beyond installation by checking compatibility.
Automation routines assist in melding comfort with efficiency. You can have it turn off the heat if a window sensor goes off or begin cooling when motion is detected in your living room. These habits are general and can be as basic or technical as you require.
Beyond climate control, when combined with lights and security, your home can be safer and more comfortable. For instance, if you step out of the house and arm your smart security system, your thermostat can simultaneously go into away mode.
Long-Term Value
Smart thermostats can slay energy bills over months and years. Savings vary based on local climate, energy prices, and system usage. Numerous users experience a significant reduction in expenses once they establish schedules and automations.
Remote access and control add convenience. Having control over your settings from your phone enables you to customize your home climate in advance of arriving home from work or vacation. This prevents waste in case you forget to adjust them prior to leaving.
Adding smart home tech such as a smart thermostat can increase a home’s value. A lot of buyers want homes with modern energy systems and smart features. This can give your home a slight advantage in certain markets.
Updates are important for permanent usage. Companies will often release updates that add new features or fix bugs. Be on the lookout for updates in your app or device settings that will keep your system humming and safe.
Conclusion
Smart thermostats simplify managing your home’s heat and cool. A smart setup is less stress and more comfort. With a bit of preparation and some simple steps, just about anyone can have one up and running in no time. Every step, from wiring to setup, saves you time and prevents mix-ups. Smart tools offer real benefits, such as reduced bills and increased control. If a step feels tricky, online videos or pro help can illuminate things quickly. Begin with little switches, record savings, and watch the difference accumulate. To keep things flowing, peek at your system once in a while. For additional tips or updates, see tech websites or contact local professionals. Be smart with tools that work for you.
Frequently Asked Questions
What tools do I need for installing a smart thermostat?
For the majority of installations, you’ll need a screwdriver or drill, some wire labels, and the instructions that come with your thermostat. Some configurations might need a voltage tester. Safety first, cut the power before you begin.
Can I install a smart thermostat without a C-wire?
Some smart thermostats can operate without a C wire, but most require one for continuous power. If you don’t have a C wire, see if your thermostat offers alternative wiring or deploy a power adapter.
How do I identify my thermostat wires?
Thermostat wires are generally color-coded and labeled on the old base. Label those wires with some tape as you pull them out. Consult your device’s manual for wiring diagrams and check twice before plugging in.
What should I do if my smart thermostat won’t turn on after installation?
First, ensure that the power is on at the circuit breaker. Verify all wiring. If problems persist, go over your installation process and check the thermostat’s troubleshooting guide.
Is professional installation necessary?
Most folks can install smart thermostats by following instructions! If you’re not confident about wiring or have a complicated HVAC system, it’s safer to hire a certified technician.
How do I set up Wi-Fi on my smart thermostat?
Once installed, use the thermostat’s on-screen setup to connect to your Wi-Fi. Type in your network information when requested. Lock down your network.
What are common mistakes during installation?
Typical errors are improper wiring, forgetting to turn off the power, and failing to verify device compatibility. Read the manual, double check every step, and you’ll be fine.